

Pink7
-
Posts
642 -
Joined
-
Last visited
Content Type
Profiles
Forums
Downloads
Posts posted by Pink7
-
-
3 hours ago, Crossy said:
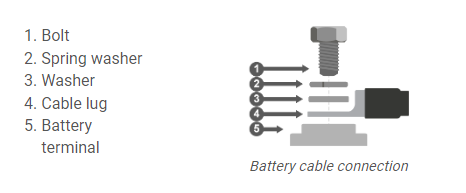
Correctly sized (for cable and battery stud) ring-crimp/lug on the BMS cable.
Everything thoroughly cleaned (sanded).
Decent electrical jointing compound on the mating faces if that's your thing, some don't like it.
Washer ONLY on the top, never between the crimp and battery.
EDIT Not exactly what you have, but you get the idea.

Good idea with spring washer.. On all batteries or only main + and main -?
Pink
-
Just did some very simple testing on my LiFePo4 battery with BMS lug on the battery pole and i got a feeling that i get better tightening without the BMS lug? So whats your experiences and opinions: BMS lug on battery pole or use its own hole and bolt?
Pink
-
3 minutes ago, MJCM said:
I found one, but I am surprised they are so cheap 700THB(ish)
I have it. I would not buy hydraulic again. I have open it many times becouse it stoped to work then until now been lucky to be able to use it. Buy the type Crossy just post. Much longer life.
Pink
-
 1
1
-
-
9 minutes ago, MJCM said:
Found the link, in your other thread. Updated my post. Still Wish it was that cheap 555555555555
Yea that would be a dream 555
Pink
-
3 minutes ago, MJCM said:
Wow that is cheap.
Sorry my main is to much busy with other things now. That was wrong info. Pls check the link i added. I payed $110 or so per battery. I payed $4050 all included.
Pink
3 minutes ago, MJCM said:Wow that is cheap.
-
 1
1
-
-
1 minute ago, Pink7 said:
If i remember correct $1050 all included ( delivery, custom etc) 32 x 280A and 2 x JK BMS 150A. More details could be found in my main tread GrowattSPF5000ESP
Pink
I agree 100%, I did buy expensive lugs to get good and much material so reason to not replace them is mainly because I dont see a way to remove current lugs and ad others in a good way without creating other problems. I guess my solution is either drill new holes or ad material between the battery and the lug, then with a extra smaller hole for bms cable.
Pink
-
27 minutes ago, Crossy said:
Crimps https://www.lazada.co.th/catalog/?q=SC35-6&location=Local
Compound just on the mating faces, there shouldn't be any gaps ????
Thanks for all info and help Crossy. I guess even after drilling new holes i have more materiel left on the lugs than those have and the fact that i just noticed diameter of the small bms lugs are just smaller than the hole on the better lugs so i will try drilling new 6mm holes on the battery lugs.
Pink
-
3 minutes ago, Crossy said:
What size cable do you have and what size is the battery stud??
Battery cable 35mm2 - battery stud 6mm i think
Regarding" You only need a smear of the joint stuff on the mating faces but it does set after a while, still easy to take apart." Fill any gaps or only use on surfaces?
Pink
-
2 minutes ago, Crossy said:
You only need a smear of the joint stuff on the mating faces but it does set after a while, still easy to take apart.
I really don't like having a stud that's way smaller than the hole, it's not good practice and can lead to over-heating.
Why not obtain and fit ring crimps of the correct dimensions??
But, as with all these things, Up2U.
I was not able to find a good quality battery connectors for large diameter cable with 6mm hole. Im my limited experience the hole sizes goes up with the dimension for the cable. Even me dont like so much gap between the stud and the hole. I could drill another hole but then its way less material left and the nut need it its space too. I will give it some more thinking.
Pink
-
4 minutes ago, Crossy said:
You really want the bolt/stud to fill the hole in the ring-crimp, hence making an adaptor with two holes.
What you want to do is not ideal but would work, but do ensure the surfaces are scrupulously clean and oxide-free before assembly and use an electrical joint compound.
What sort of battery currents are you expecting??
I have buy the electrical joint compound already. After apply will it be hard? Im planing for max of 60-80 Amp on each battery.
Pink
-
33 minutes ago, Crossy said:
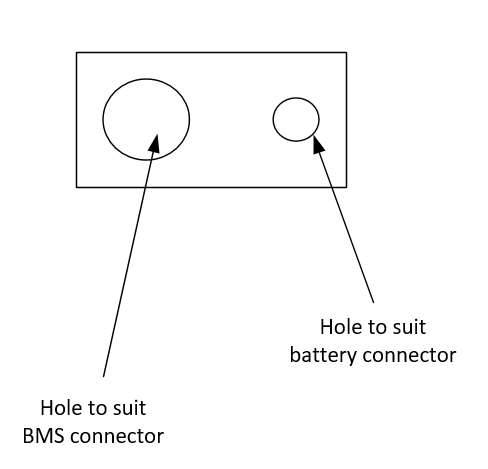
Could you drill out the BMS connector so it fits over the shoulder (washer on top) for a larger contact area?
OR
Make something like this from an inter-cell strip?
If I cut some pieces of the extra bars who i got with the batteries with a exact drilled hole and place between the pole and connector as a washer will that be a ok solution? Any disadvantages?
Pink
-
26 minutes ago, Crossy said:
Could you drill out the BMS connector so it fits over the shoulder (washer on top) for a larger contact area?
OR
Make something like this from an inter-cell strip?
I have been thinking of this too.... Just drill a new smaller hole. Its enough pace for it.
Pink
-
4 minutes ago, Crossy said:
I mean this: -
Which is what I'm assuming you want to fix.
Maybe I'm not understanding.
yes correct.
Pink
-
1 hour ago, Crossy said:
Does the hole in the BMS connector fit over the "shoulder" on the battery terminal?
Otherwise, I'd modify one of the inter-cell strips with exact size holes and fasteners.
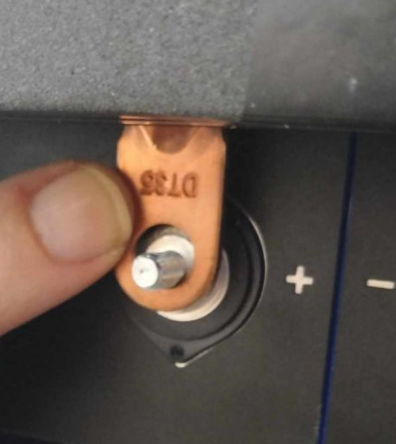
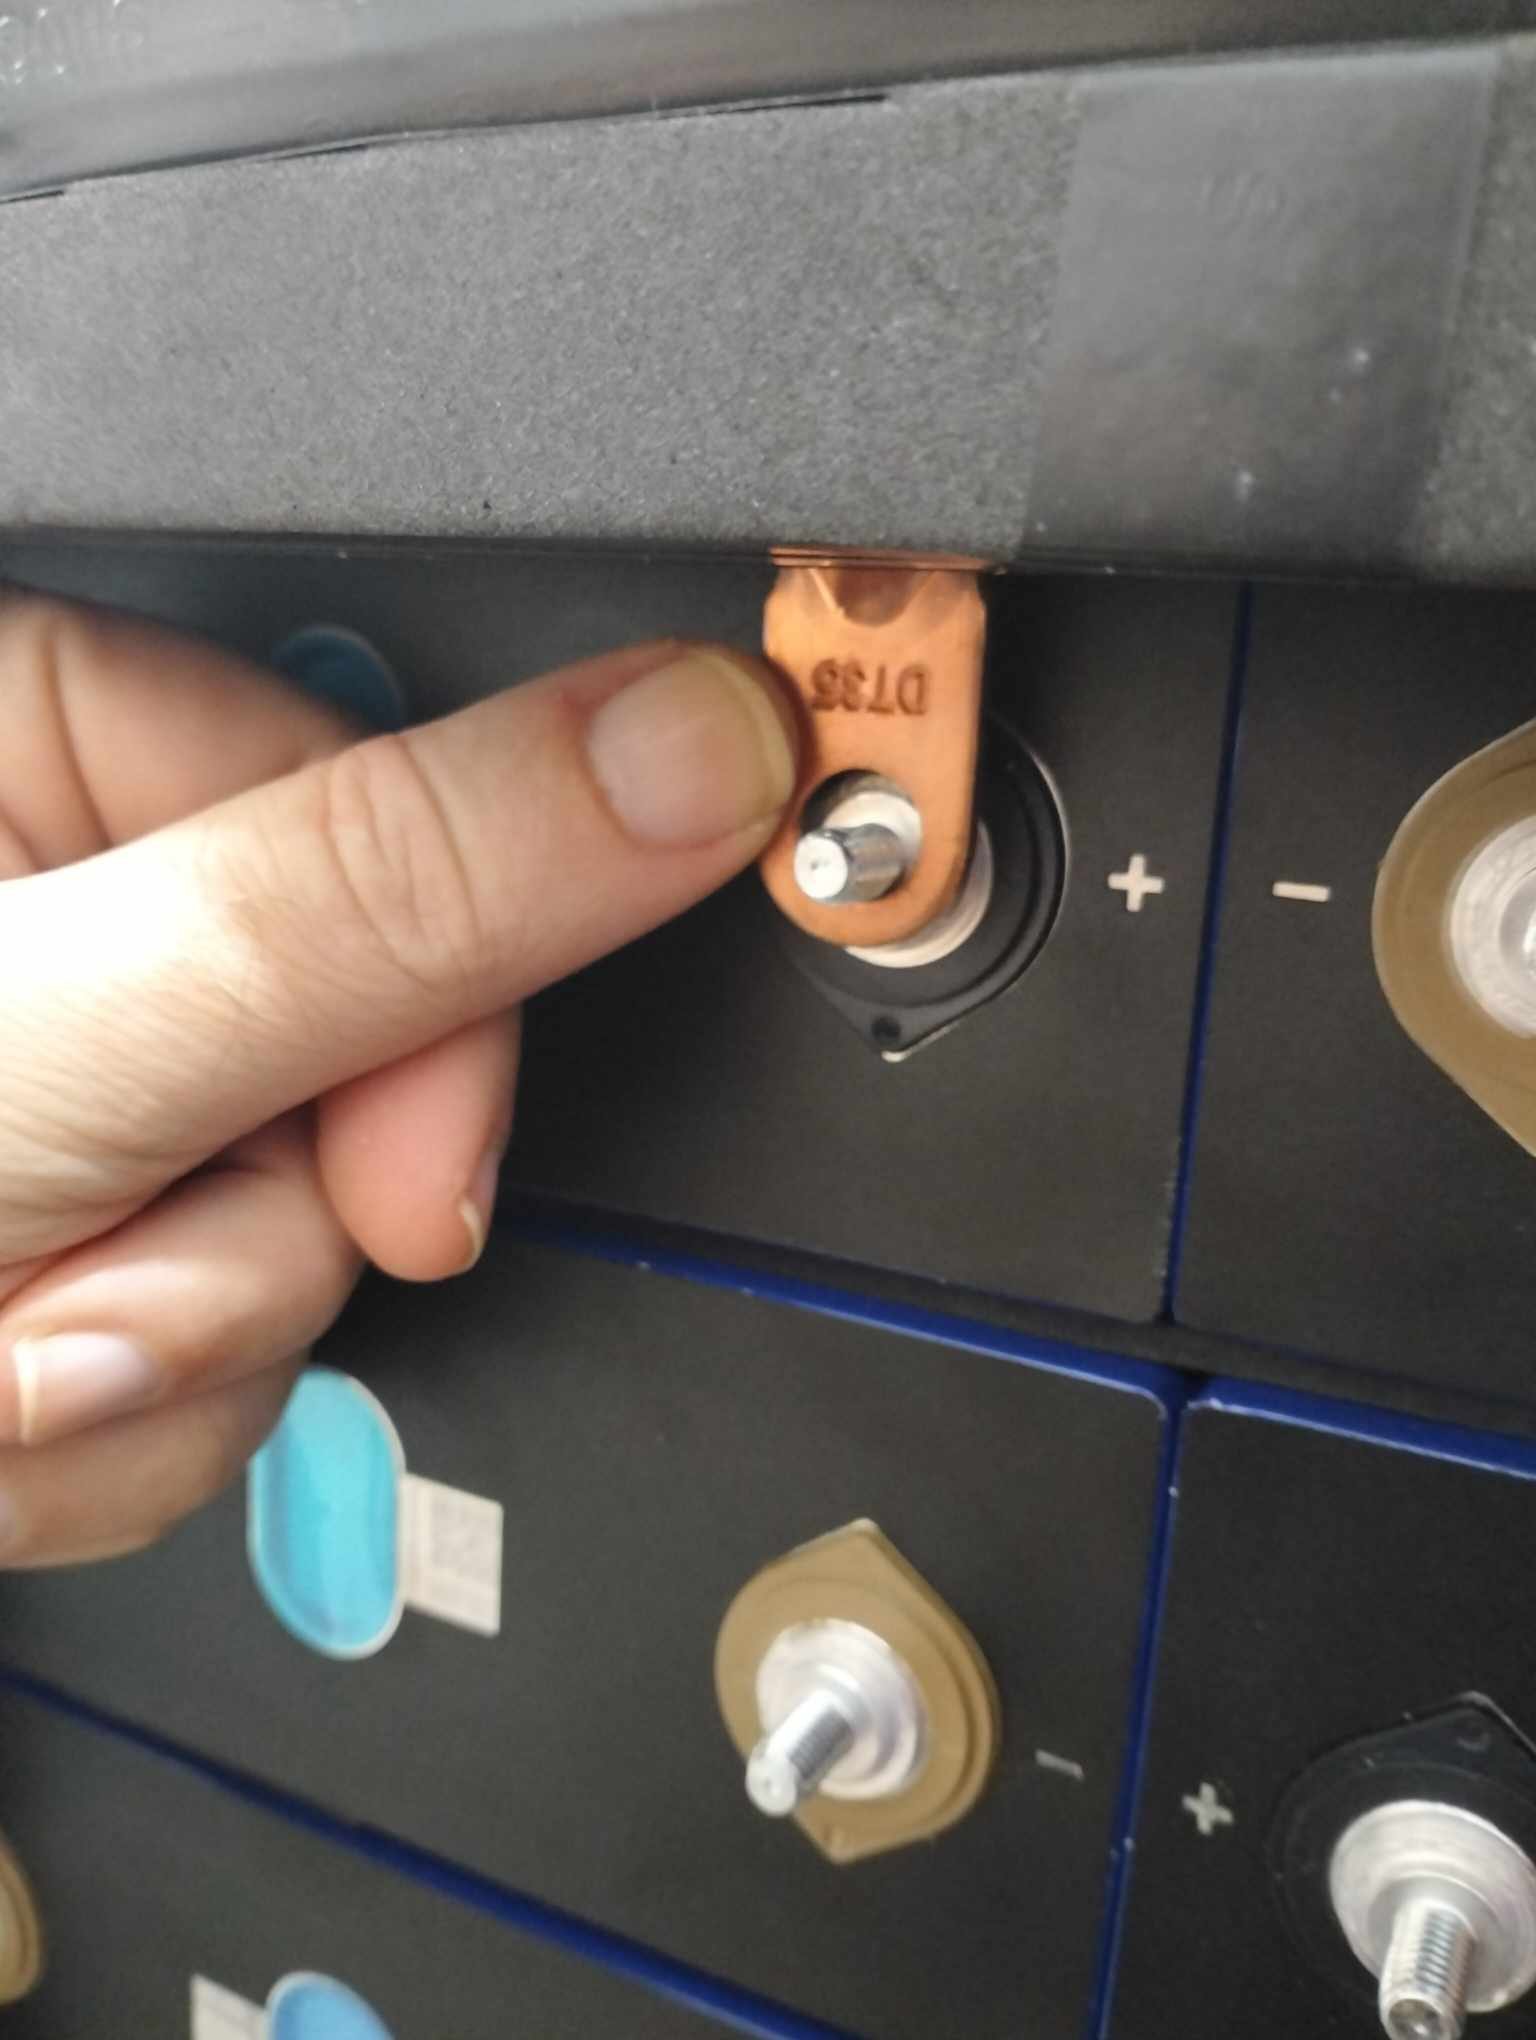
Its still a bit early for me so i had to re read this to get the BMS connector part. Bms connector size is near perfect on the battery terminal. As long as you mean the terminal for the thin bms wire?
Pink
-
38 minutes ago, Crossy said:
Does the hole in the BMS connector fit over the "shoulder" on the battery terminal?
Otherwise, I'd modify one of the inter-cell strips with exact size holes and fasteners.
If I understand what you ask correctly, the terminal is on top of the shoulder but only a small part of it. Could you explain : "modify one of the inter-cell strips with exact size holes and fasteners."
Pink
-
32 minutes ago, Pink7 said:
So now its time to get the batteries and JK BMS mounted together. I think I have a quite small contact area between battery connector an the battery pole. Any thoughts on this?
Pink
I consider cut some pieces of the extra bars who i get with the batteries with a exact drilled hole and place between the pole and connector as a washer.
Pink
-
So now its time to get the batteries and JK BMS mounted together. I think I have a quite small contact area between battery connector an the battery pole. Any thoughts on this?
Pink

-
8 minutes ago, Crossy said:
Aren't the cells 280Ah?
So, 280 * 3.2V = 896Wh per cell.
* 32 = 28kWh ish.
146,924/28 = 5,300 Baht / kWh.
Yes its 280Ah
Pink
-
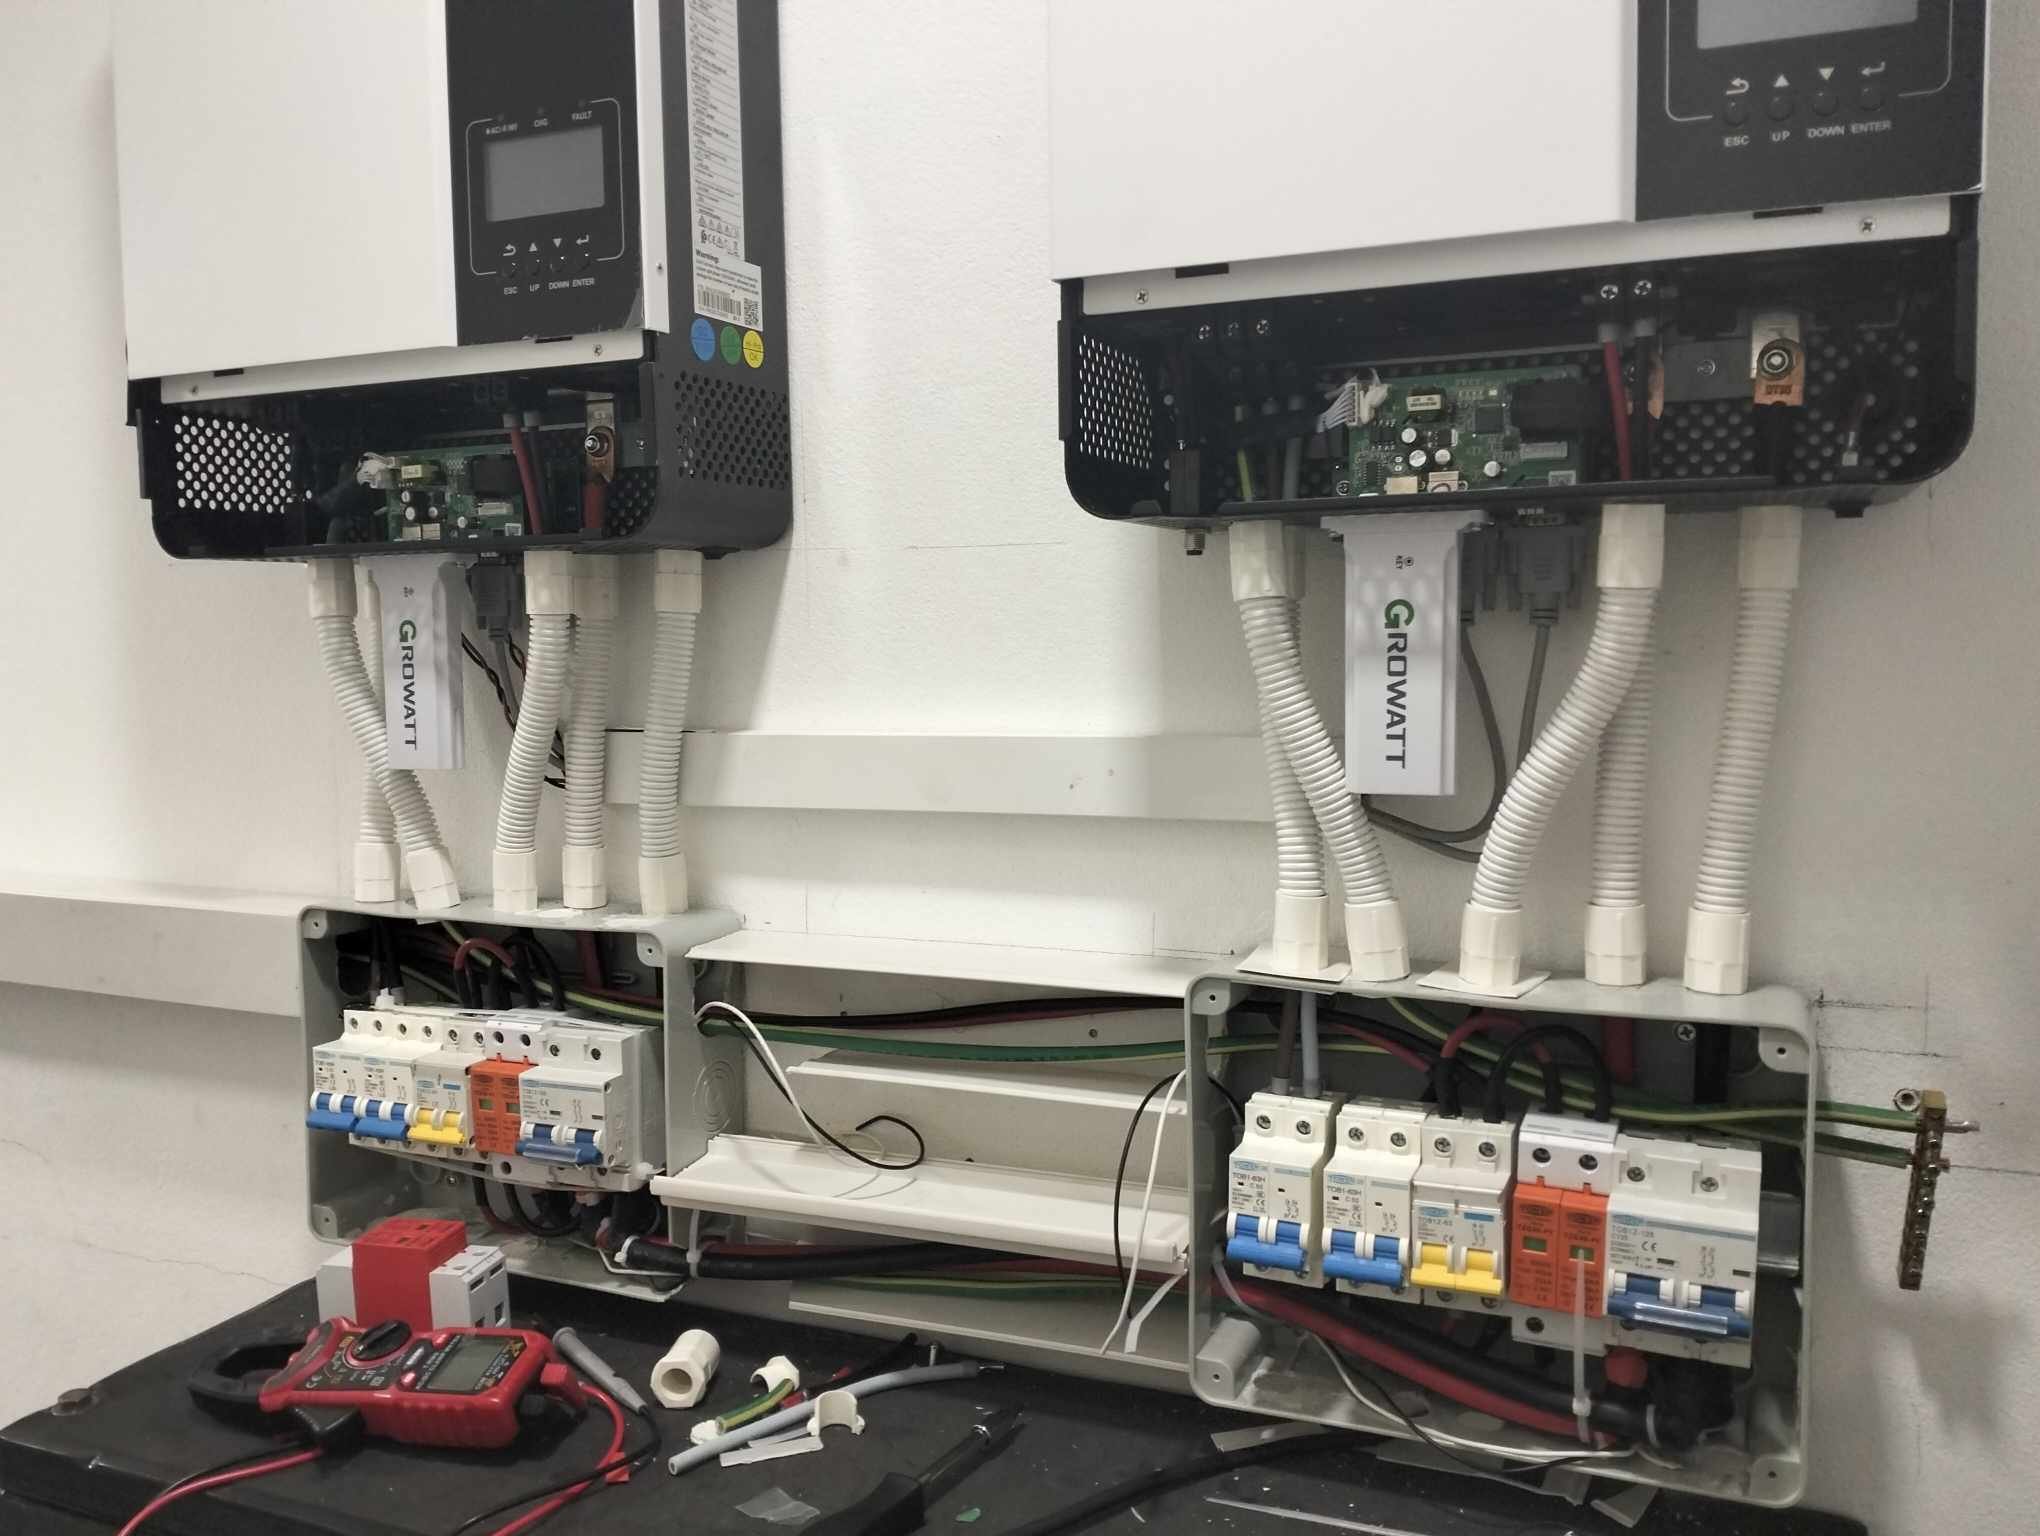
Parallel cables and Wifi just added...
Pink
-
 1
1
-
1
-
-
15 hours ago, Pink7 said:
This afternoon solar was connected to my 2 x Growatt inverters. I checked the dc power (DC 250 each) and powered it on. Im not sure if Growatt SPF500ES really can do battery-less because i connected a wire to Ac out breaker on the one inverter and there was no AC Power. Tomorrow i will try the other one when have sun again. When i turn the switch to power it up first time it did not start because i forgot to open DC breaker with solar power. Its not to much work left now then it should hopefully be ready.
Pink
So today i have done more testing and with real sun conditions ( yesterday testing was just as sun was going down) Both inverter DC270+ in and AC 230 out with only solar connected ( no battery yet and no AC in) So all good !!!
Pink
-
2
-
-
This afternoon solar was connected to my 2 x Growatt inverters. I checked the dc power (DC 250 each) and powered it on. Im not sure if Growatt SPF500ES really can do battery-less because i connected a wire to Ac out breaker on the one inverter and there was no AC Power. Tomorrow i will try the other one when have sun again. When i turn the switch to power it up first time it did not start because i forgot to open DC breaker with solar power. Its not to much work left now then it should hopefully be ready.
Pink
-
2
-
-
1 hour ago, Crossy said:
I just extend the BMS wires, but a JST extension is also viable.
How's your soldering?
More experienced than skilled. So i was thinking of join the wires together with some soldering. I will be ok but i know it could be done more beautiful than i do. Usually i will twin the wires together and fold the joint then solder it then shrink tube. In this case might not fold it, just twin together and wire.
Pink
-
4 of my wires to BMS is a bit short to reach the batteries in bottom of my build. Extend the needed 4 wires or get a JST extension for the whole set of wires?
Pink
-
On 8/30/2023 at 10:10 PM, Pink7 said:
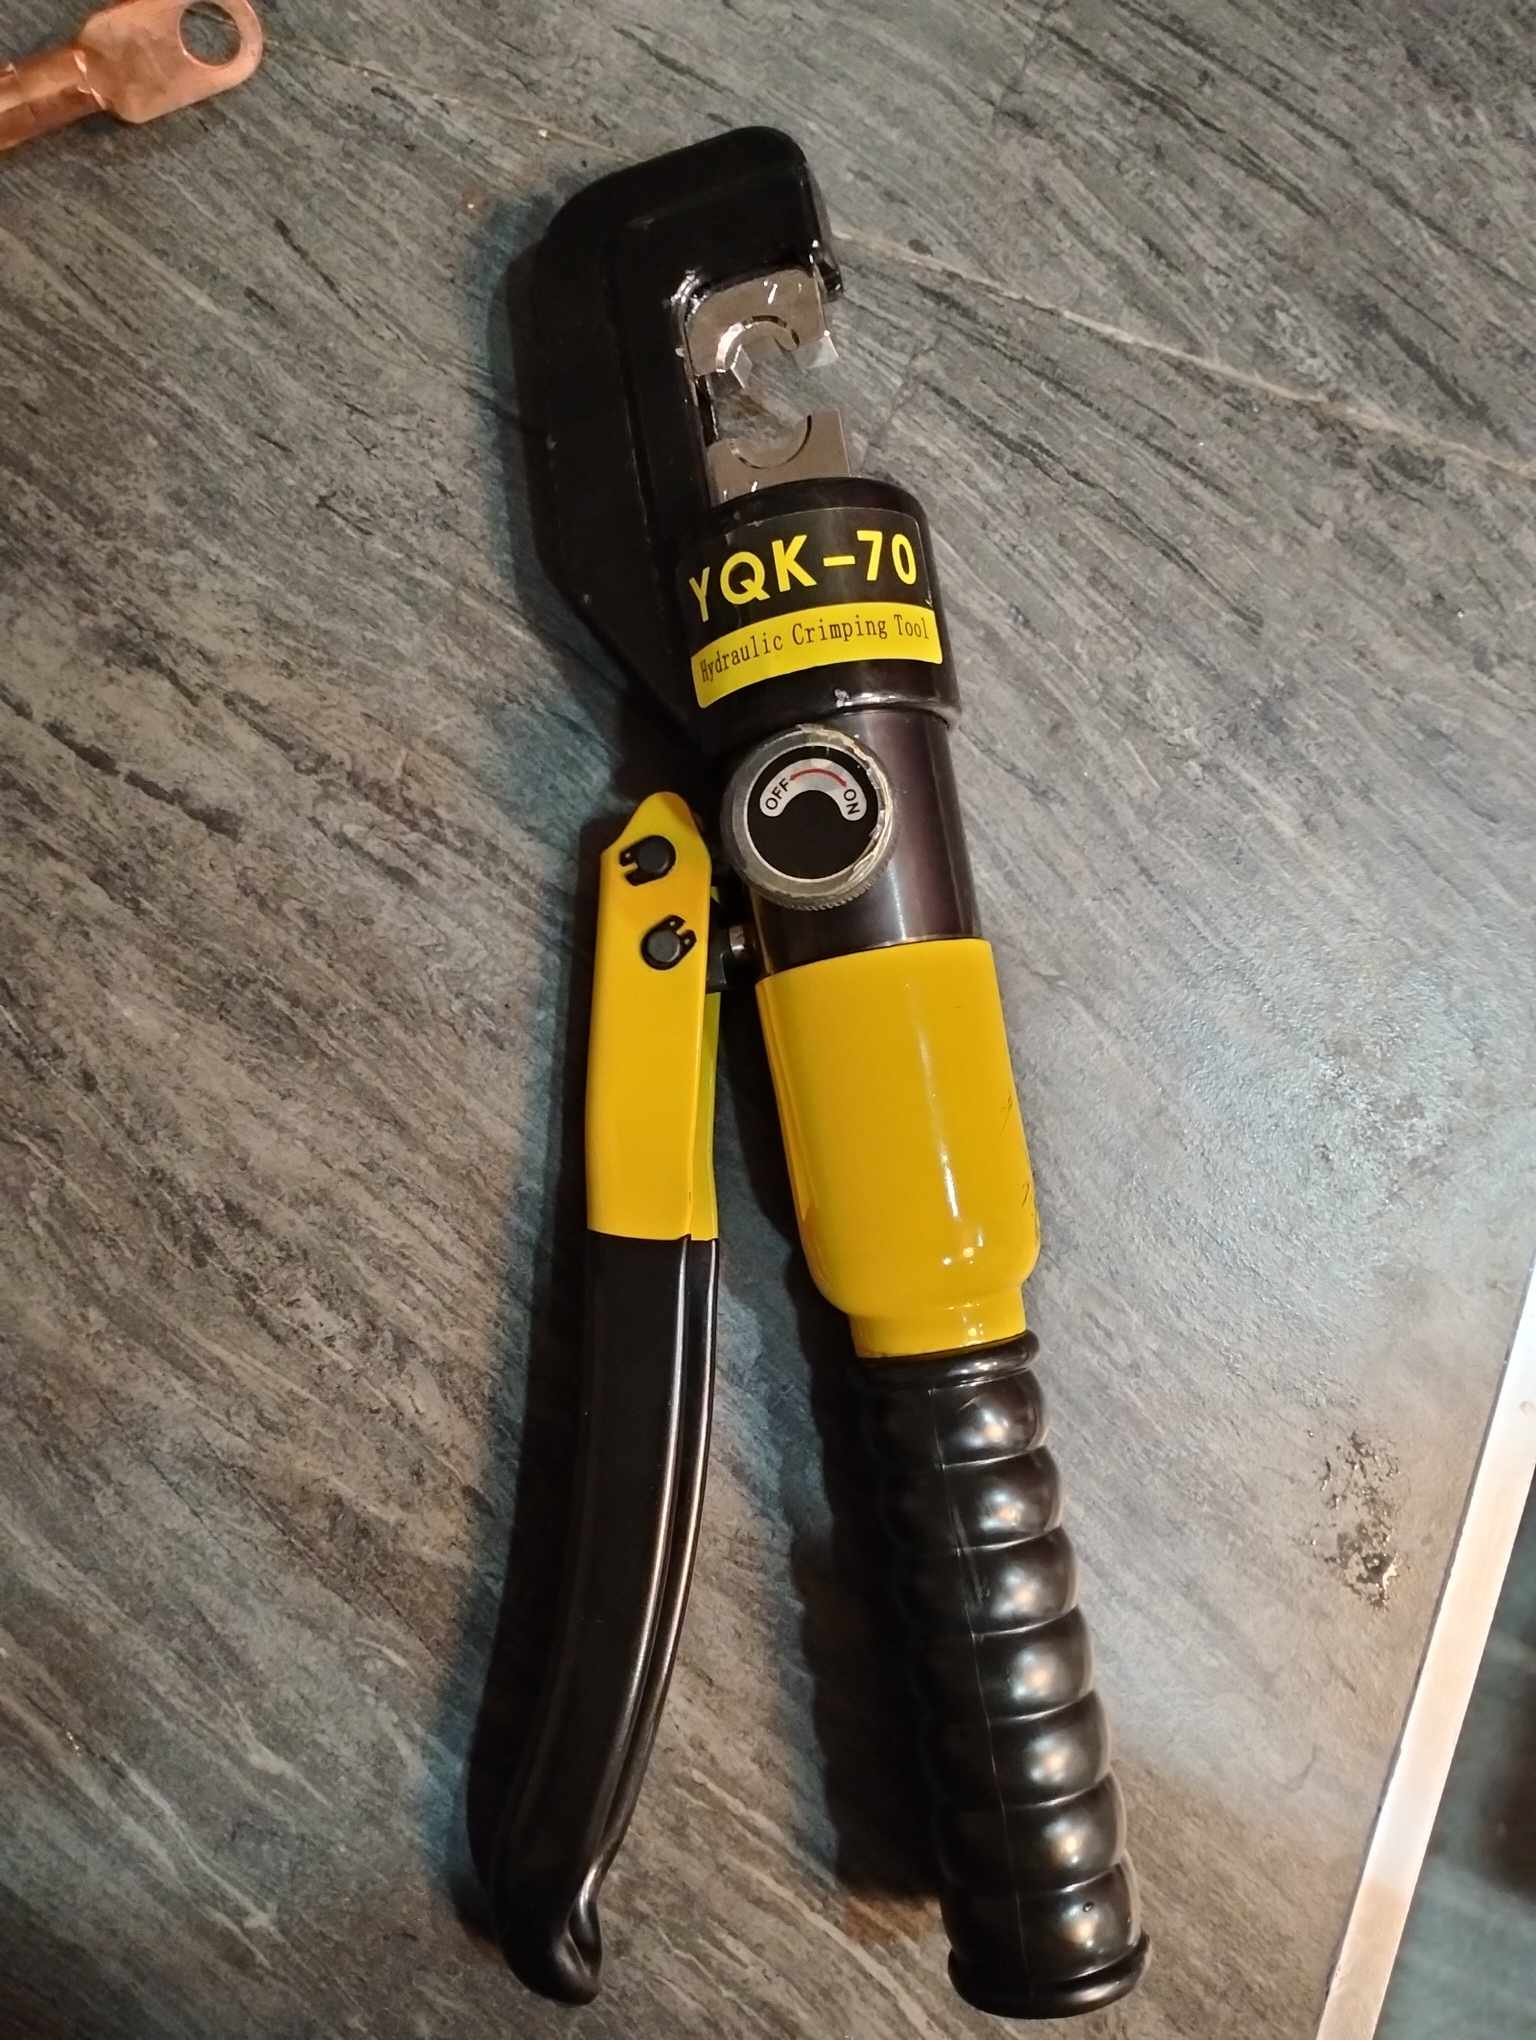
Some progress last days on cables and breaker boxes etc, but have to do some changes from my plans as the cables much less flexible than i expected. I was just making cables from breakers to batteries now when the tool to crimp the connectors just stop working, so i must check if i can replace the hydraulic. So it held up 10 connectors or so..
Pink
And then the tool decide to be working again..After try taking it apart and back again.
Pink
-
1
-
 1
1
-
Bms lug on battery pole or not?
in Alternative/Renewable Energy Forum
Posted
I may miswrite my initial post a bit? I tried to discuss placement of the lugs for BMS wires going to each positive pole. I see some prefer to place them on the bars connecting the batteries not on the pole itself.
Pink