Jurghh
Member
-
Joined
-
Last visited
Everything posted by Jurghh
-
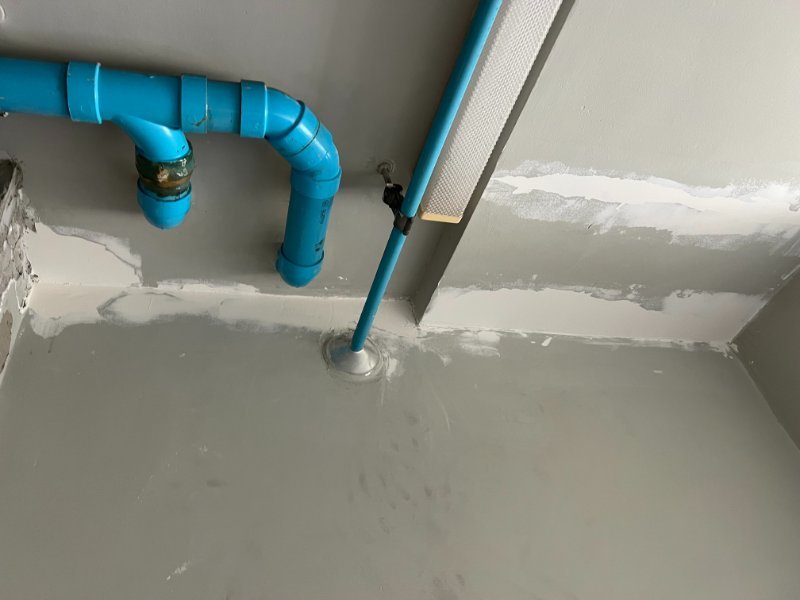
The builder who was me helping fix all the earthquake damage at my condo started the final job, the outdoor laundry area, took a few days off and then never came back. I was paying him a day rate so he's not swindled me. He only worked on the wall with the large cracks in it, the rest i've since done myself. On that big wall he extended the edges and dabbed bits of mortar (red plumb brand or Kangaroo) in preparation to skim another layer of mortar. I'm going to do this myself now but i'm wondering if i need to prime the painted surface with something first or even score it? Also, any tips on how to make sure the wall is flat and level? I have an aluminium scraper bar that is longer than the width of the wall (see photo). Thanks.


-
The sander has a UK 3 pin plug but it's good to know that the blue type of socket are good for outdoor extensions. I think i'm going to go for the setup in the pictures.

-
Thanks
-
The first ones in your above post look perfect. I'll try and find them online. I'm looking for a single plug over double or quad because I need to use the extension with a sander up a ladder and the sander's cable is short. Sometimes the connection will be off the ground. Thanks
-
This cable has a third earth conductor it's just hard to see in the photo as it came loose. As Crossy said you can find 3 core flex online here.
-
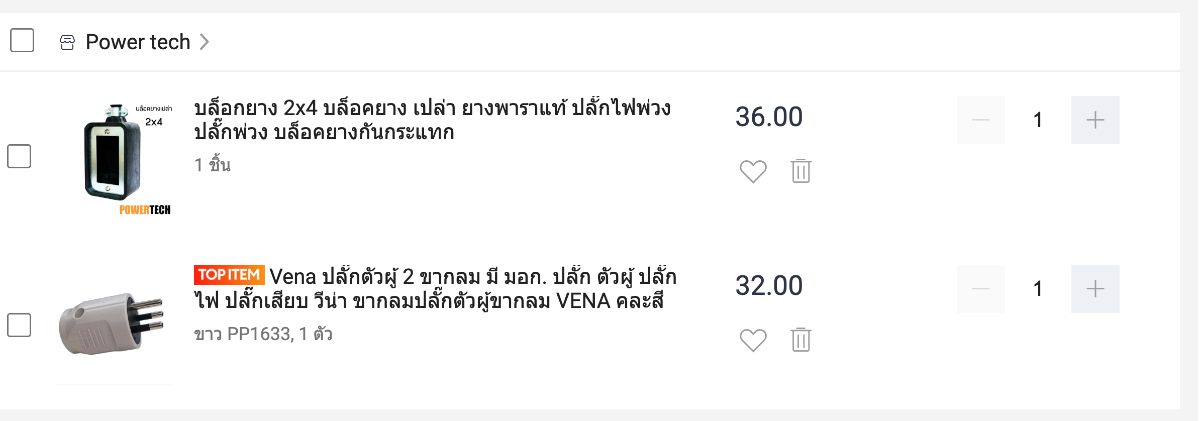
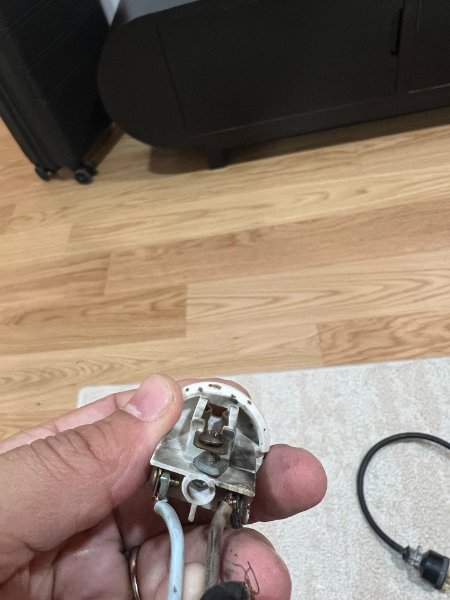
I recently had a single plug 3x1.5mm2 extension cable from Lazada spark on the female end that I had attached a power tool to. Upon opening it up I found that the wires inside were loose and some were hanging on by just a few strands. The extensions male plug also had an issue, the earth pin had pushed almost all the way in. So the question is, are there high quality non-moulded 3 pin Thai plugs available? Ones with a cable grip to stop the wires pulling out the terminals. I've had a look online but haven't seen anything. I'd like to reuse the cable as it's still good.
-
Learning every day. Thanks again
-
My bad, the photo I uploaded wasn't the correct model. I have the MK K5045 in the photo below. I think i'll make the connection with some Wago 227s for now and replace this cooker outlet with a dual terminal flex outlet when I next visit SG or the UK.

-
The oven will be grounded. It's also on a dedicated circuit with a 30mA RCBO. Thanks for your reply. Those connectors look interesting.
-
I’m in Bangkok. If he is too I’d love it if you’d put me in touch with him. I think for this small thing I should be able to do it myself.
-
Also, if I go for wagos in a 3x3” box has anyone ever seen a suitable cover? I’ve seen metal covers for the 4x4” boxes. I used one once and drilled a hole, inserted a rubber grommet and fed the wires through. I could do that again but I’ve not seen that size box cover. The existing outlet plate has the added advantage of the clamp protecting the flex wire from movement.
-
I have a 3400W built in oven that can go to 340C for pizzas. I mention that because maybe it will get close to 3400W under normal use, I don’t know. I’ve installed an MK 45A cooker outlet plate in the wall for the connection. The oven is on a dedicated 20A circuit with 4mm2 THW wire and came with a heat resistant 3x1.5mm2 flex cable which I ferruled the ends of. I was a bit surprised that it wasn’t at least 2.5mm2 but I’m sure the manufacturer knows best. The issue is… the cooker outlet plate only has one terminal each for L, N & E so two wires have to share a terminal. The screw hits down on the 4mm2 first making it difficult to secure the 1.5mm2 however with much effort I managed to make it work. Of course now I’m worried about the connections coming loose in the future. Do you think it would be better to connect the wires using wagos in the back box and put cover over? I wouldn’t ferrule the 1.5mm2 if I use Wagos.

-
The finished product. Thanks again to all who replied.
-
With my entry experience over the last two years being on a Non-Ed and now a Non-O (with a few tourist visas/ exempts thrown in for good measure), I would expect to be grilled at Immigration in the OP’s scenario. I have a friend who stays here just under six months a year on visa exempts/ tourist visas but he does the border bounce half way through, never a flight for this reason. Fact of the matter is it’s never nice being questioned at airport immigration. The nerves and suspense waiting in the queue trying to search out the friendliest looking IO. If you find a guy with a Bluetooth headset on the phone to his friend then you’ve hit the jackpot. I avoid the female ones who look like they’ve been doing it a while. It’s with them that I’ve had the most issues. Despite having no grounds to deny you entry some of them can make you feel like they don’t want to let you in which is obviously scary if you have your whole life here/ puppies. While I’m completely legit I still prefer to enter with my wife and infant child if I can. They don’t say a single word then and it’s bliss
-
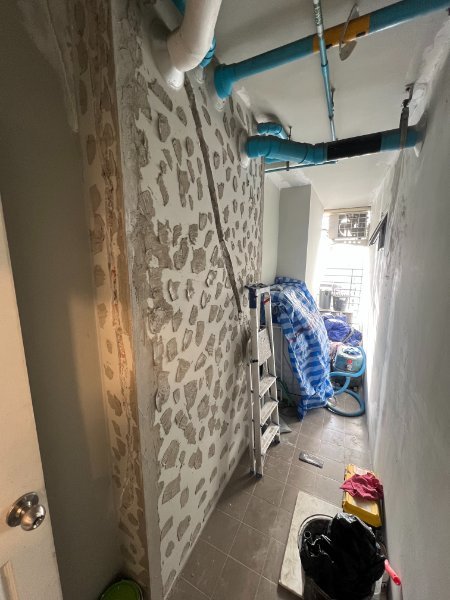
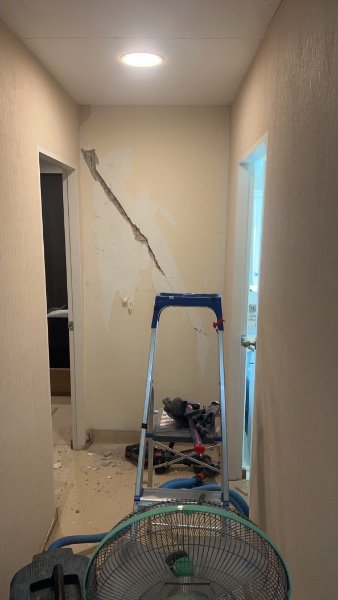
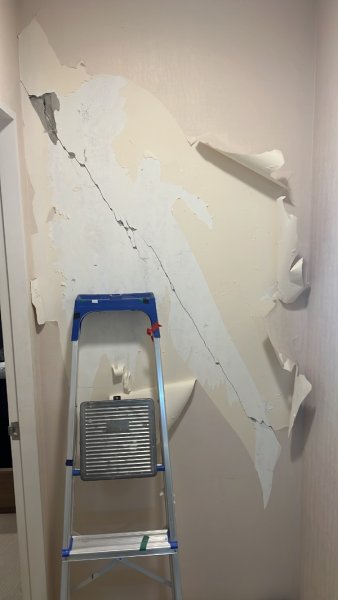
Thanks for the replies guys. The builder, who is working on something else at my place, just replied pretty much saying the same thing. Cut back the render and apply the metal wire mesh. It’s a job I’d be comfortable doing myself. The builder said the most urgent one is an external wall that if it’s cracked right through could let moisture in. I’ll cut back the render on the crack and have a look how bad it is.
-
This is a dividing wall between the hallway and a bedroom, it’s a single brick thick. The crack goes through to the other side of the wall. A builder who’s had a look at it seems to think it’s not a big deal. Today I cut into the wall to take a look at the brick underneath and the brick is also cracked on the upper half of the total crack. Any ideas for a suitable repair?
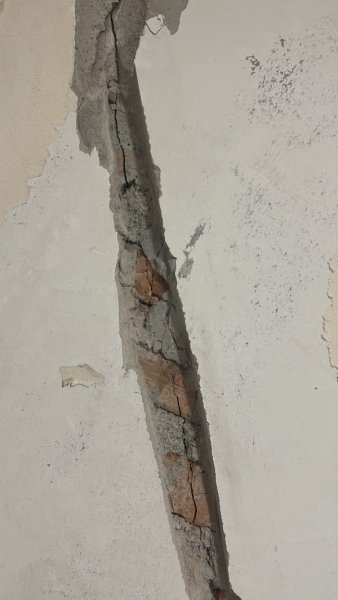
-
I didn't notice that. Yes you are correct. Thanks
-
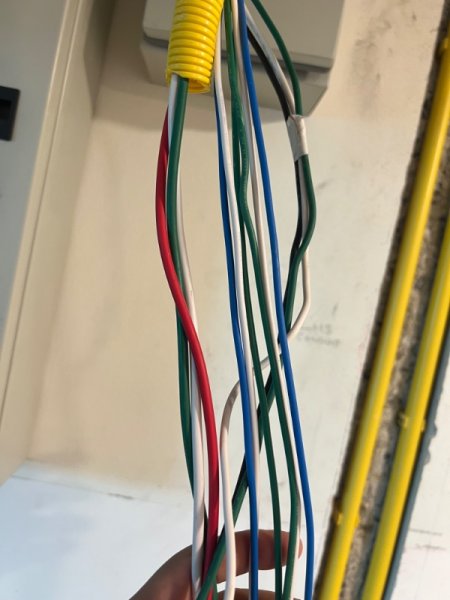
What kind of wire do you have installed currently? Are they single wires of different colours or are they sheathed twin and earth type cable? It's normal to put the single wires in some form of conduit. As it's been suggested use the white or yellow PVC pipes. They have a thinner wall than the blue water pipe which makes them easy to bend with a spring tool and all the other accessories and attachments are designed for those pipes. The white pipe is thinner and comes in 2.4m lengths. The yellow is a bit thicker and comes in 4m. I like the white pipe as you can have a slightly shallower wall chase when burying the conduit in the wall but that's not relevant in your case. Back to current carrying capacity, this seems to be a popular method.. 4-6 conductors: Derate by 80%. 7-9 conductors: Derate by 70%. 10-20 conductors: Derate by 50% This is for unsheathed THW single cables (which is what I'm assuming you have). You don't include the earth/ ground cables in the calculation, only current carrying conductors. Thai Yazaki 2.5mm2 THW cable is rated to 28A in free air. Bangkok Cable 2.5mm2 THW is rated to 29A. So if you had 2-3 circuits of the former (4-6 current carrying conductors) in a single conduit the rating would fall to 22.4A. Which is still fine on a 16 or 20 amp circuit. So don't put too many circuits in one single conduit. You check the current rating of the wire by first finding out the cross sectional area (e.g. 2.5mm2, 4mm2, 6mm2 etc.) and then checking on the manufacturers website but they should all be pretty similar. Check out the tables in the links below. https://thaiyazaki-electricwire.co.th/images/productindustrial/_2021101206531260227 IEC 01 THW.pdf https://www.bangkokcable.com/system/product/file_upload/210531_450!750V 70C 60227 IEC 01 (THW)-REV 04.pdf
-
Thanks. 50A
-
Learning curve
-
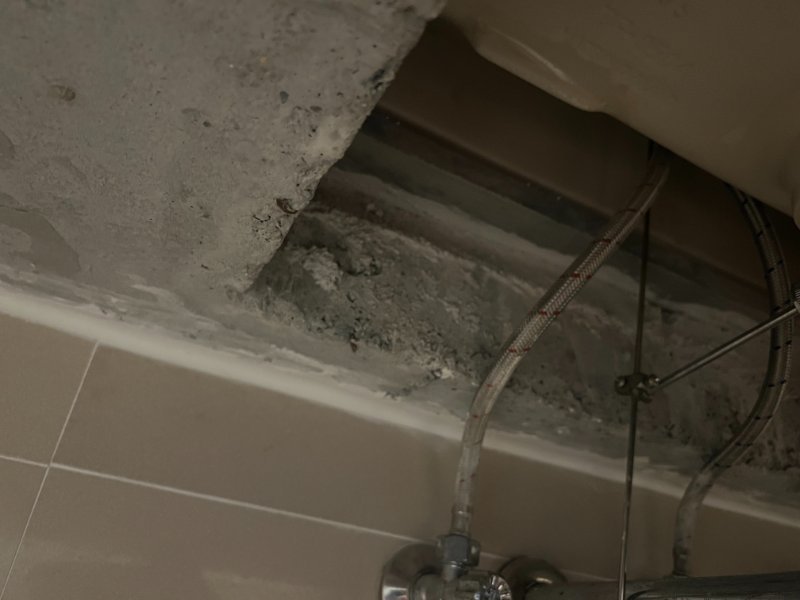
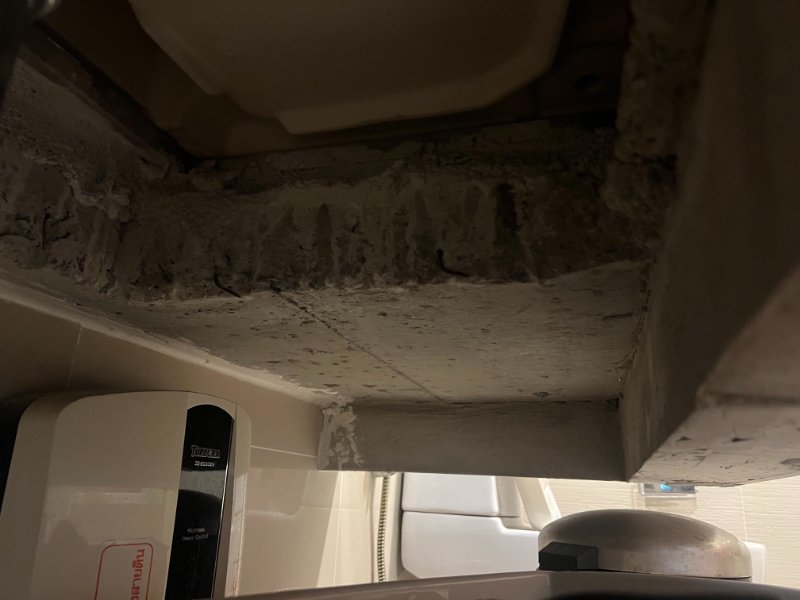
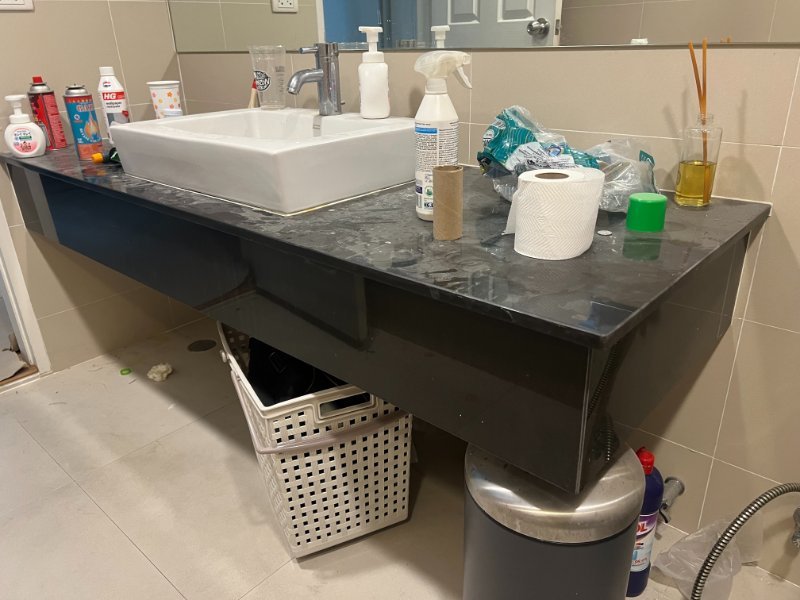
So I've currently got some workmen renovating the common bathroom in my condo. I was going to get them to do the larger ensuite but they're not interested in the job. My condo has a number of rules regarding construction that any contractor would find frustrating and they'd rather pass. Q Chang who I used, can't find another contractor to do the other bathroom mostly because the other contractors don't want to take on a job with a customer that can't speak Thai. To be honest with the amount of dust and noise involved in removing all the floor and wall tiles I think i'll just keep the ensuite as it is. However, the brand new modern vanity my wife ordered has been delivered so the brick <deleted> house concrete thing that's there has to make way and I've been selected for the task. The common bathroom had the same concrete vanity but about half the size. The workers removed it by drilling multiple (maybe 50+) holes with an SDS drill and then I let them use my 8kJ SDS MAX demolition hammer tool. It made such a racket you could hear it 12 floors below. I've already put my neighbours through quite enough so i'm wondering is there a quieter way to demolish this thing? It has rebar going through it with the rebar set into the walls with expoxy. The concrete is around 11cm thick with a lower lip around the edge around another 11cm. Even a 9 inch angle grinder will only cut around 6-7cm. The new vanity sits higher than the existing one so it should cover the area of tiles that will inevitably suffer damage. I'd pay someone to come cut it out with one of those 12 inch concrete saws if that's an option.
-
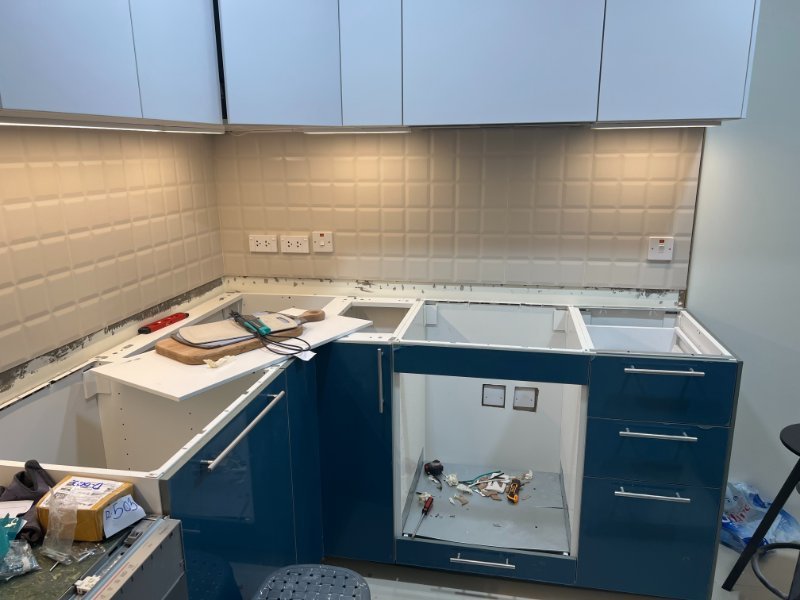
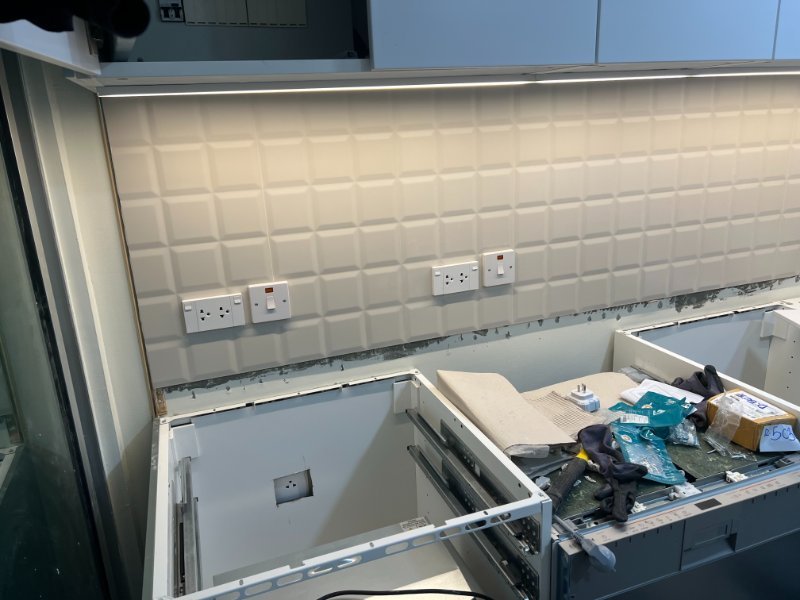
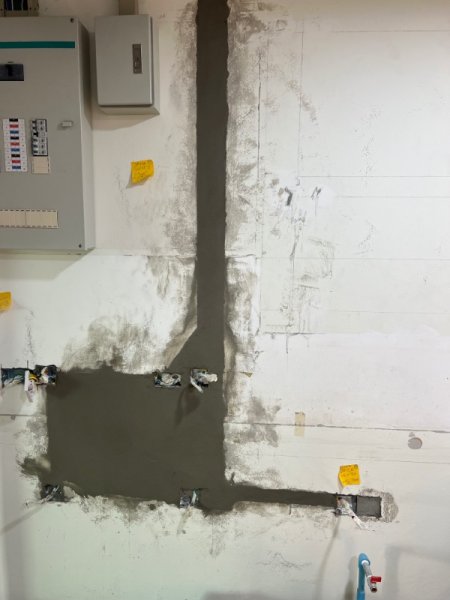
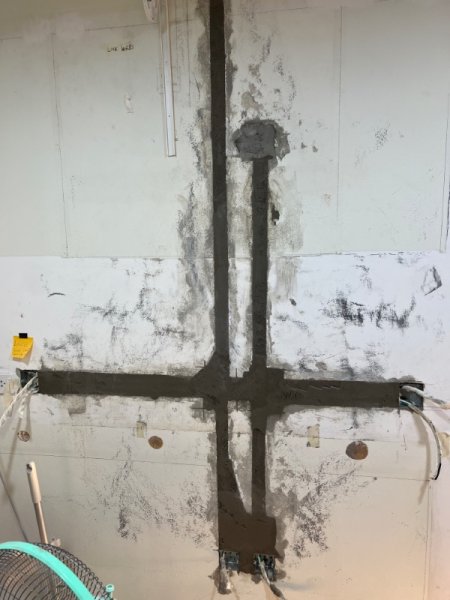
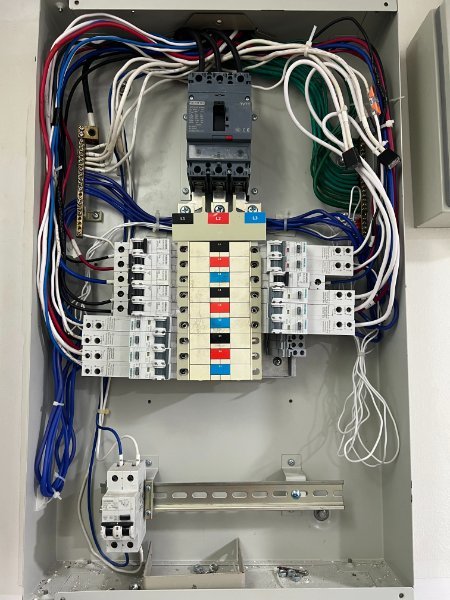
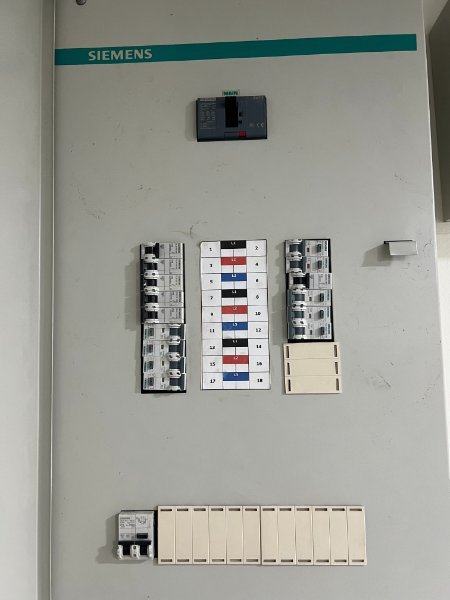
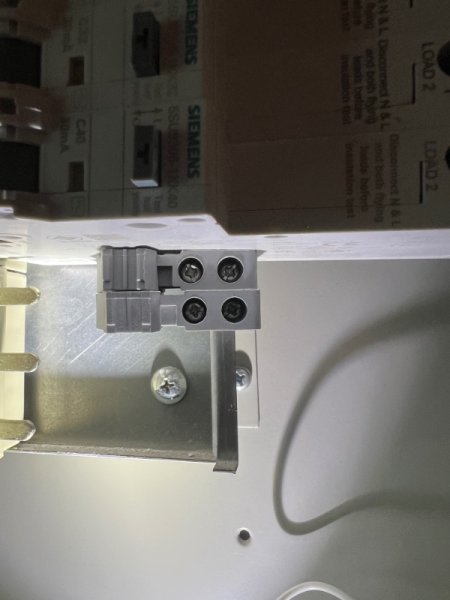
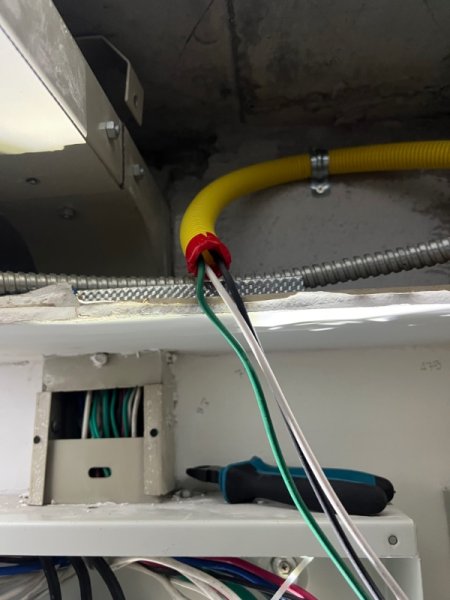
I managed to get the wires through in the end. All the new circuits are connected and I did a quick test on each one with a multimeter. Next i'll try adding a socket on each circuit and testing the RCBO with my little socket tester. The loads are balanced at L1=100A, L2= 112A, L3=104A. Tomorrow i'll post a photo of completed wall chases/ conduit and then i'll post again when the chases are filled in and the receptacles installed. Just in case anyone's interested.
-
The din mount things hold ok. They’re really designed to have two points of contact like on a din rail. It’s not a super great hold but looks like it should do the job. Next issue is that the existing space is a bit too tight to pass the four new circuits through. I’m thinking to drill a hole in the top of the CU (or maybe one each side of the existing channel), add a grommet and feed the wires through it. Before I do that I’ll have another go getting them through how it is now.
-
My local proper electrics store didn't have them in stock when I checked last week. That's not surprising now I see that the Lazada options are all from China. I've ordered some which should arrive around the same time I'm back in Thailand. Updates to follow. Thanks again.
-
OK here is the information you seek. It's easy to find a parking space at one of the BKK short term car parks, much easier than Don Mueang. My preference is to enter the short term car parks at BKK (I think there are two opposite the terminal) from the 1st floor then immediately head to the second or third floor where there are more spaces. The other option is to enter the car parks from the 5th floor but if you do this you have to drive all through the 5th floor past many double parked cars (it can be tight) just to get to the ramp where you can down to the lower floors. I've never had a problem finding a space on floors 2,3,4. I usually go for floor 3. Floors 1 & 5 have the convenience of a walkway to the terminal. For the other floors you need to use the steps or lift to floor 1 or 5. You can park as long as you want but it's around 250THB a day. Long term parking... I think as others have said it's around 140THB a day. There's a shuttle bus to and from the main terminal. When I used this option I took a Grab taxi from the car park to arrivals. It's about a 6 or 7 minute journey. On the way back I took the shuttle bus from just past where the taxis pick up passengers. There's a bus stop there. I had to wait at least 20 minutes maybe longer for the bus. The bus is free but you need to make sure you get the correct bus. The information is on the Airport website. Each parking space has a cover which offers some shade. There's plenty of space between cars so it's unlikely someone will 'door you'. After almost two weeks my car had a thick layer of dust all over it but you clean your windows and you're away. You just turn up and take a ticket. There's a person in the little kiosk. When you leave you can pay by QR or cash. Long term car park location: https://maps.app.goo.gl/DAp6L77QzREasKmM6