Encid
-
Posts
1,294 -
Joined
-
Last visited
Content Type
Events
Forums
Downloads
Quizzes
Gallery
Blogs
Everything posted by Encid
-
Not Bangkok but just down the road in Pattaya... ARC. They are currently producing some double glazed sliding windows and doors for me. They have had customers from all over Thailand... including Bangkok. Recommended...
-
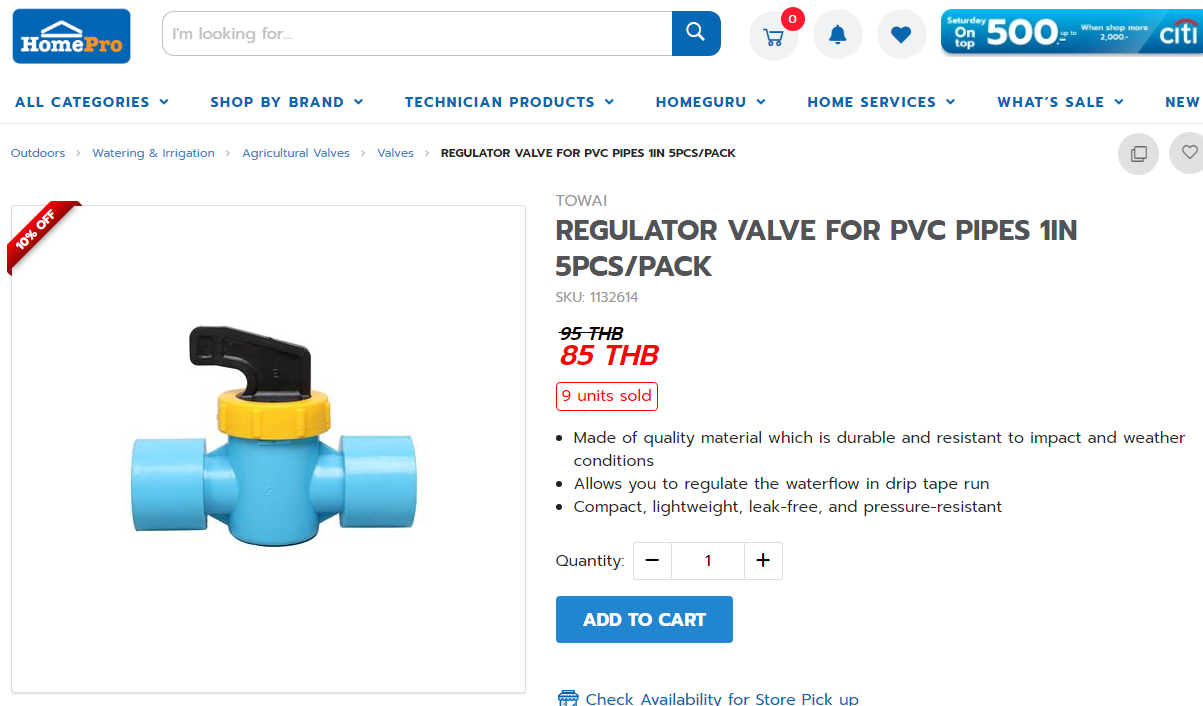
There are 1" PVC valves that are used to regulate the water flow rate for drip irrigation systems that might work for you... relatively inexpensive too.
-
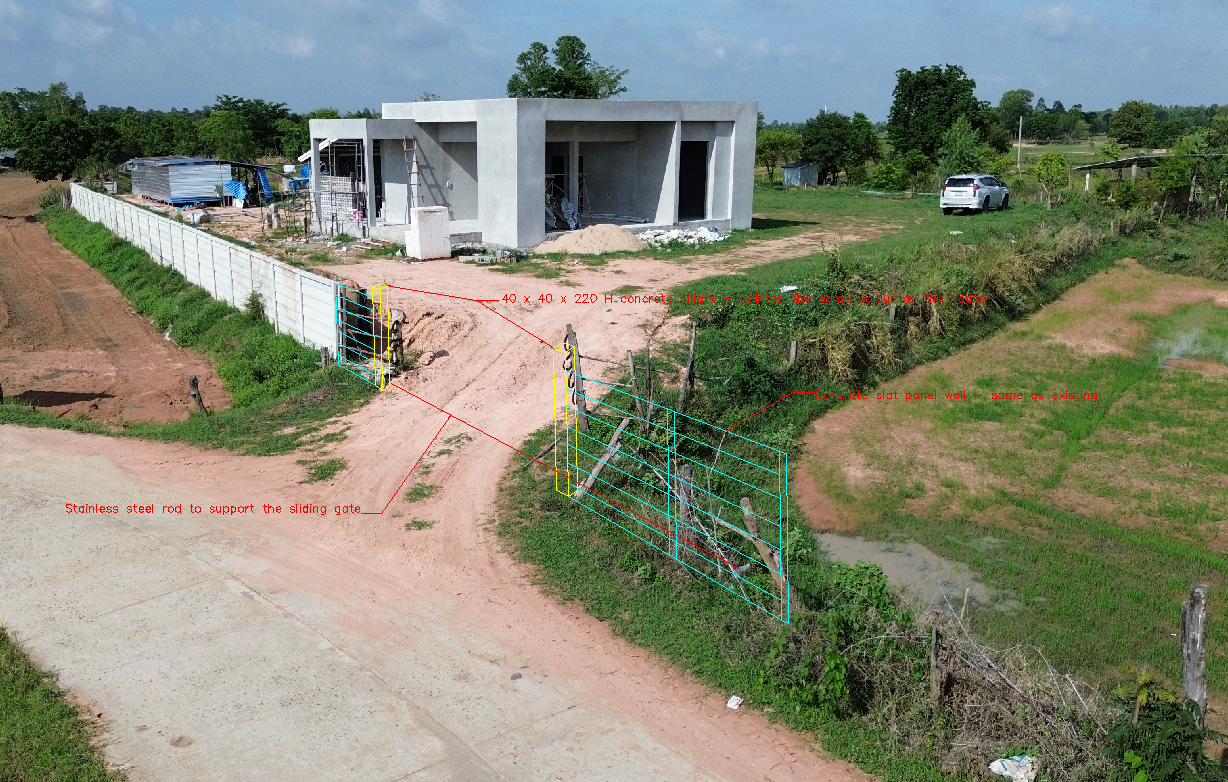
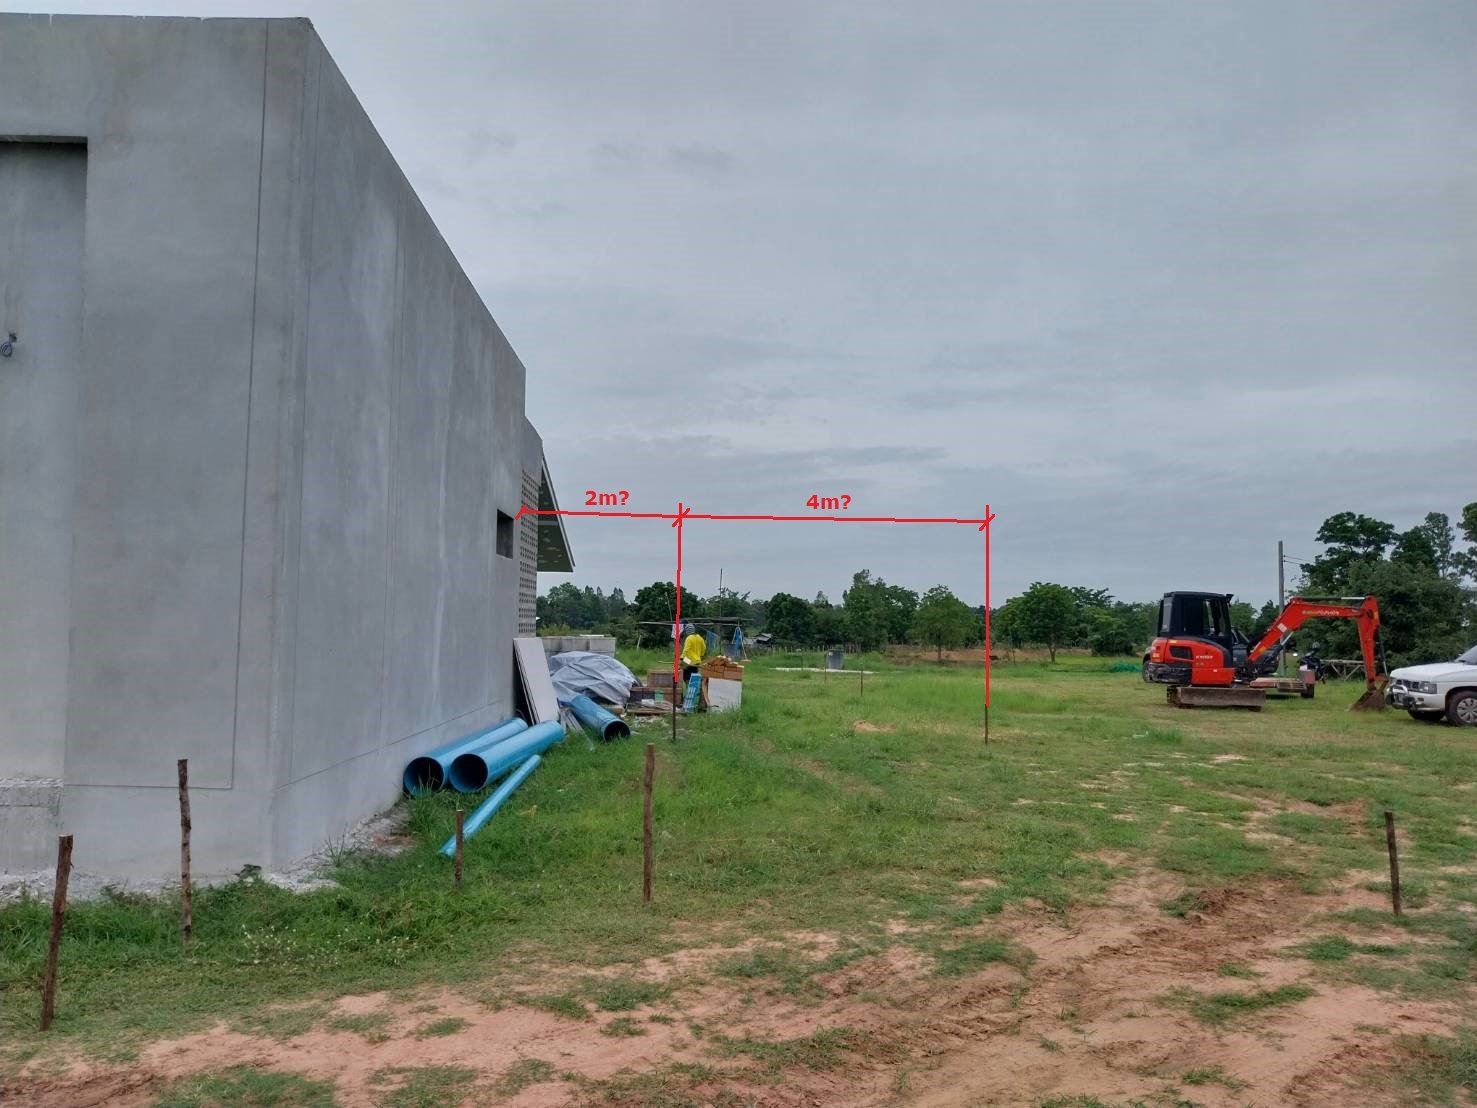
We have also negotiated with our next-door neighbour (my wife's sister) to obtain a small amount of land next to their farm to enable us to install some sliding gates at our boundary wall. We will be extending the existing 2m high RC slat panel wall one more bay (2.5m) then erecting a couple of 40x40cm square columns 4m apart to act as the gate supports, then add a couple more bays of the 2m high RC slat panel wall which will hide the gate when it is in the open position. The 2m high gate will be electrically operated by a 220V motor inside the gate and controlled by hand-held battery-operated remote controllers.
-
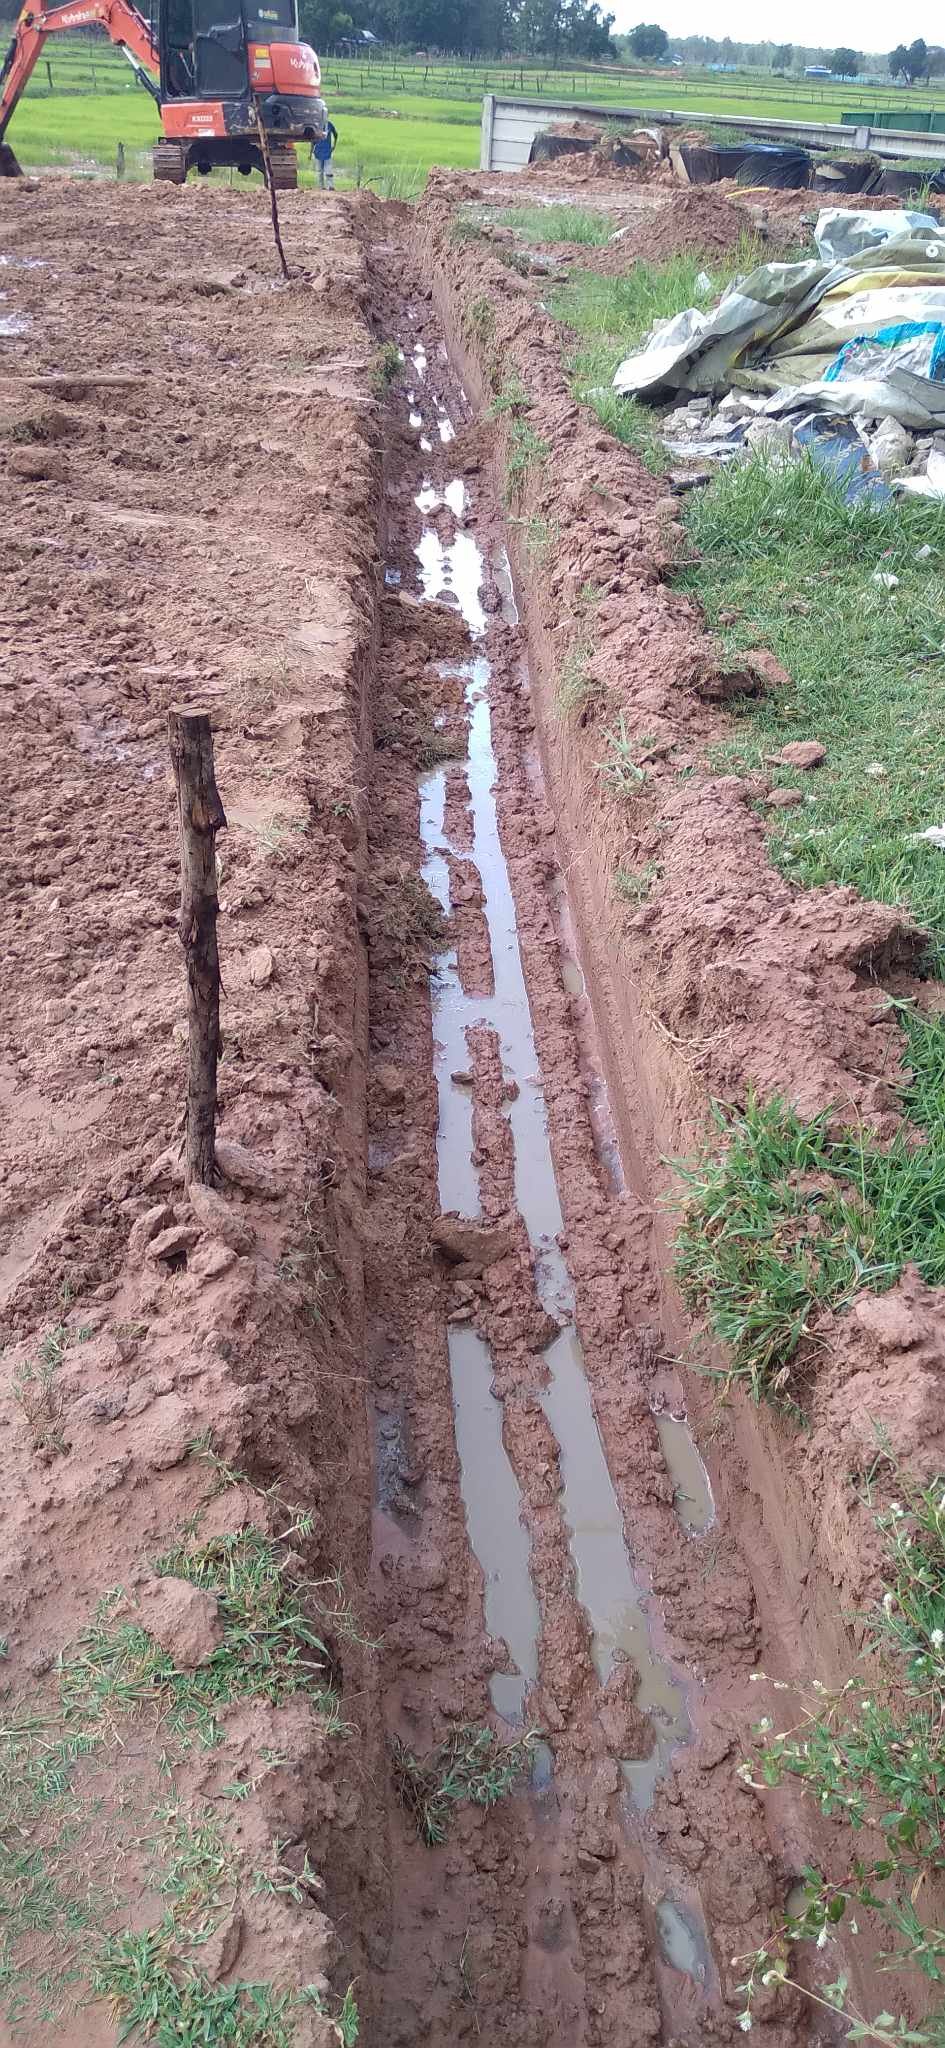
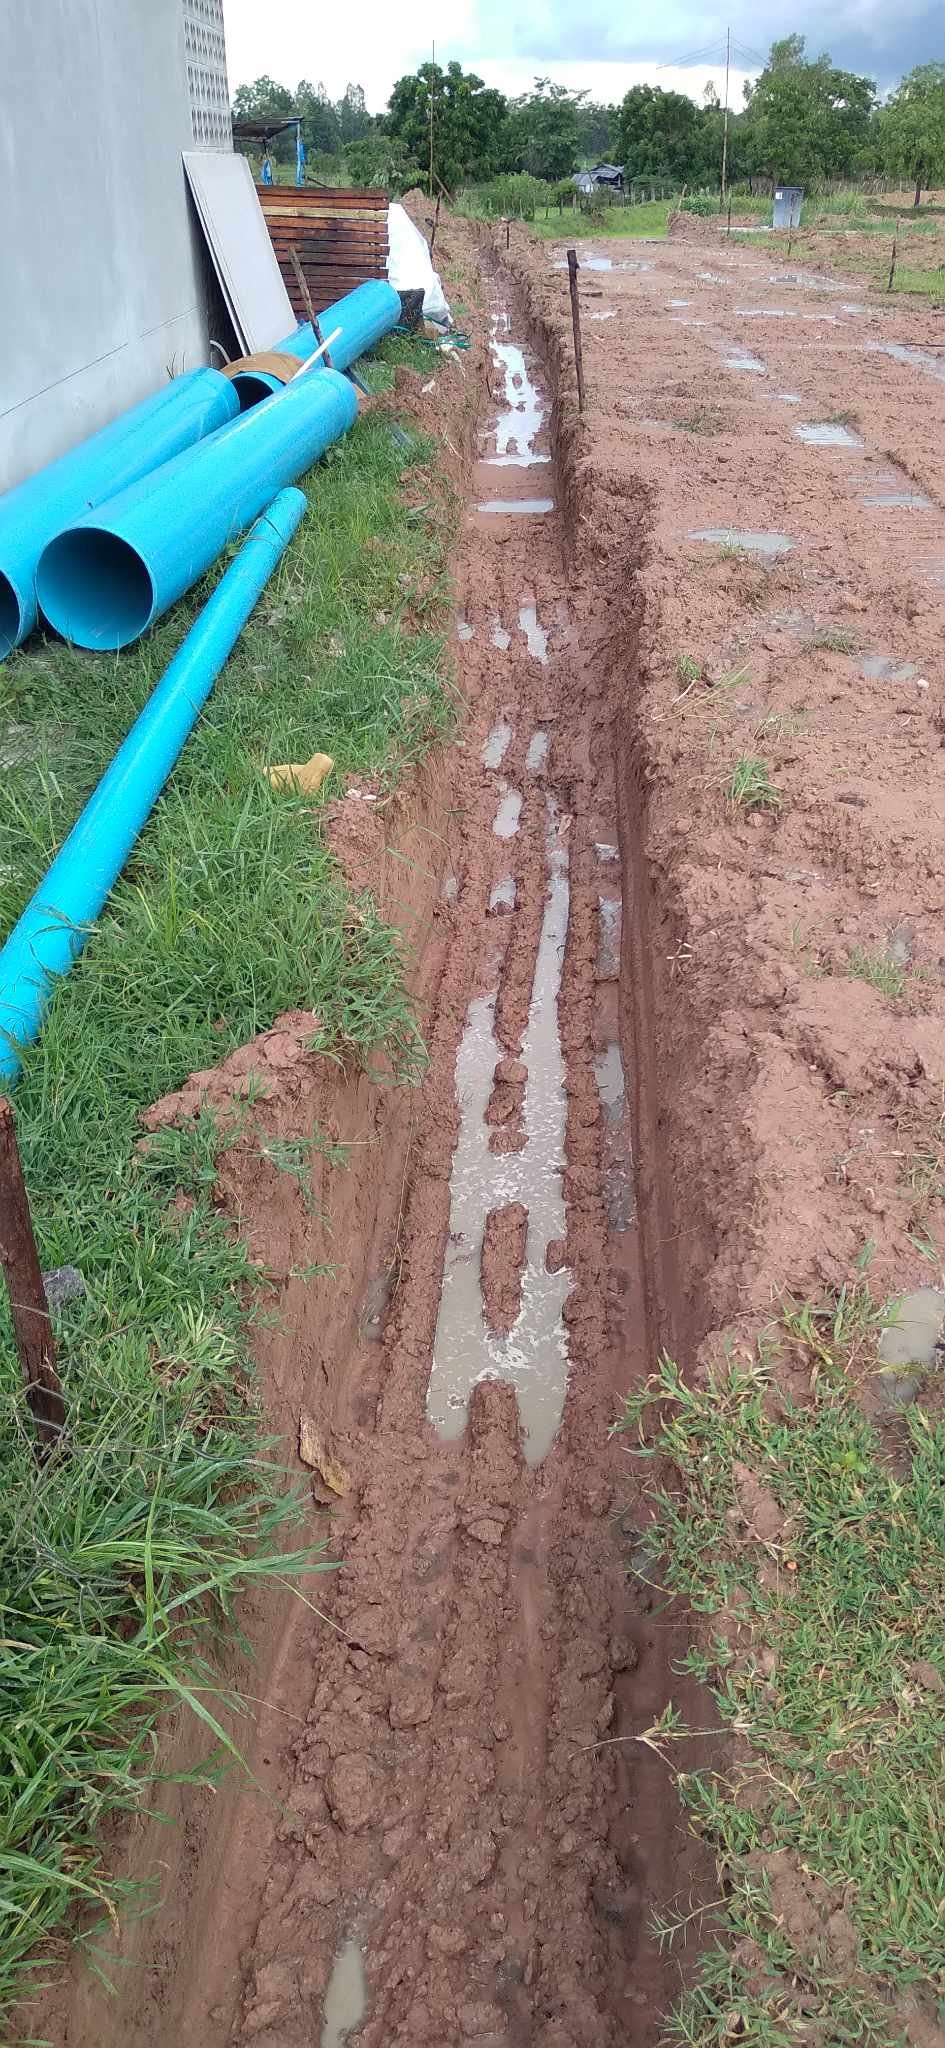
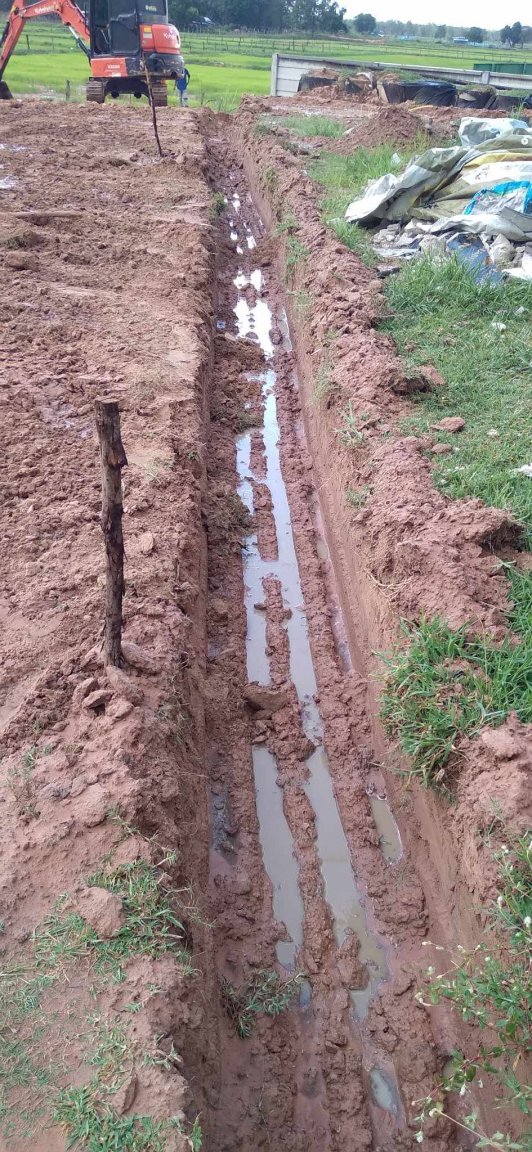
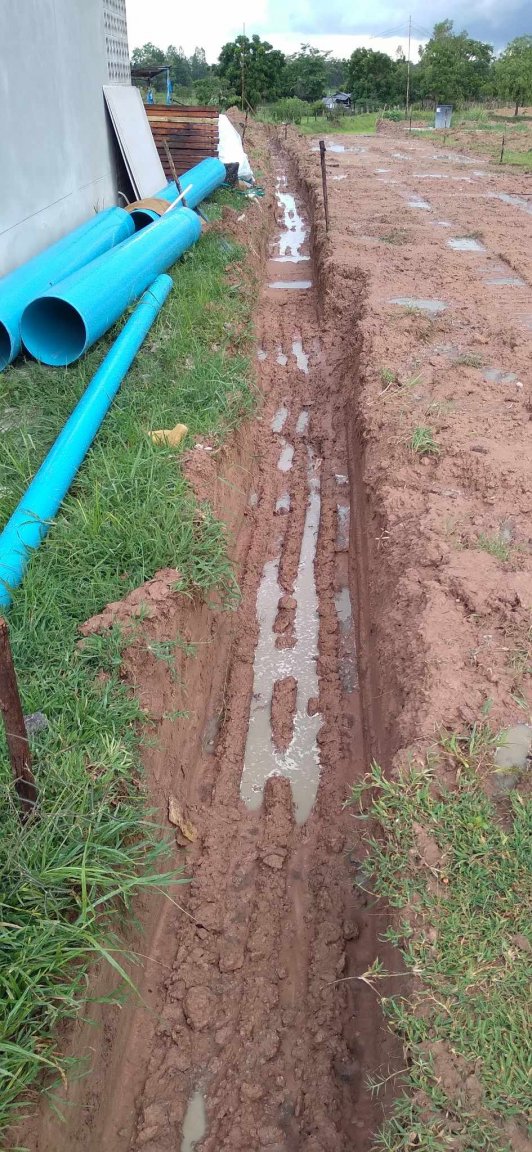
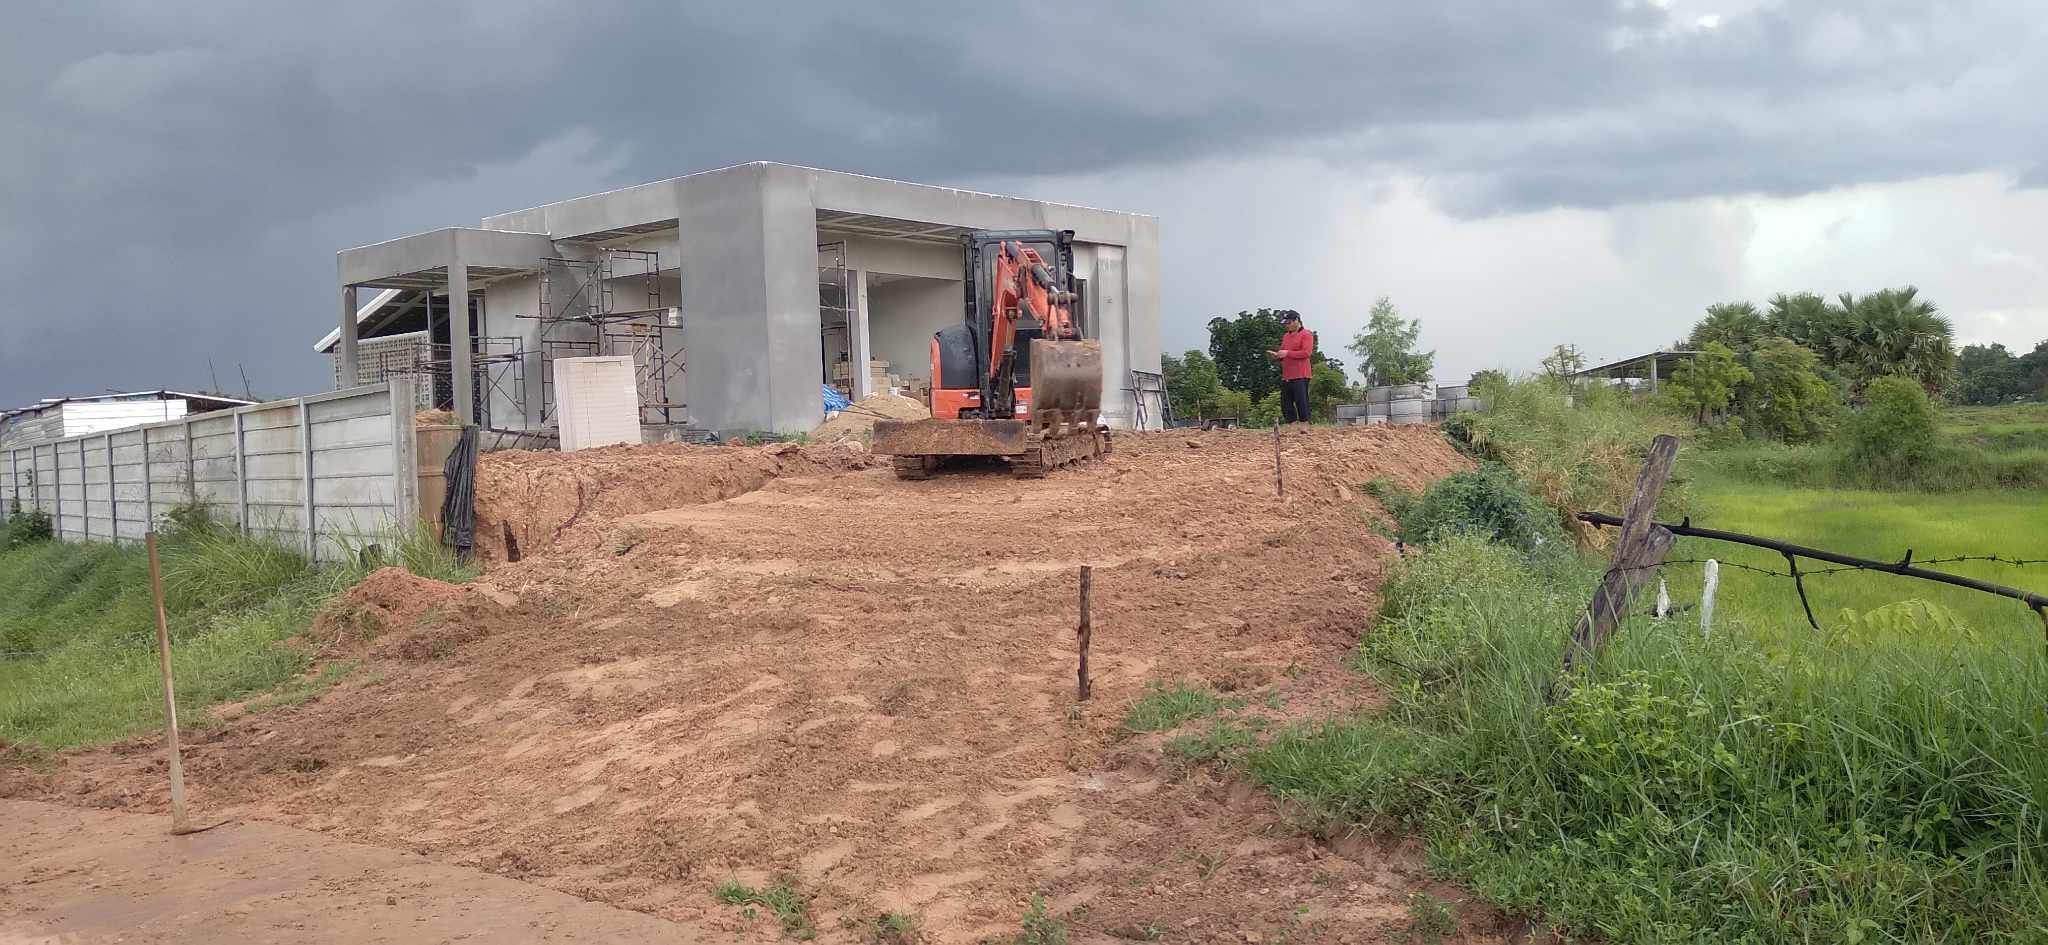
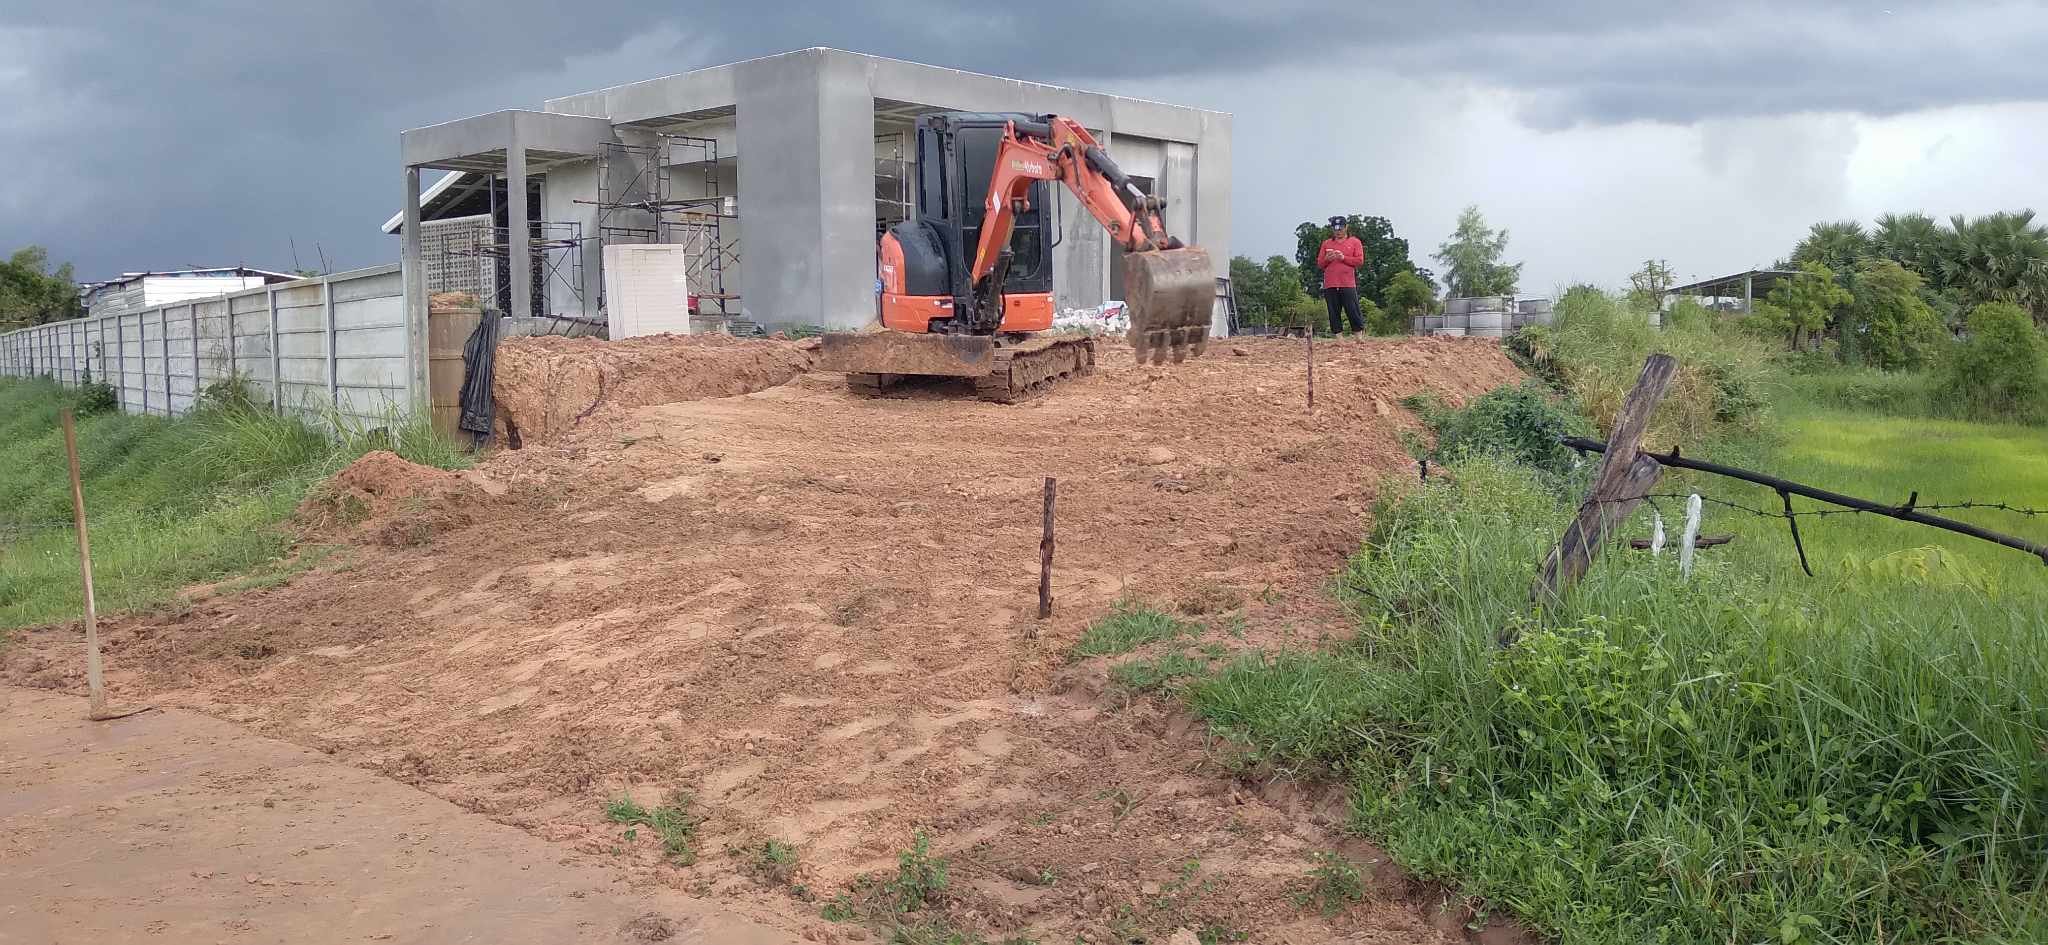
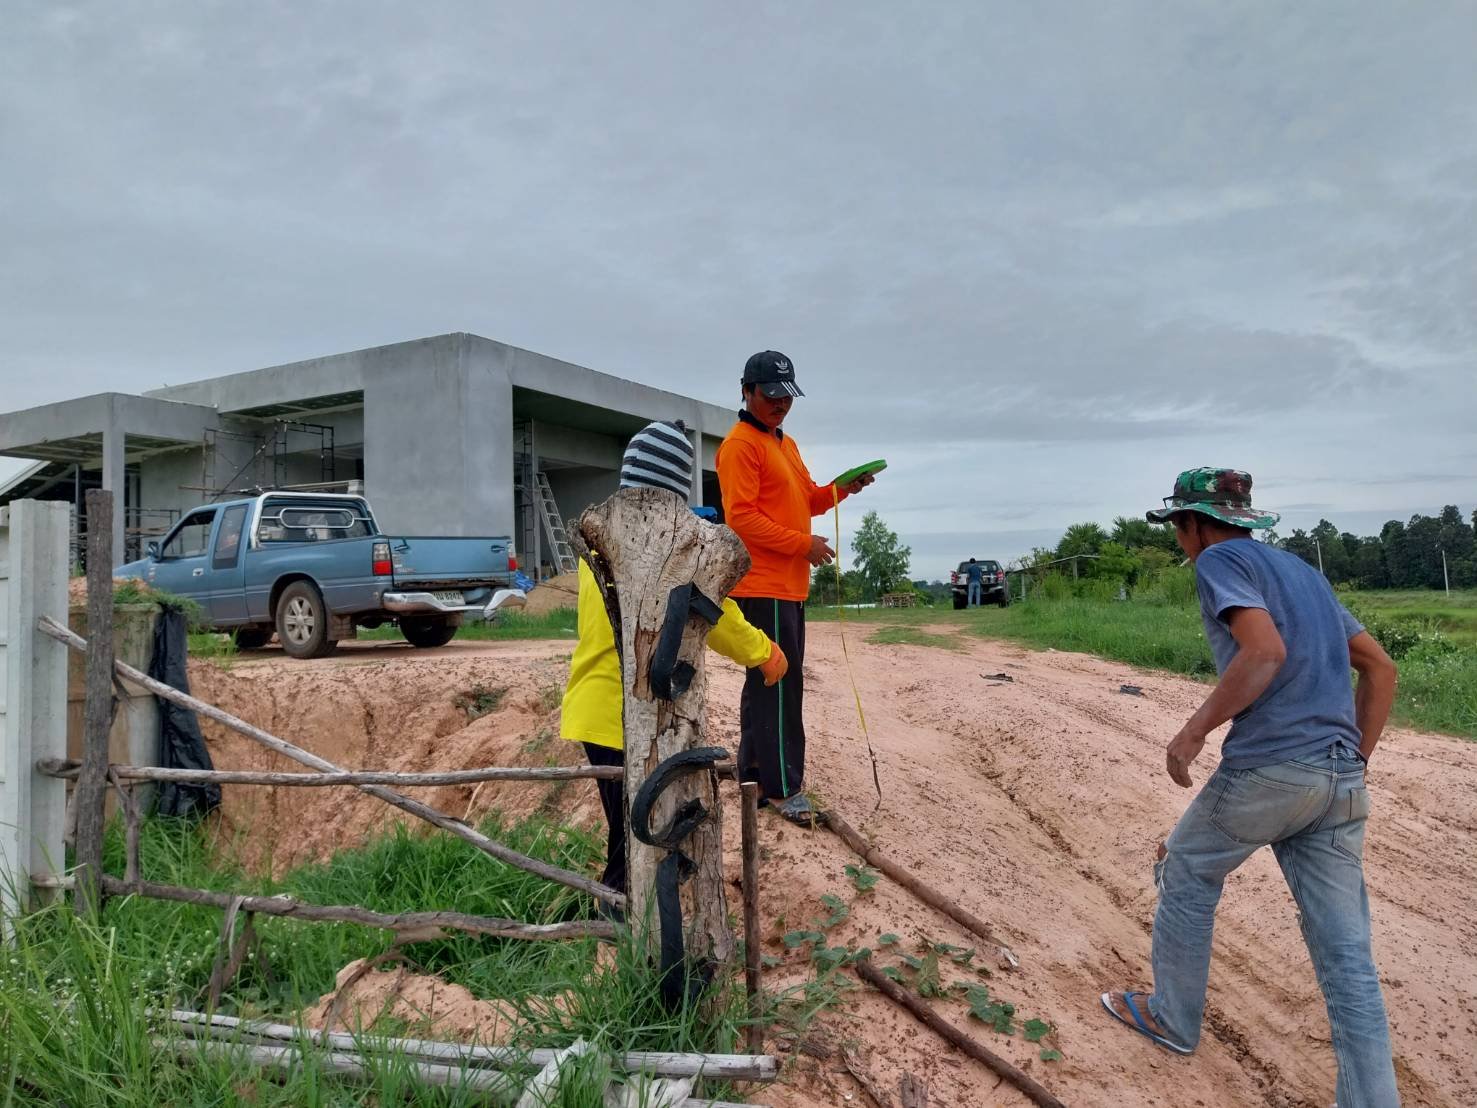
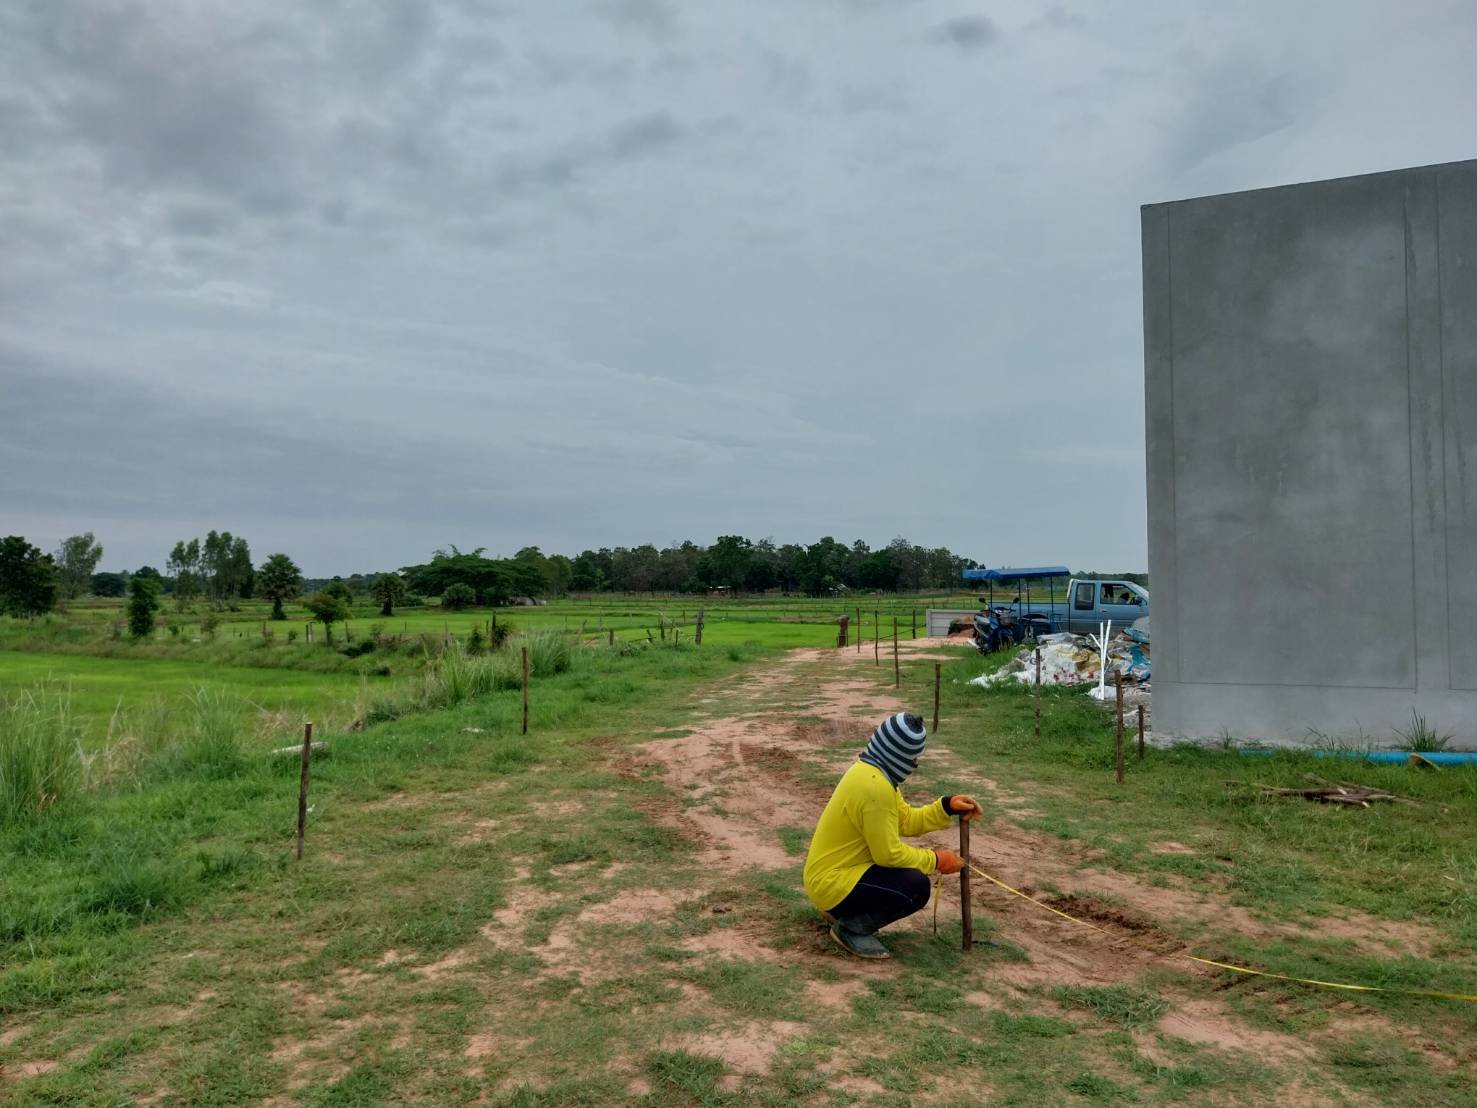
And then the back-hoe got to work preparing the surface. These photos are from yesterday... 21st July, and you can see the result of the recent rains.
-
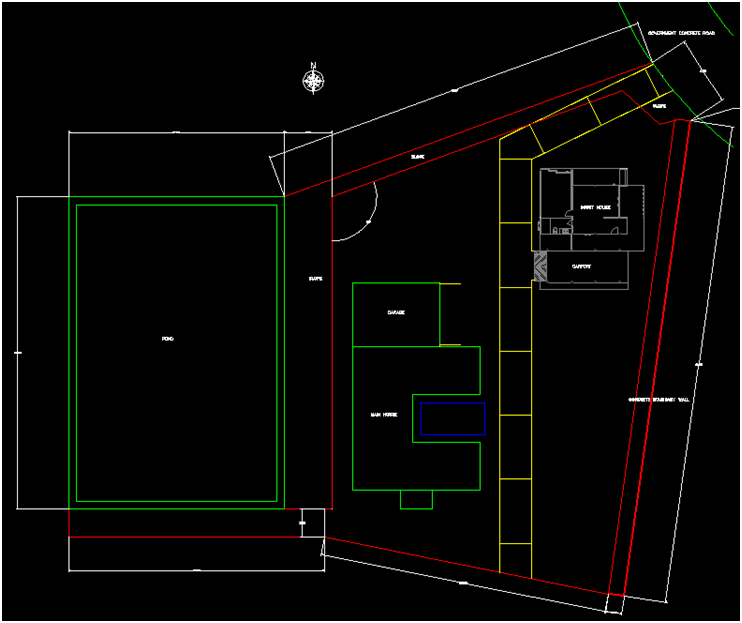
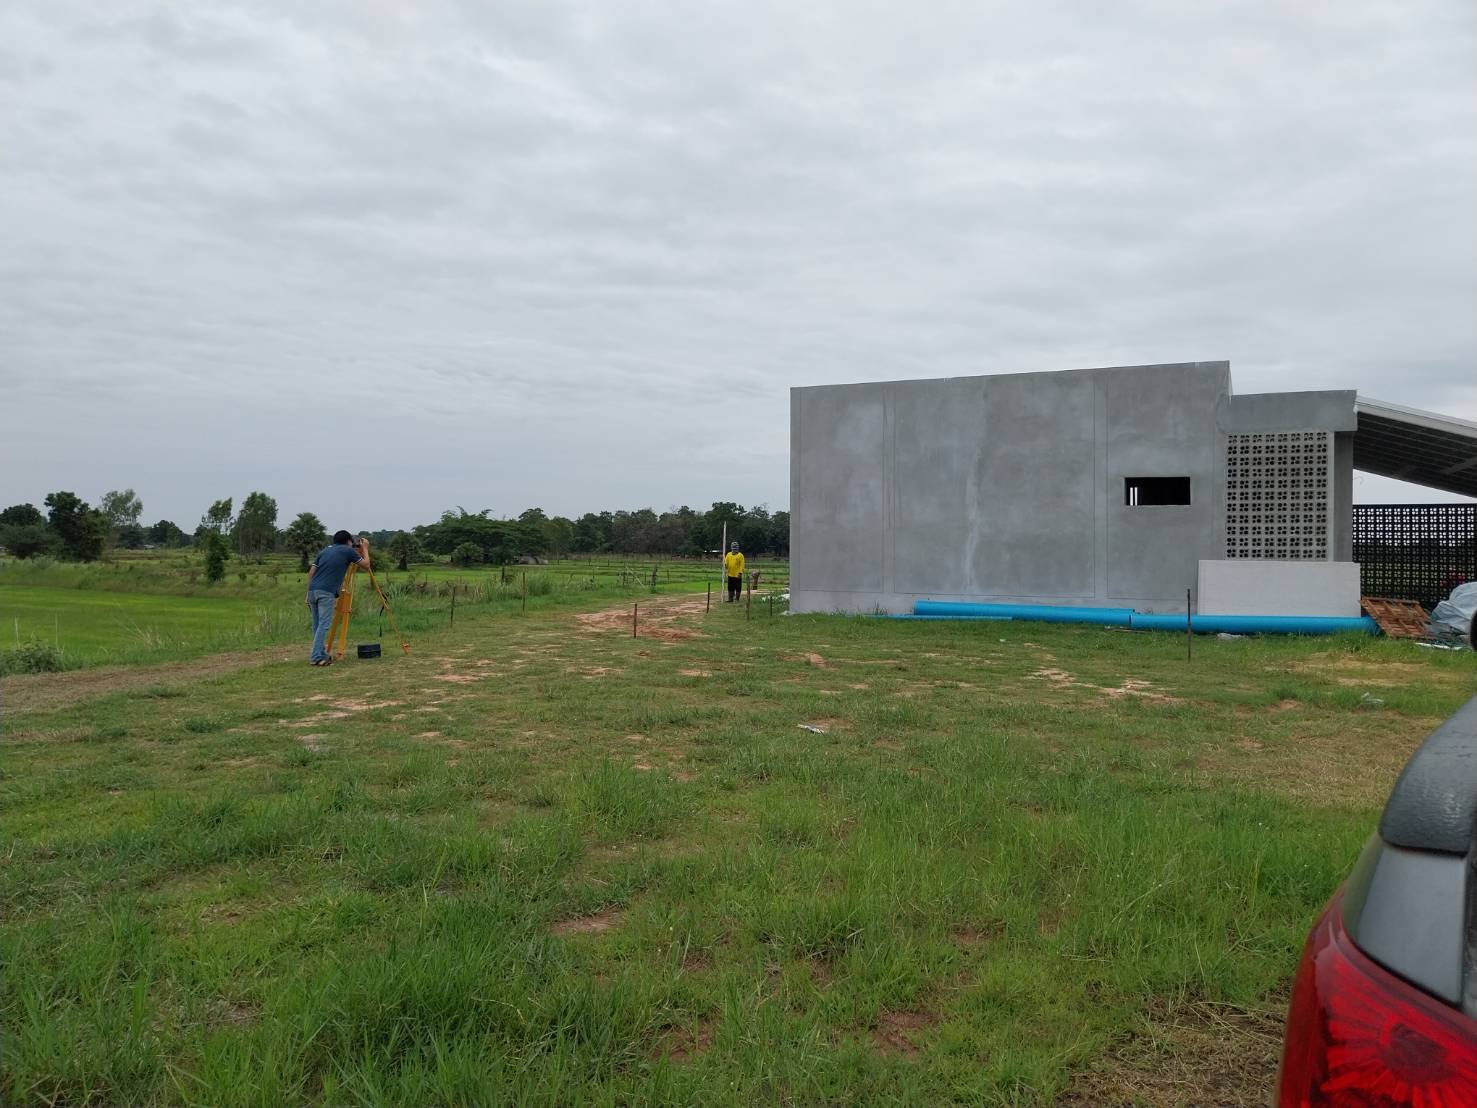
And work has started on the construction of our access road. It will be a 4m wide reinforced concrete road rising up a 1.6m high ramp from the government road to the corner of our Guest House, then head South in a straight line to another ramp down to access the farm. The road will have a spoon drain on the East side and will be designed and built to support the load of a fully laden sip-lor truck (10-wheeler) (30,000kg or 30T empty plus a load of 18,000 kg or 18T = 48T total). I don't think that we will ever see any machinery heavier than that accessing the farm. Both the ramp from the government road to the building site and the ramp to the farm needs to be a 15-20% maximum slope, with a 50% of slope transition at both ends of the ramp. My builder scratched his head a bit when he saw this diagram, but after we discussed the reasons for the transitions he agreed that this would be a very good ramp design. The RC access road needs to be built in sections nominally 8m long x 4m wide, with construction joints fitted every 8m to cater for expansion and to eliminate cracking. We intend to use some neoprene water seal strips to act as the construction joints. The RC access road will be located 2m from the West wall of the Guest House and run in a straight parallel direction to the farm, where another ramp is required. The future Main House will also be accessed from this road. Some photos of the early preparation work:

-
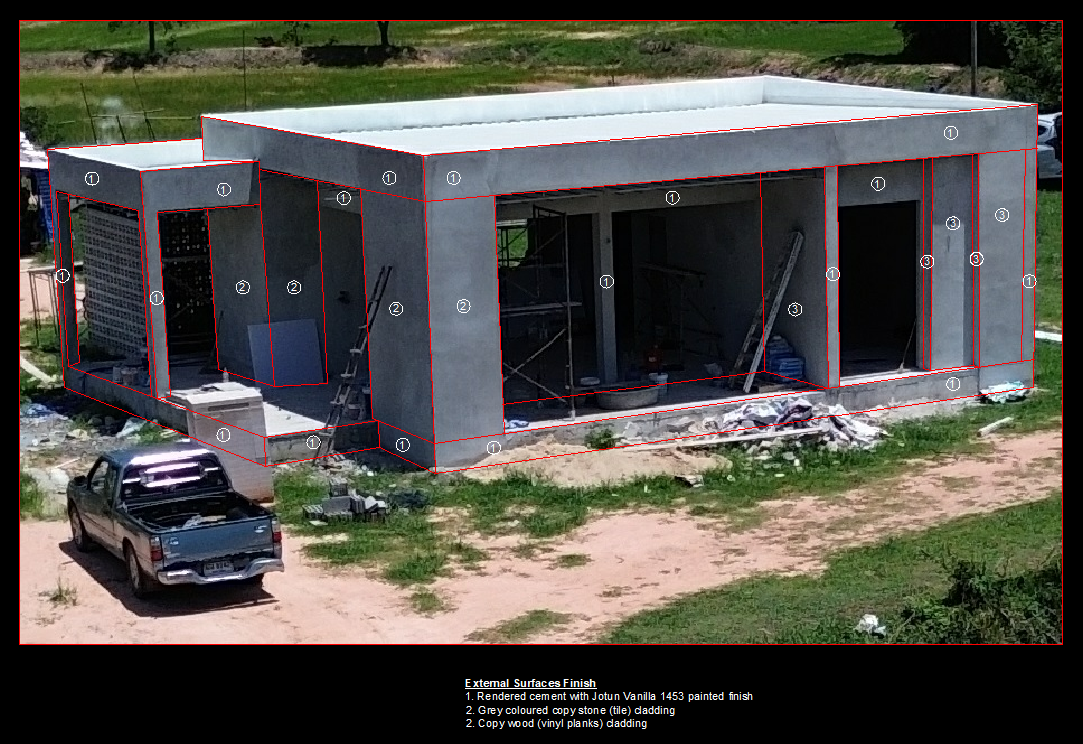
I also used CAD to indicate the type of finished surfaces we want on the outside of the building. Using AutoCAD I referenced in an aerial photo I had taken with the drone, then drew lines and text etc. on top of the raster image to show our builder what we want. I had already calculated the areas required for the "copy stone" and "copy wood" surfaces, added 10% for contingency, and ordered the material from Thaiwatsadu... they get delivered to site early next week. After discussions with our builder we agreed to do this work after the uPVC windows and doors have been installed, so there are no complications from incorrect positioning of any cladding. Just out of interest, this particular photo was taken at midday on July 4... which was about 10 days after the solar solstice. This particular solstice means that the Earth's Northern Hemisphere has tilted as far as it can toward the sun and the sun's rays are reaching as far North as they possibly can, giving us the maximum amount of sunlight we will get all year. Our build location is about 16° North... and you can see from the shadows in the photo that the North face of our building is receiving some direct sunlight (albeit minimal and only for a short duration).
-
Me too! I am continually trying to be yen-yen dealing with the daily issues, but I must admit that my wife is subjected to my true nature (in private) when I discover something done wrong or badly. She knows that I get frustrated with stupid errors, but supports me in getting the problems sorted out to my satisfaction with the builder. She pours the oil on the troubled waters...
-
If you have been taking much notice of the developments in this thread you will see that I am trying to build a dwelling that is of reasonable quality. There is absolutely no way that I would consider using any products from Mr DIY where most of their merchandise is cheap, Chinese-made, and of inferior quality with no warranty. I bought a 75 baht 1/2" garden tap for the farm from them once... as soon as the water line was pressurized (by a domestic water pump) the tap body just exploded... no warranty, no refund, no return custom from me ever!!! All our bathroom and kitchen fittings will be American Standard, and sourced from a reputable dealer like Boonthavorn with associated product warrantees.
-
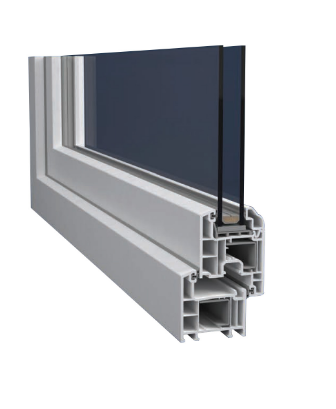
Your uPVC frame type is similar to ours: We have ordered all our uPVC sliding doors and windows from ARC-CMR who use components sourced from Belgium. Their products have an expected life-cycle of over 40 years. I have been very happy with their understanding of our requirements, their product knowledge, and their professionalism. They visited our building site on 22 June to take final "as-built" measurements of all the door/window openings in the house shell. We are expecting the first shipments to arrive in site at the end of the first week in August when installation will begin.
-
I believe that the PEA buy-back rate for electricity is about 2.2 baht per unit if you are lucky enough to get hold of a Power Purchase Agreement (PPA) with them. Our current "temporary" usage rate is about 8.9 baht per unit. A standard residential usage rate is about 5.5 baht per unit... although YMMV.
-
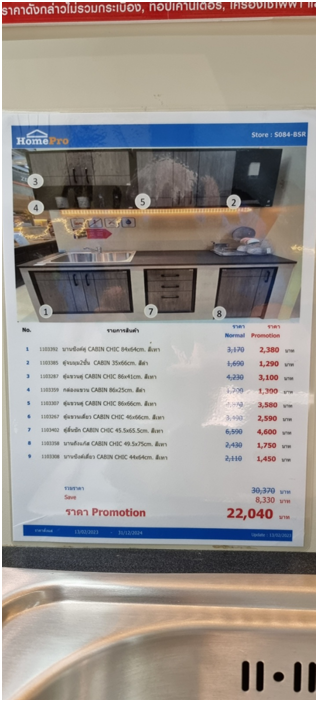
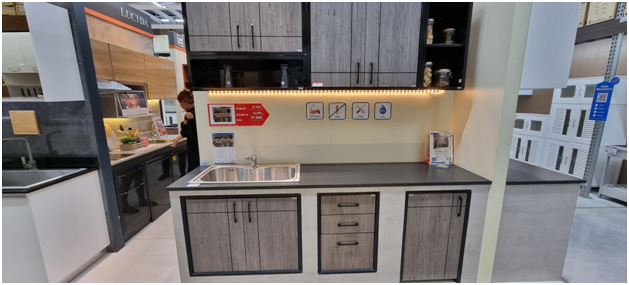
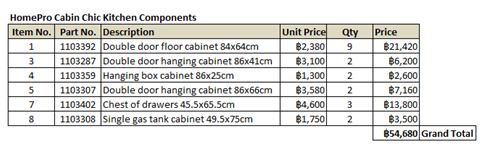
We have also selected our kitchen cabinets. We found some that we liked in HomePro... from their “Cabin Chic” kitchen collection. So I again used CAD to do a layout of what doors were to go where and what type, and where the cabinets were to be located etc. and produced a BOQ in Excel. Interesting that the HomePro online pricing was significantly lower than the store advertised prices (even the "promotion" prices), but MegaHome in Korat was able to fill our order from stock at hand and give us the online pricing... and then they threw in free delivery because our order was over 50K!
-
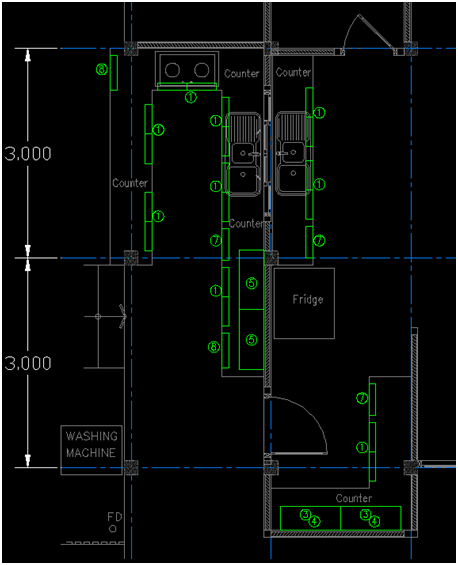
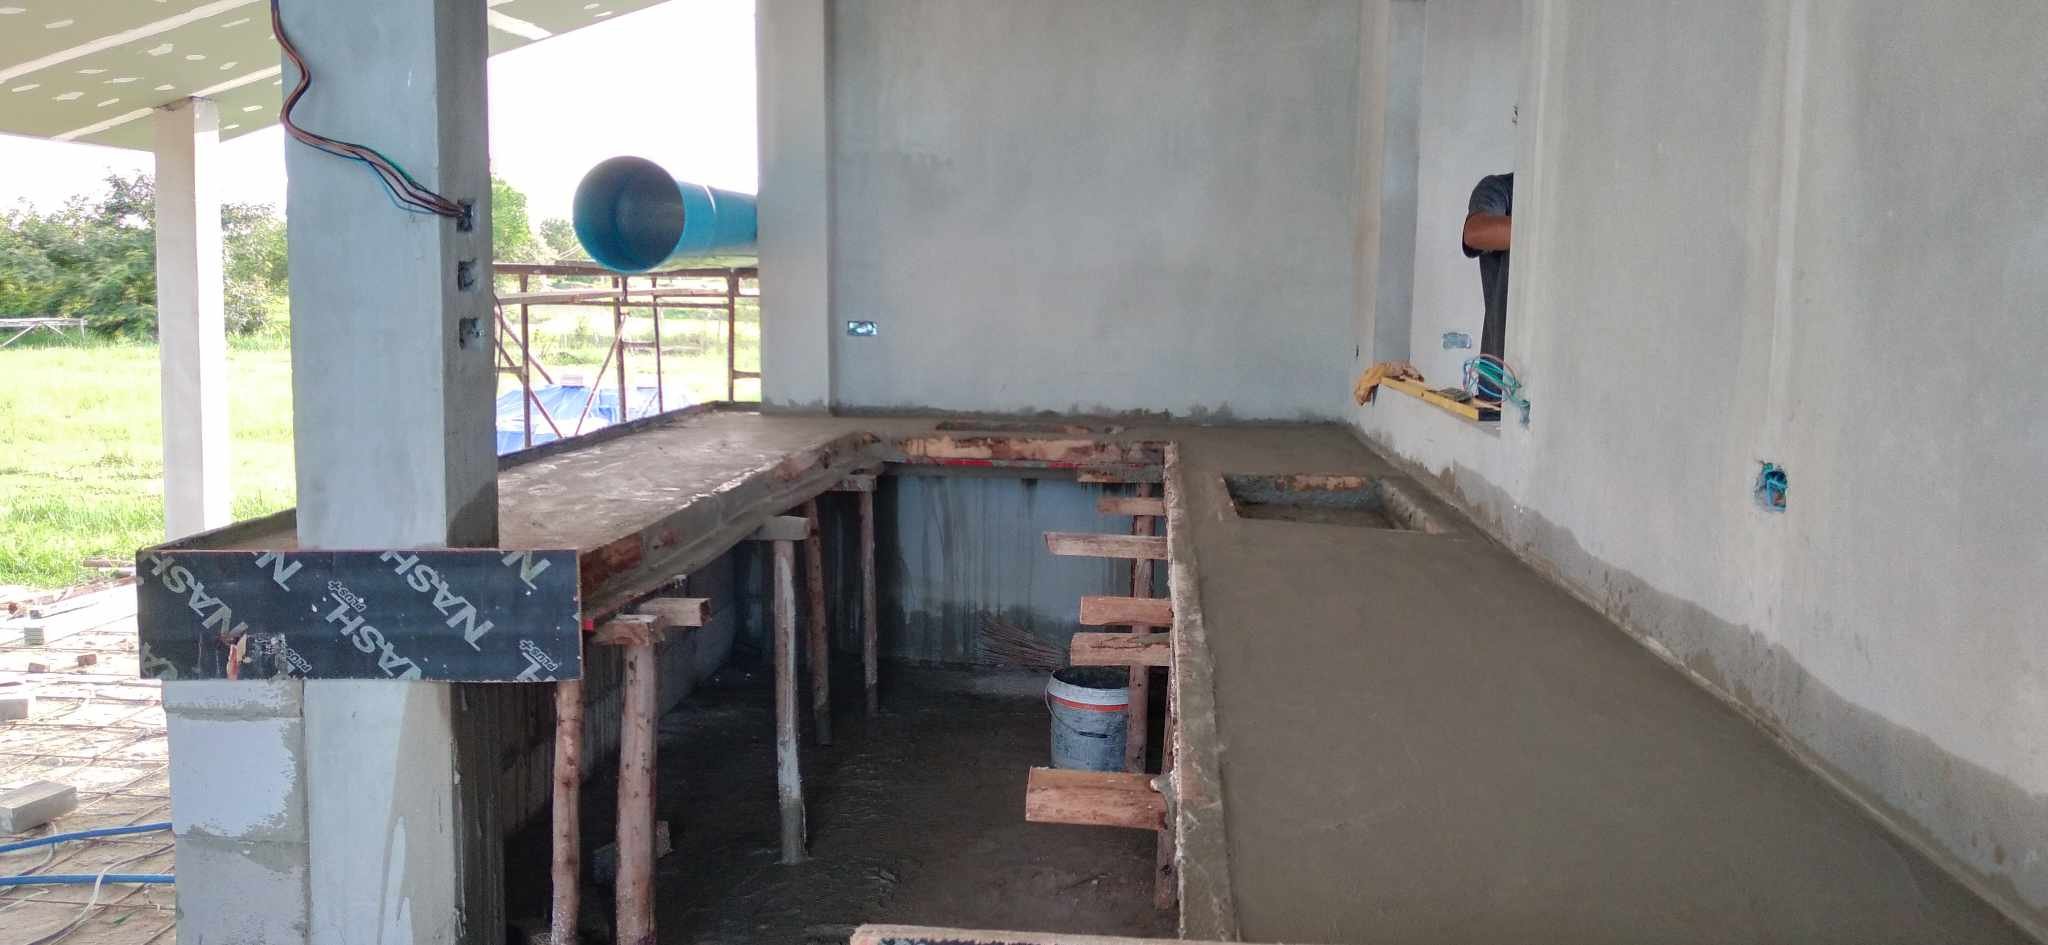
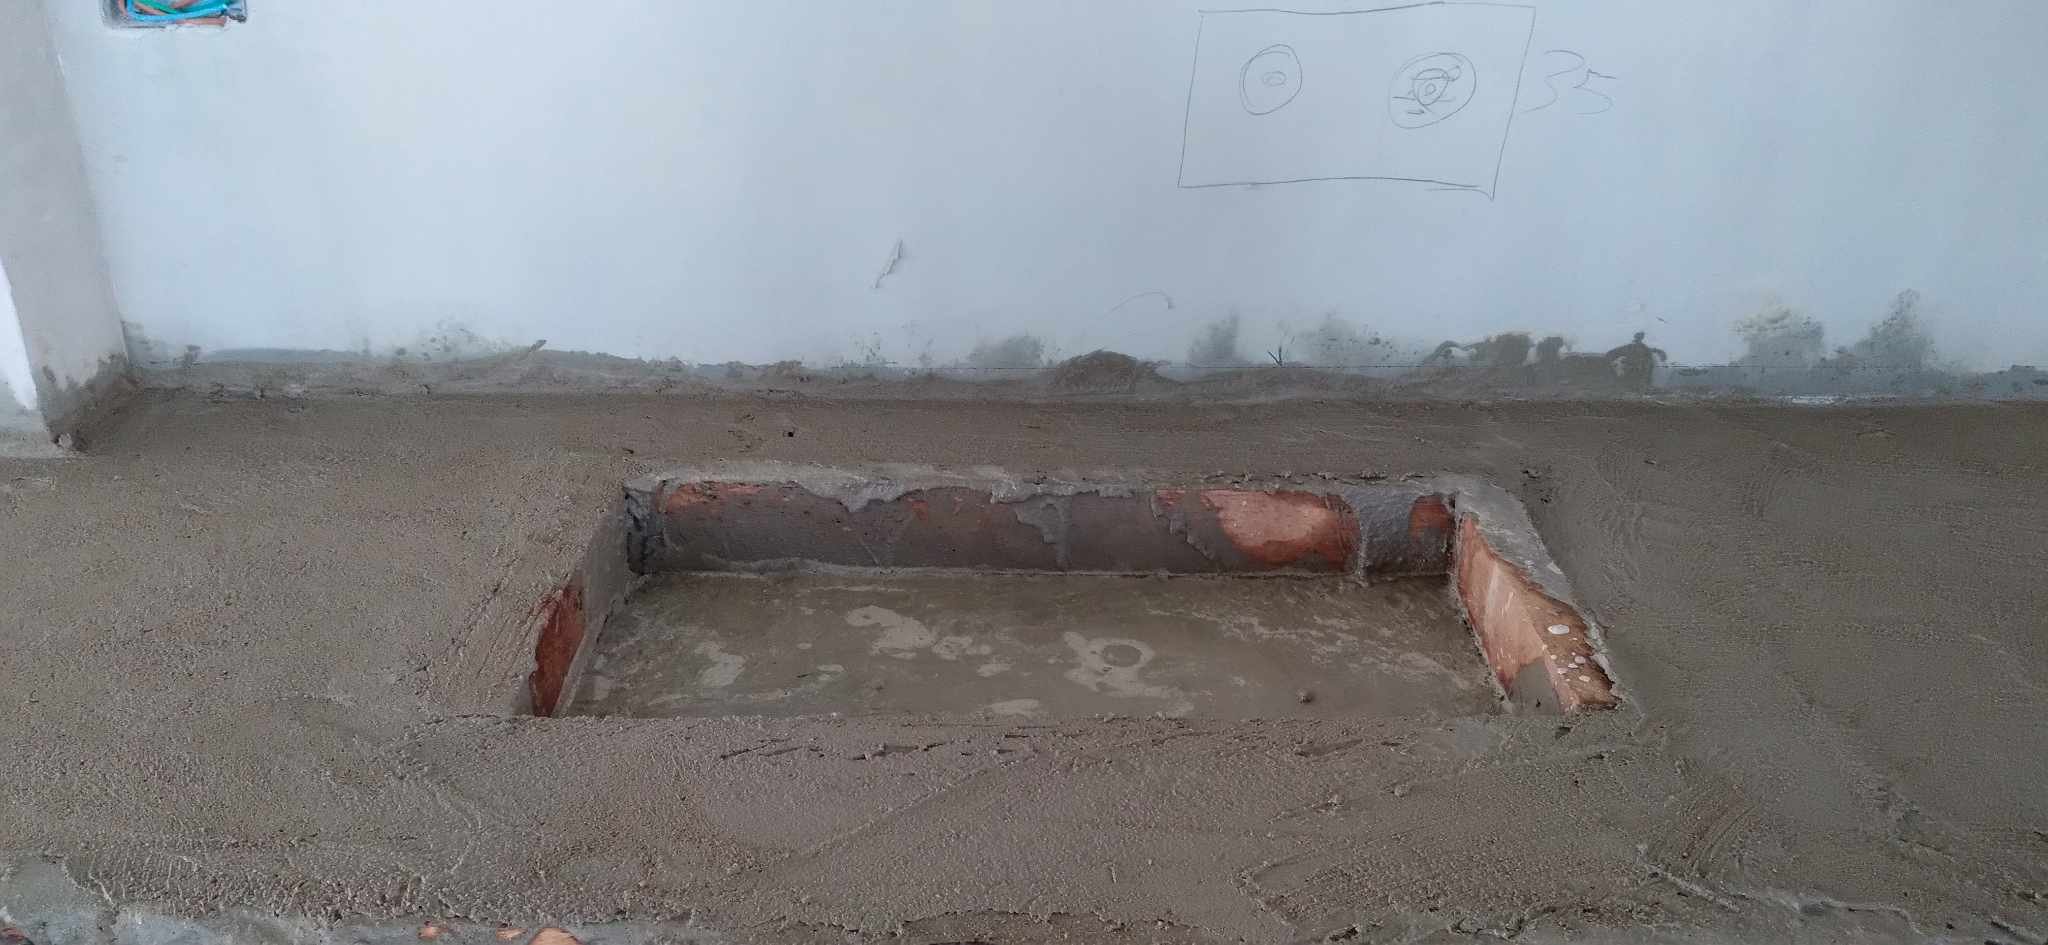
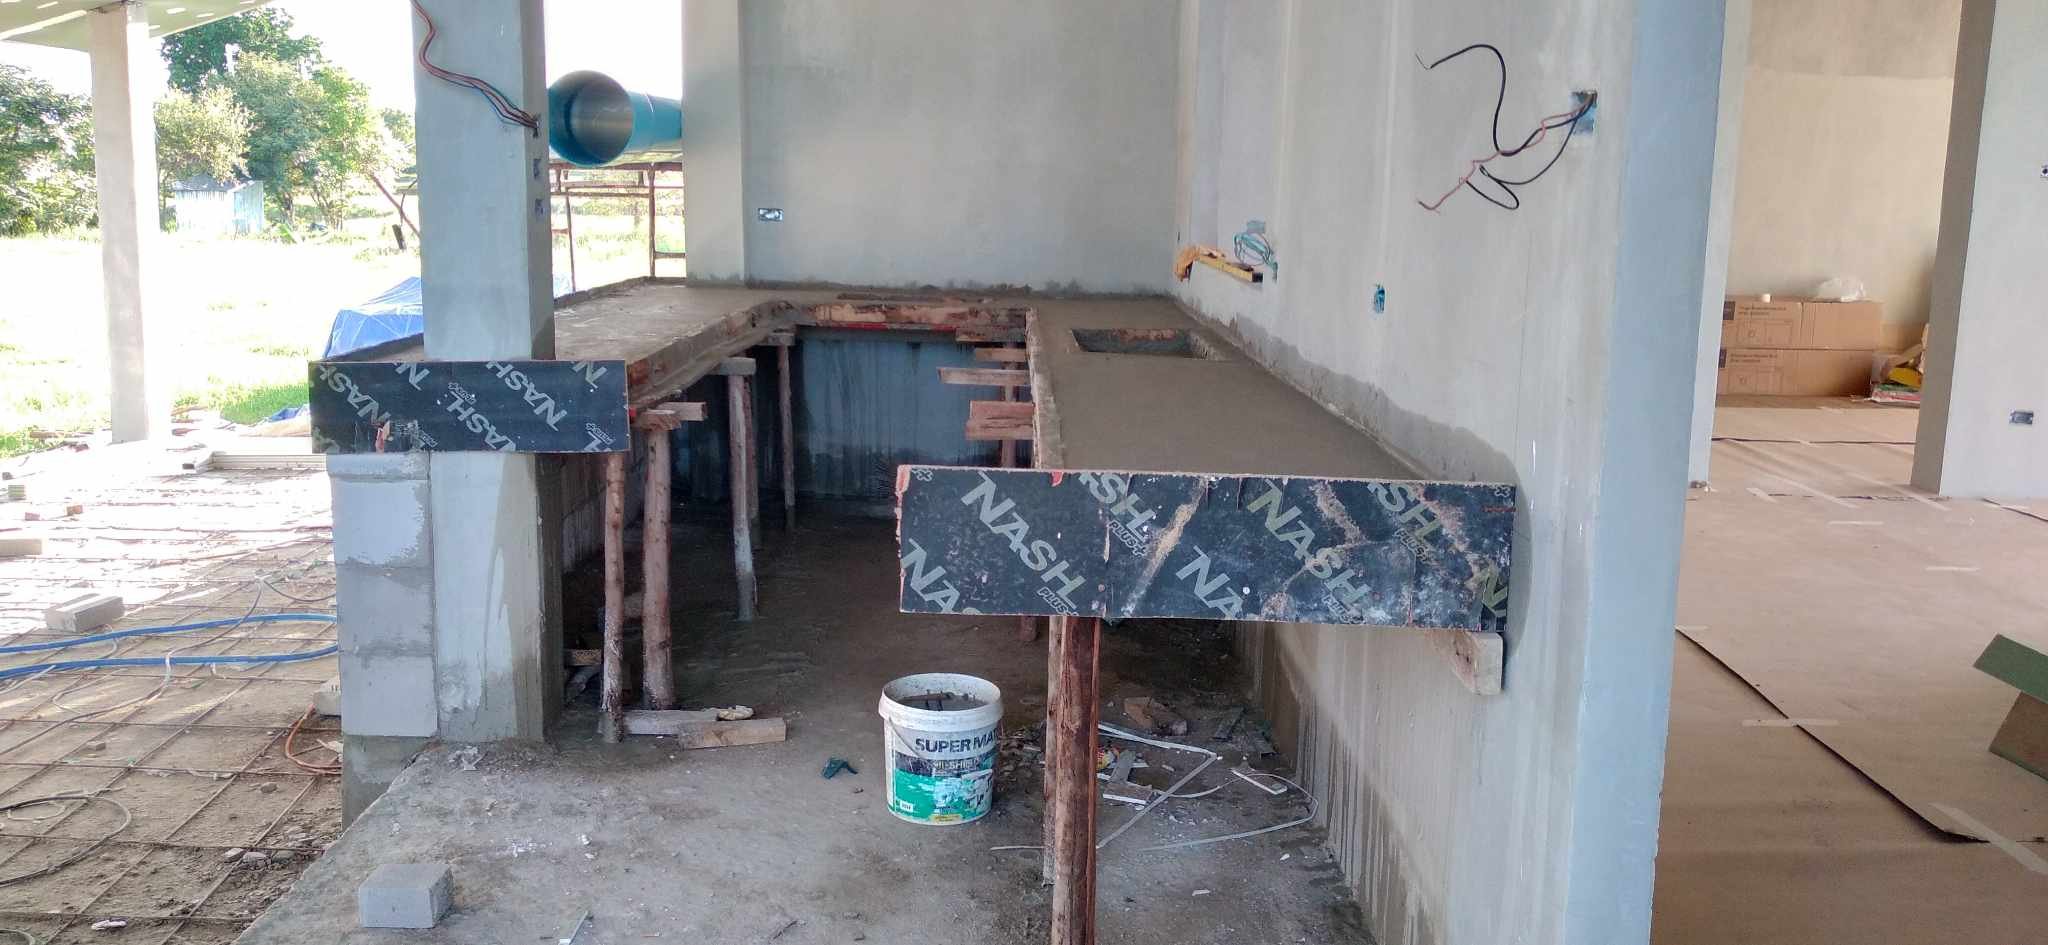
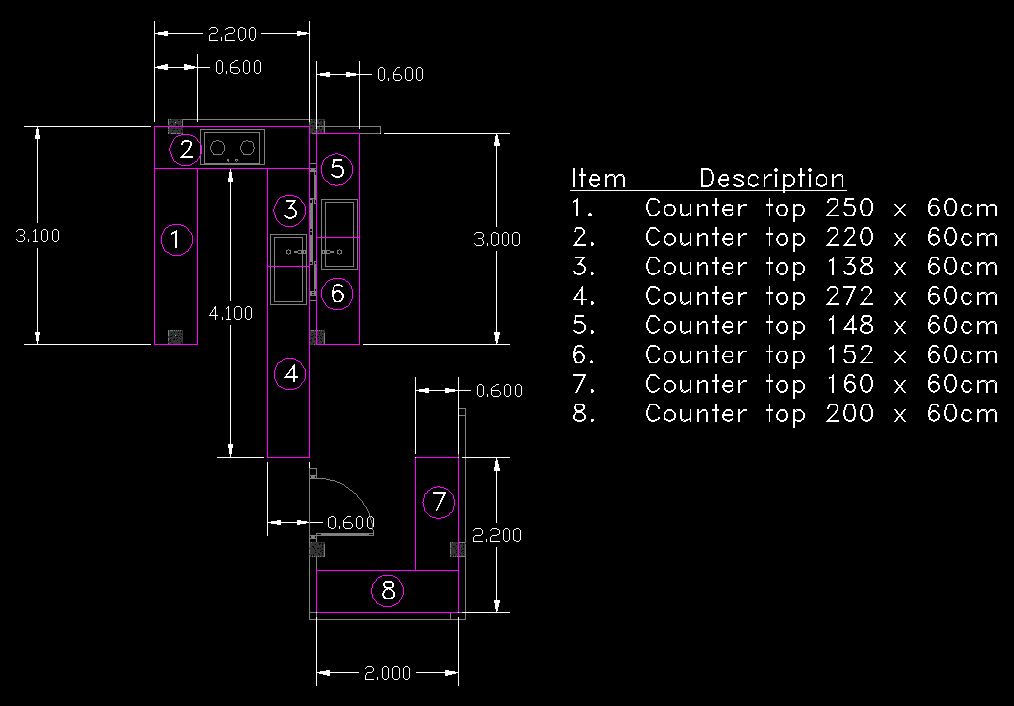
Work has also started on the counters for the kitchen areas. I did a layout of the counter areas in CAD for our builder and they are working to that. He is also sourcing some granite counter tops for us... early indications are that local prices are much cheaper than Boonthavorn or Thaiwatsadu.
-
We have not yet installed our solar system. We are still on a temporary disc meter on a temporary charge rate. I expect that to change once our build is complete and we apply for a house number. Then the PEA charge rate will change from temporary to residential. Hopefully it will be an office documentation change only and we get to keep the existing meter (which can spin both directions).
-
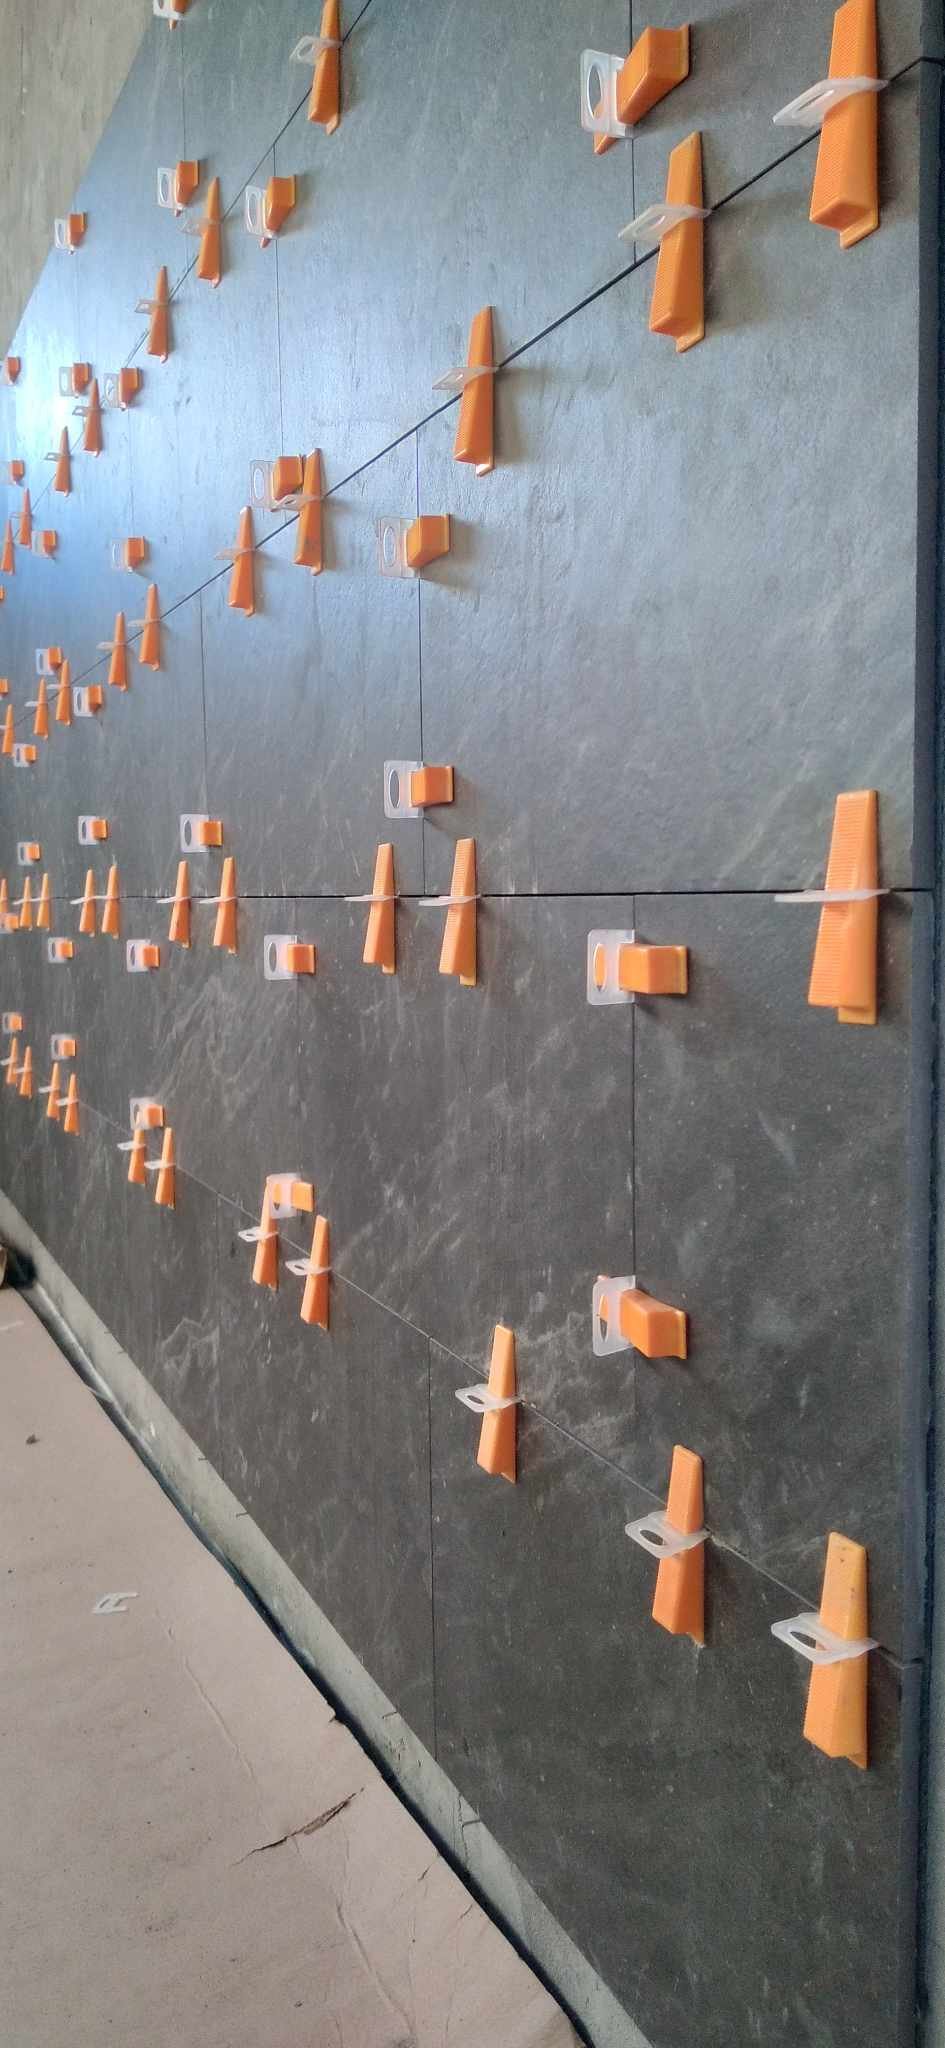
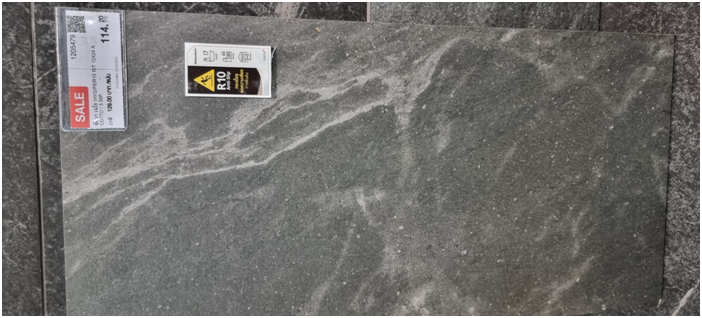
For the bathroom we have chosen 12” x 24” Cotto R10 anti-slip tiles like this: We will be using a black coloured epoxy grout (like Weberepox Easy - which is Anti-fungus, Chemical resistant, Anti-stain, Abrasion resistant, Anti-bacteria, Anti-efflorescent stain, Anti-algae, Dust less, Impact resistance, Resistant to detergents, and Resistant to oils). Before tiling the bathroom, I made sure that the builder understood that I wanted him to lay the floor tiles first... that way the water that runs down the wall tile has a better chance of heading away to the drain point than in another direction. Most tilers like to do the walls first because they can finish the wall and work on the floor while the wall tiles are drying... but you can't do that when you lay floors first, so it takes a bit longer, but it's a more water secure job.
-
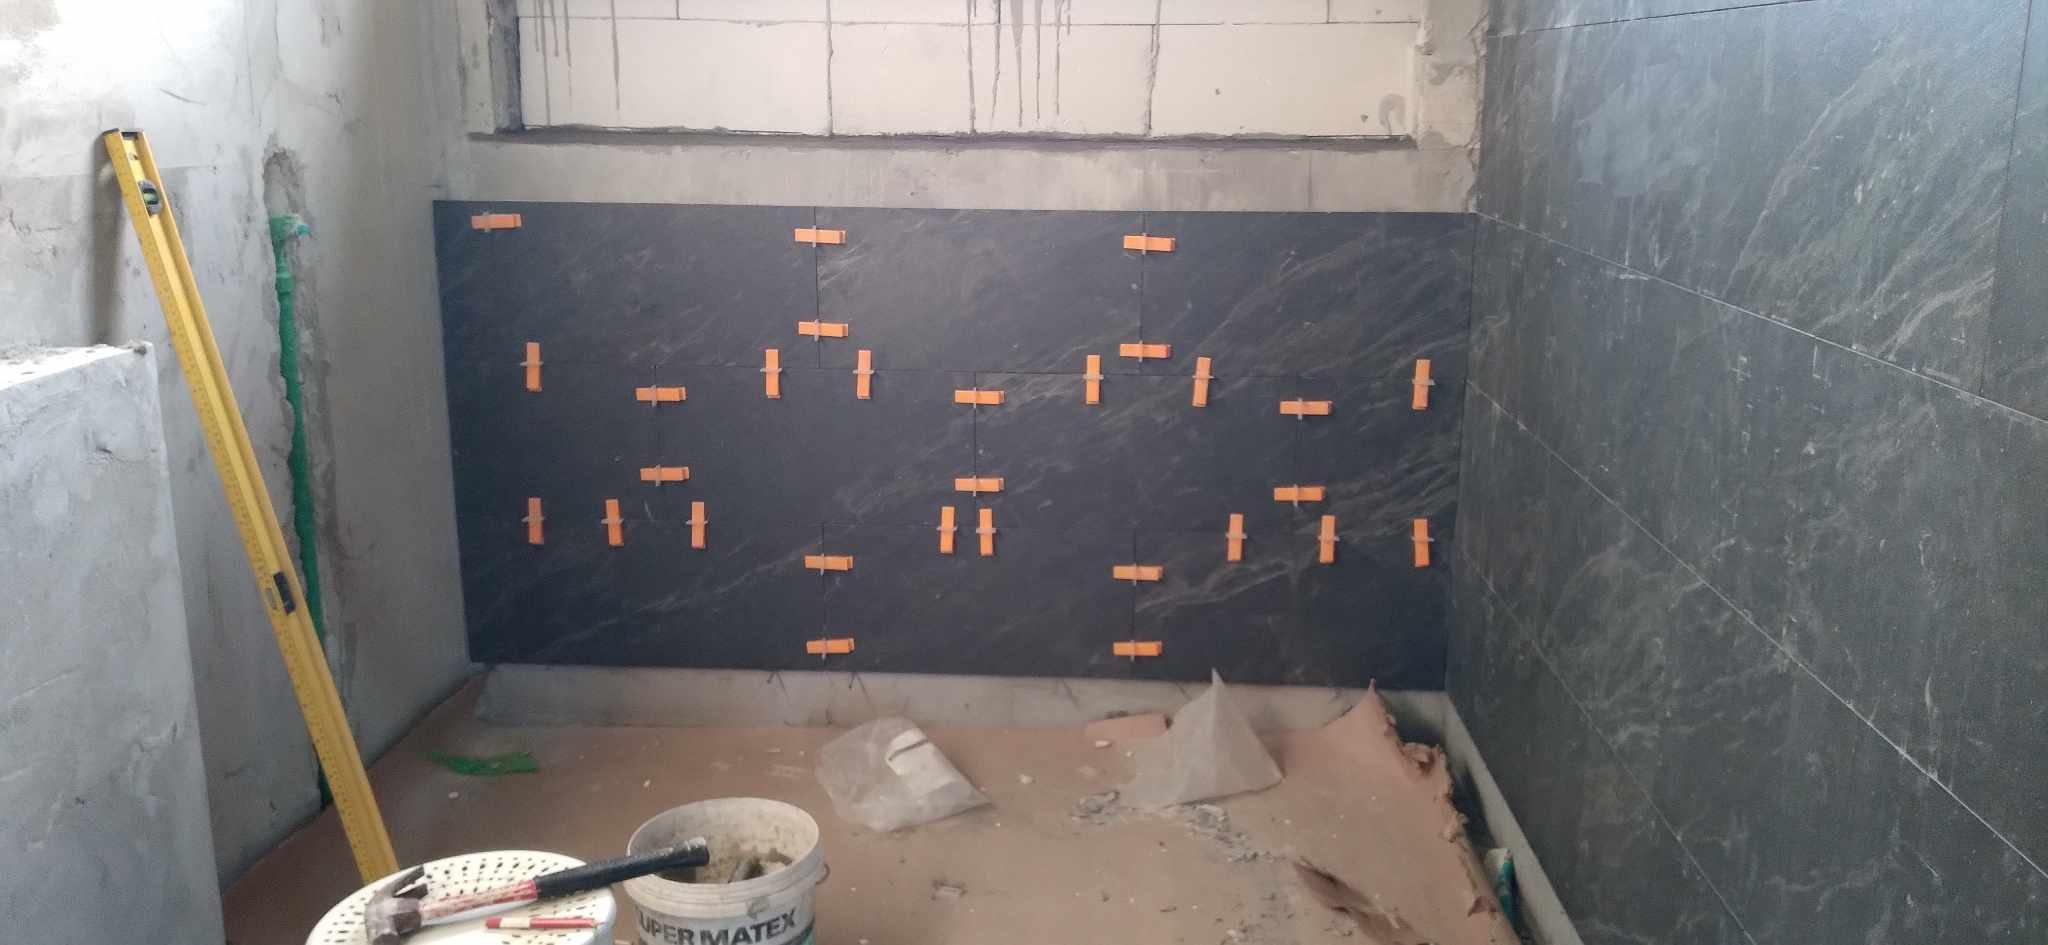
The tiling on the bathroom walls has also started... the floor was completed about a week ago and left to dry and seal. A silicone bead was run around the perimeter of the floor tiles to act as a water seal before the wall tiles were started. The tiler has become quite comfortable with using the levelling system now... as you can see...

-
One day later and it had all been rectified...

-
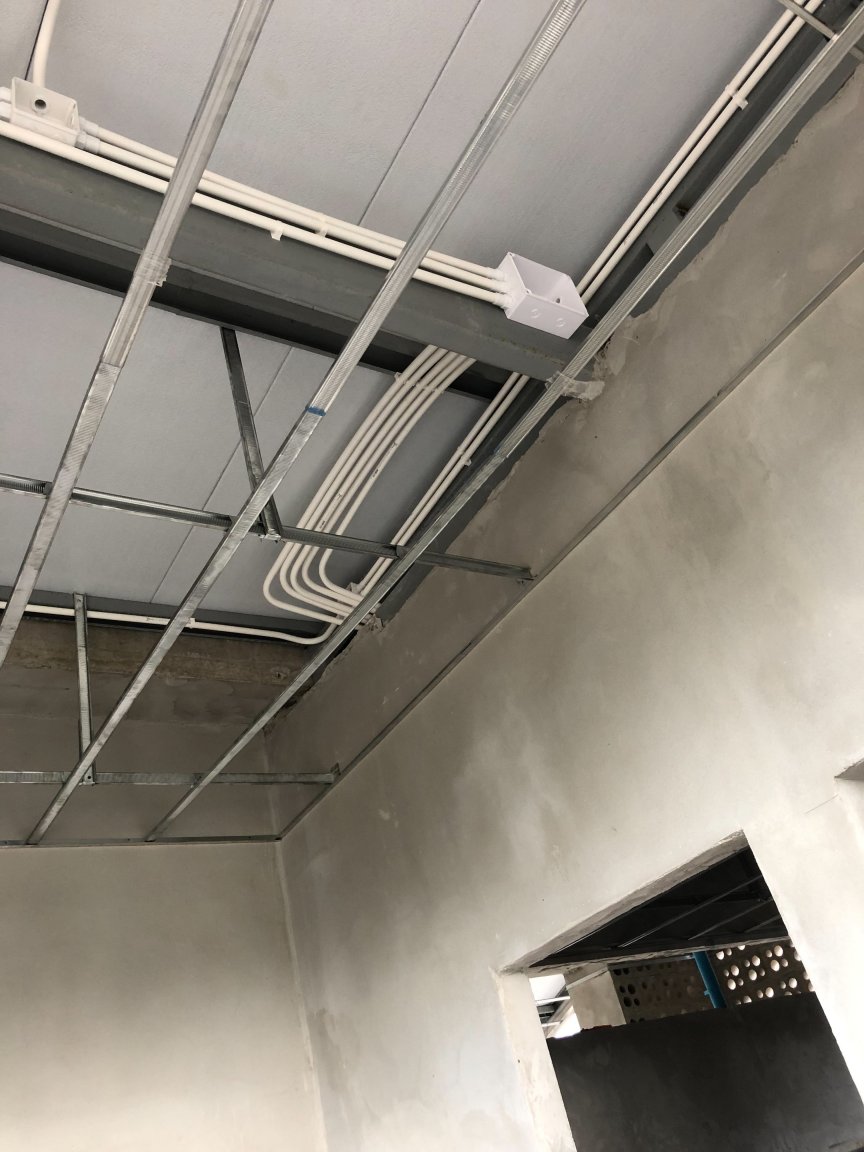
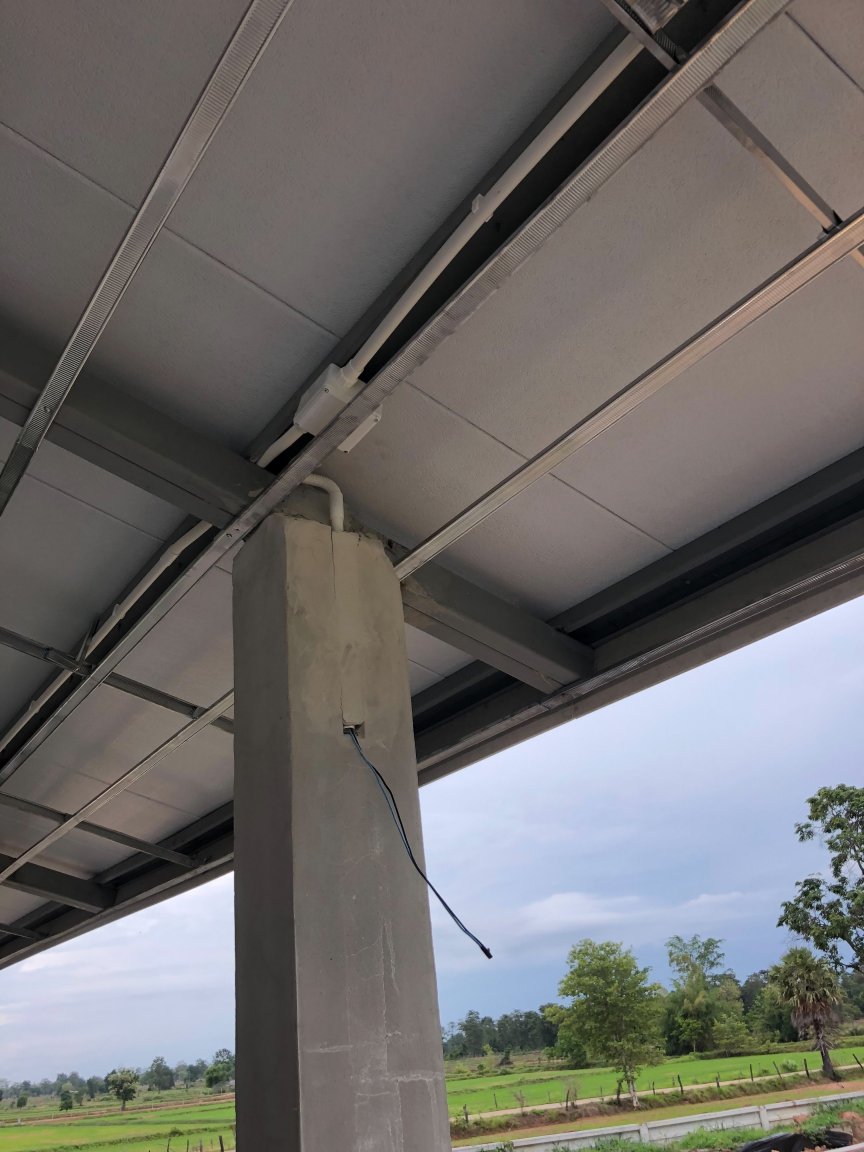
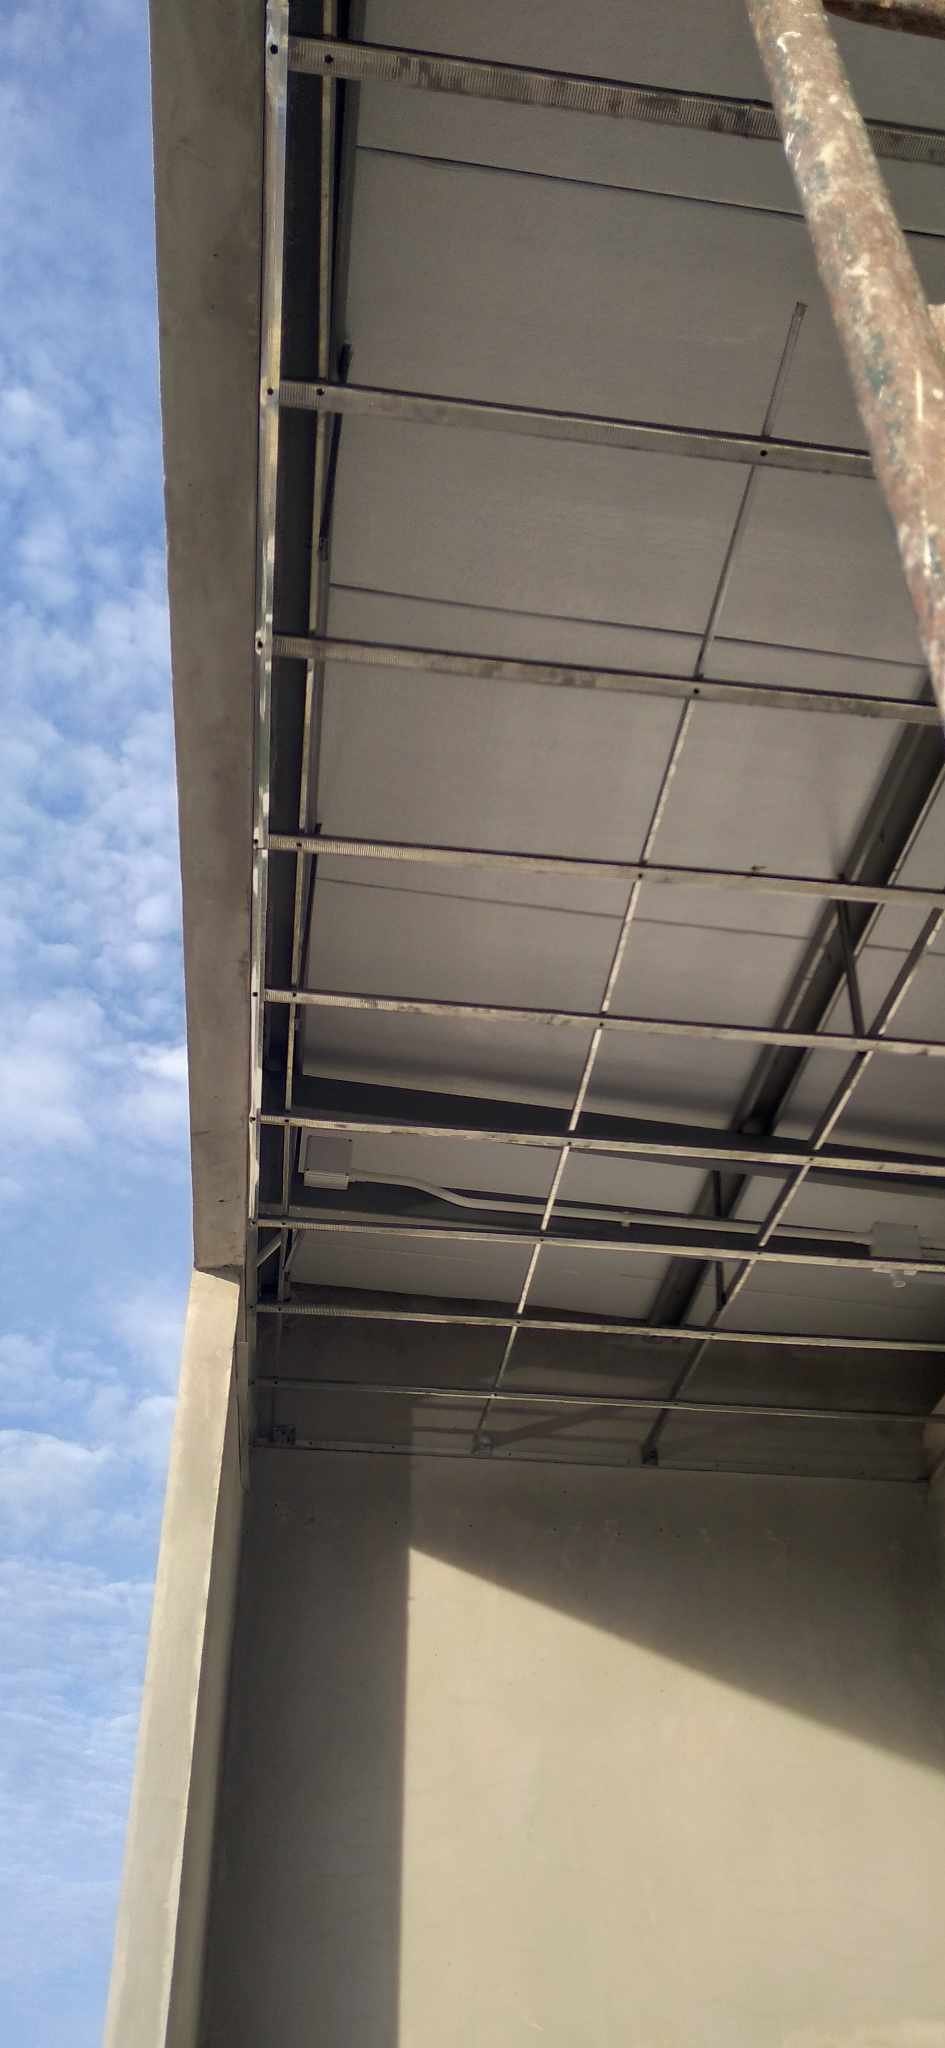
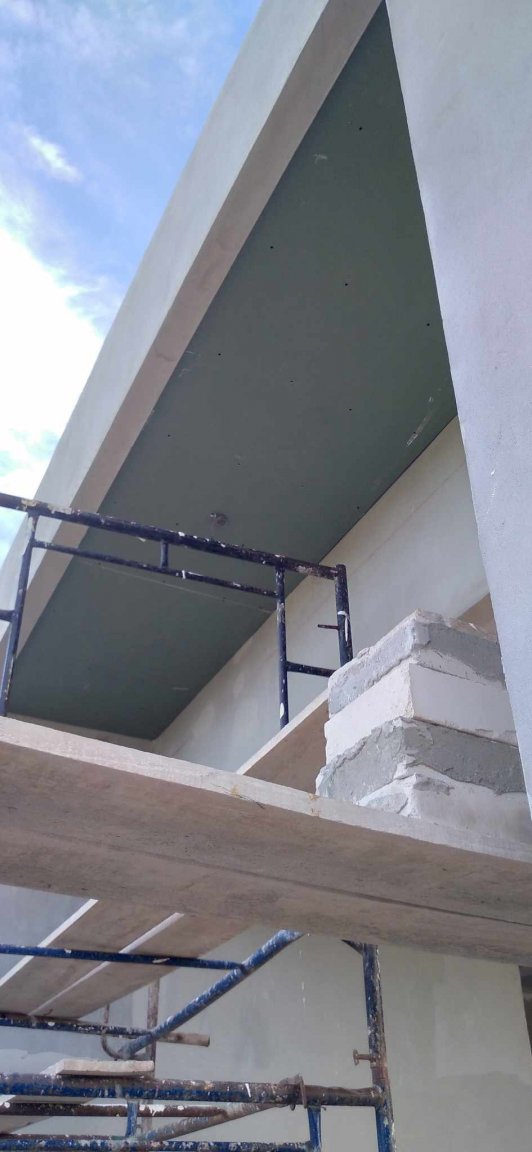
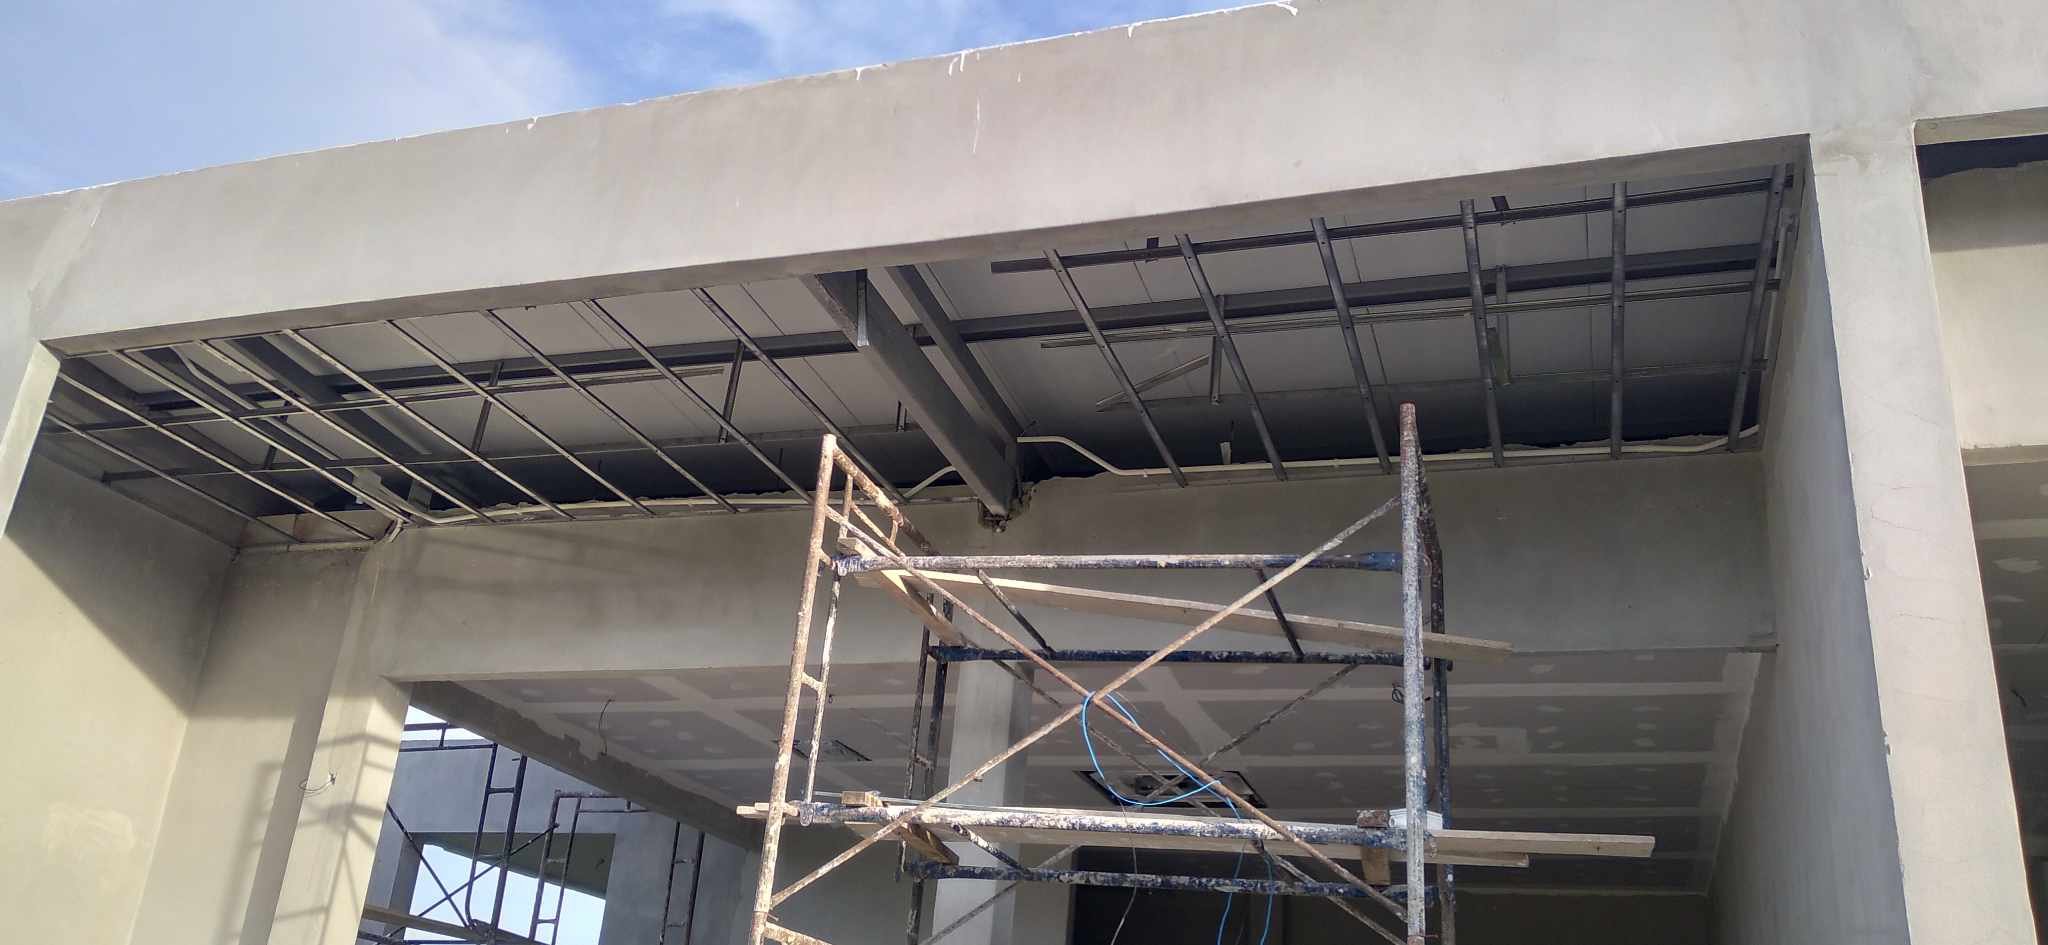
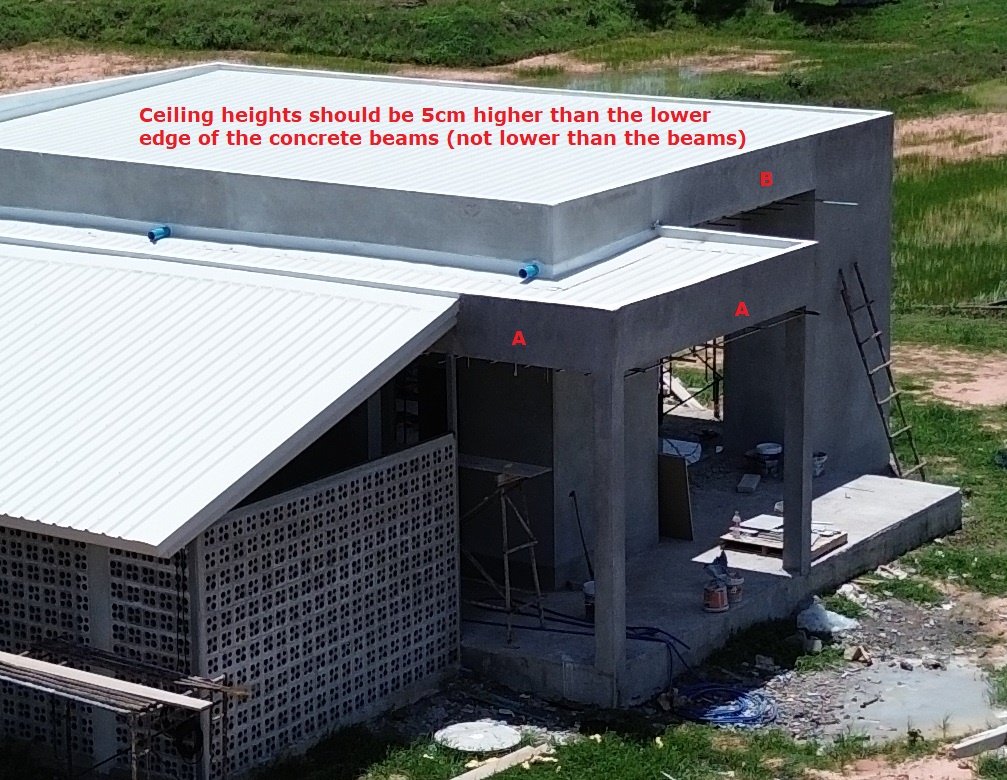
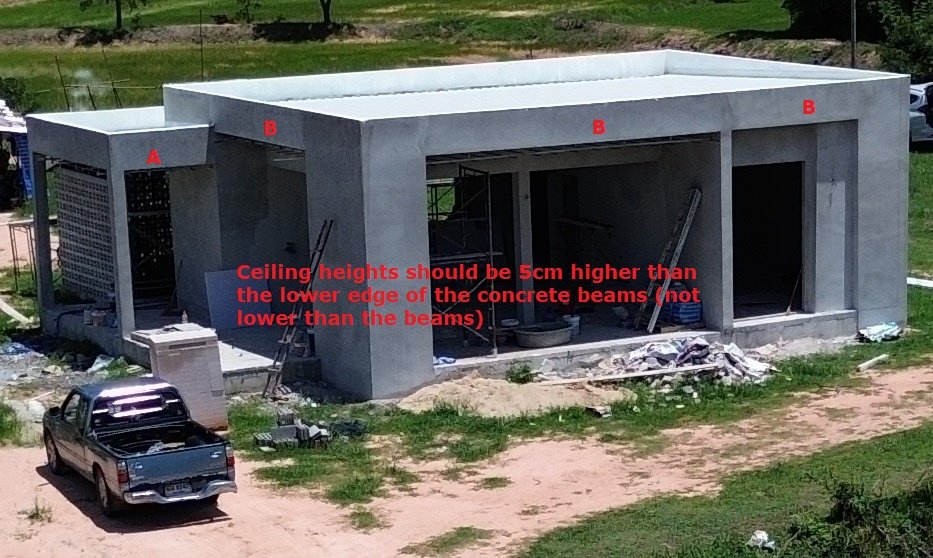
Not such a good job outside in the Thai Kitchen and above the decks. We had discussed a ceiling height of around 2.8m with the builder, but he had not discussed this with the electrician who ran his cables and conduits wherever he wanted... it looked OK, but he had no thought as to where the ceiling would be. The ceiling guy took the figure of 2.8m quite literally, and rather than discussing it with the builder to talk with us about proceeded to install his ceilings at a height that was lower than the concrete roof beams... meaning that his SCG smart board ceiling would have been subjected to rain water on the East and the North sides of the house. I took a couple of photos with the drone and marked them up then sent them to the builder to get things rectified: We didn't bother with the lower kitchen height in the Thai kitchen as it will all be boxed up and rendered then painted so you won't notice it. There will be a small step in the ceiling at the end of the deck where it wraps around to become the Thai Kitchen.
-
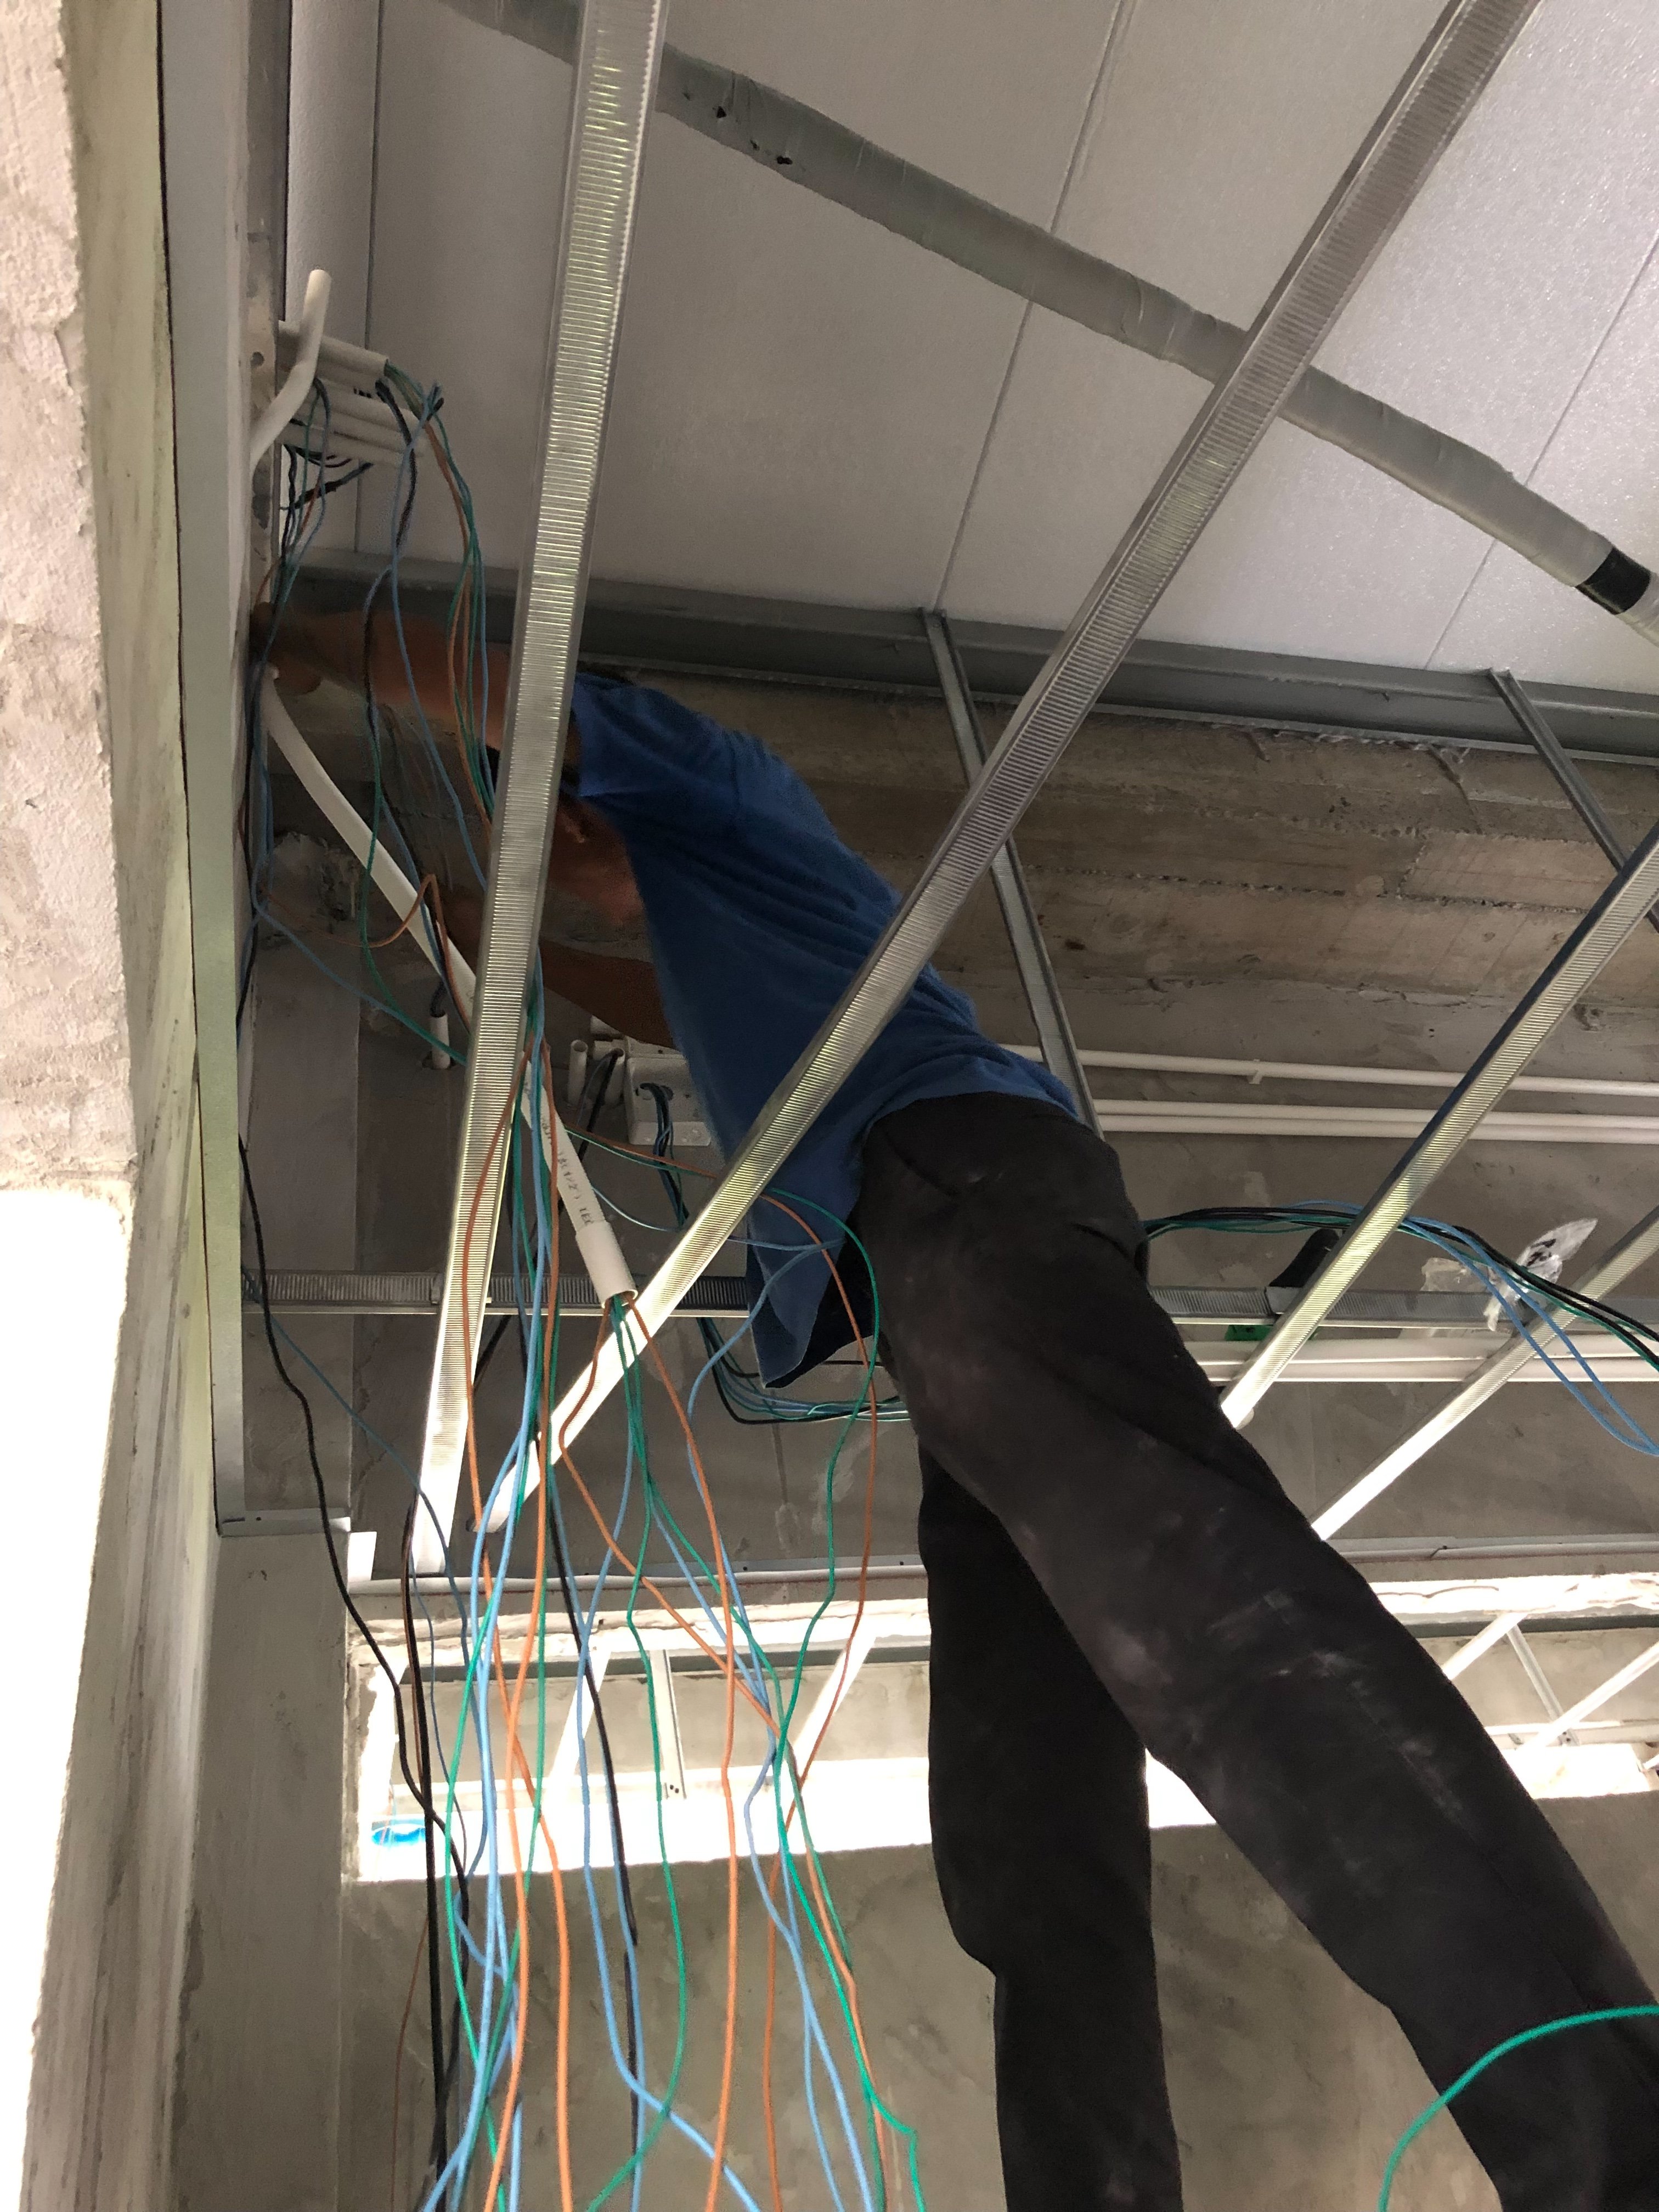
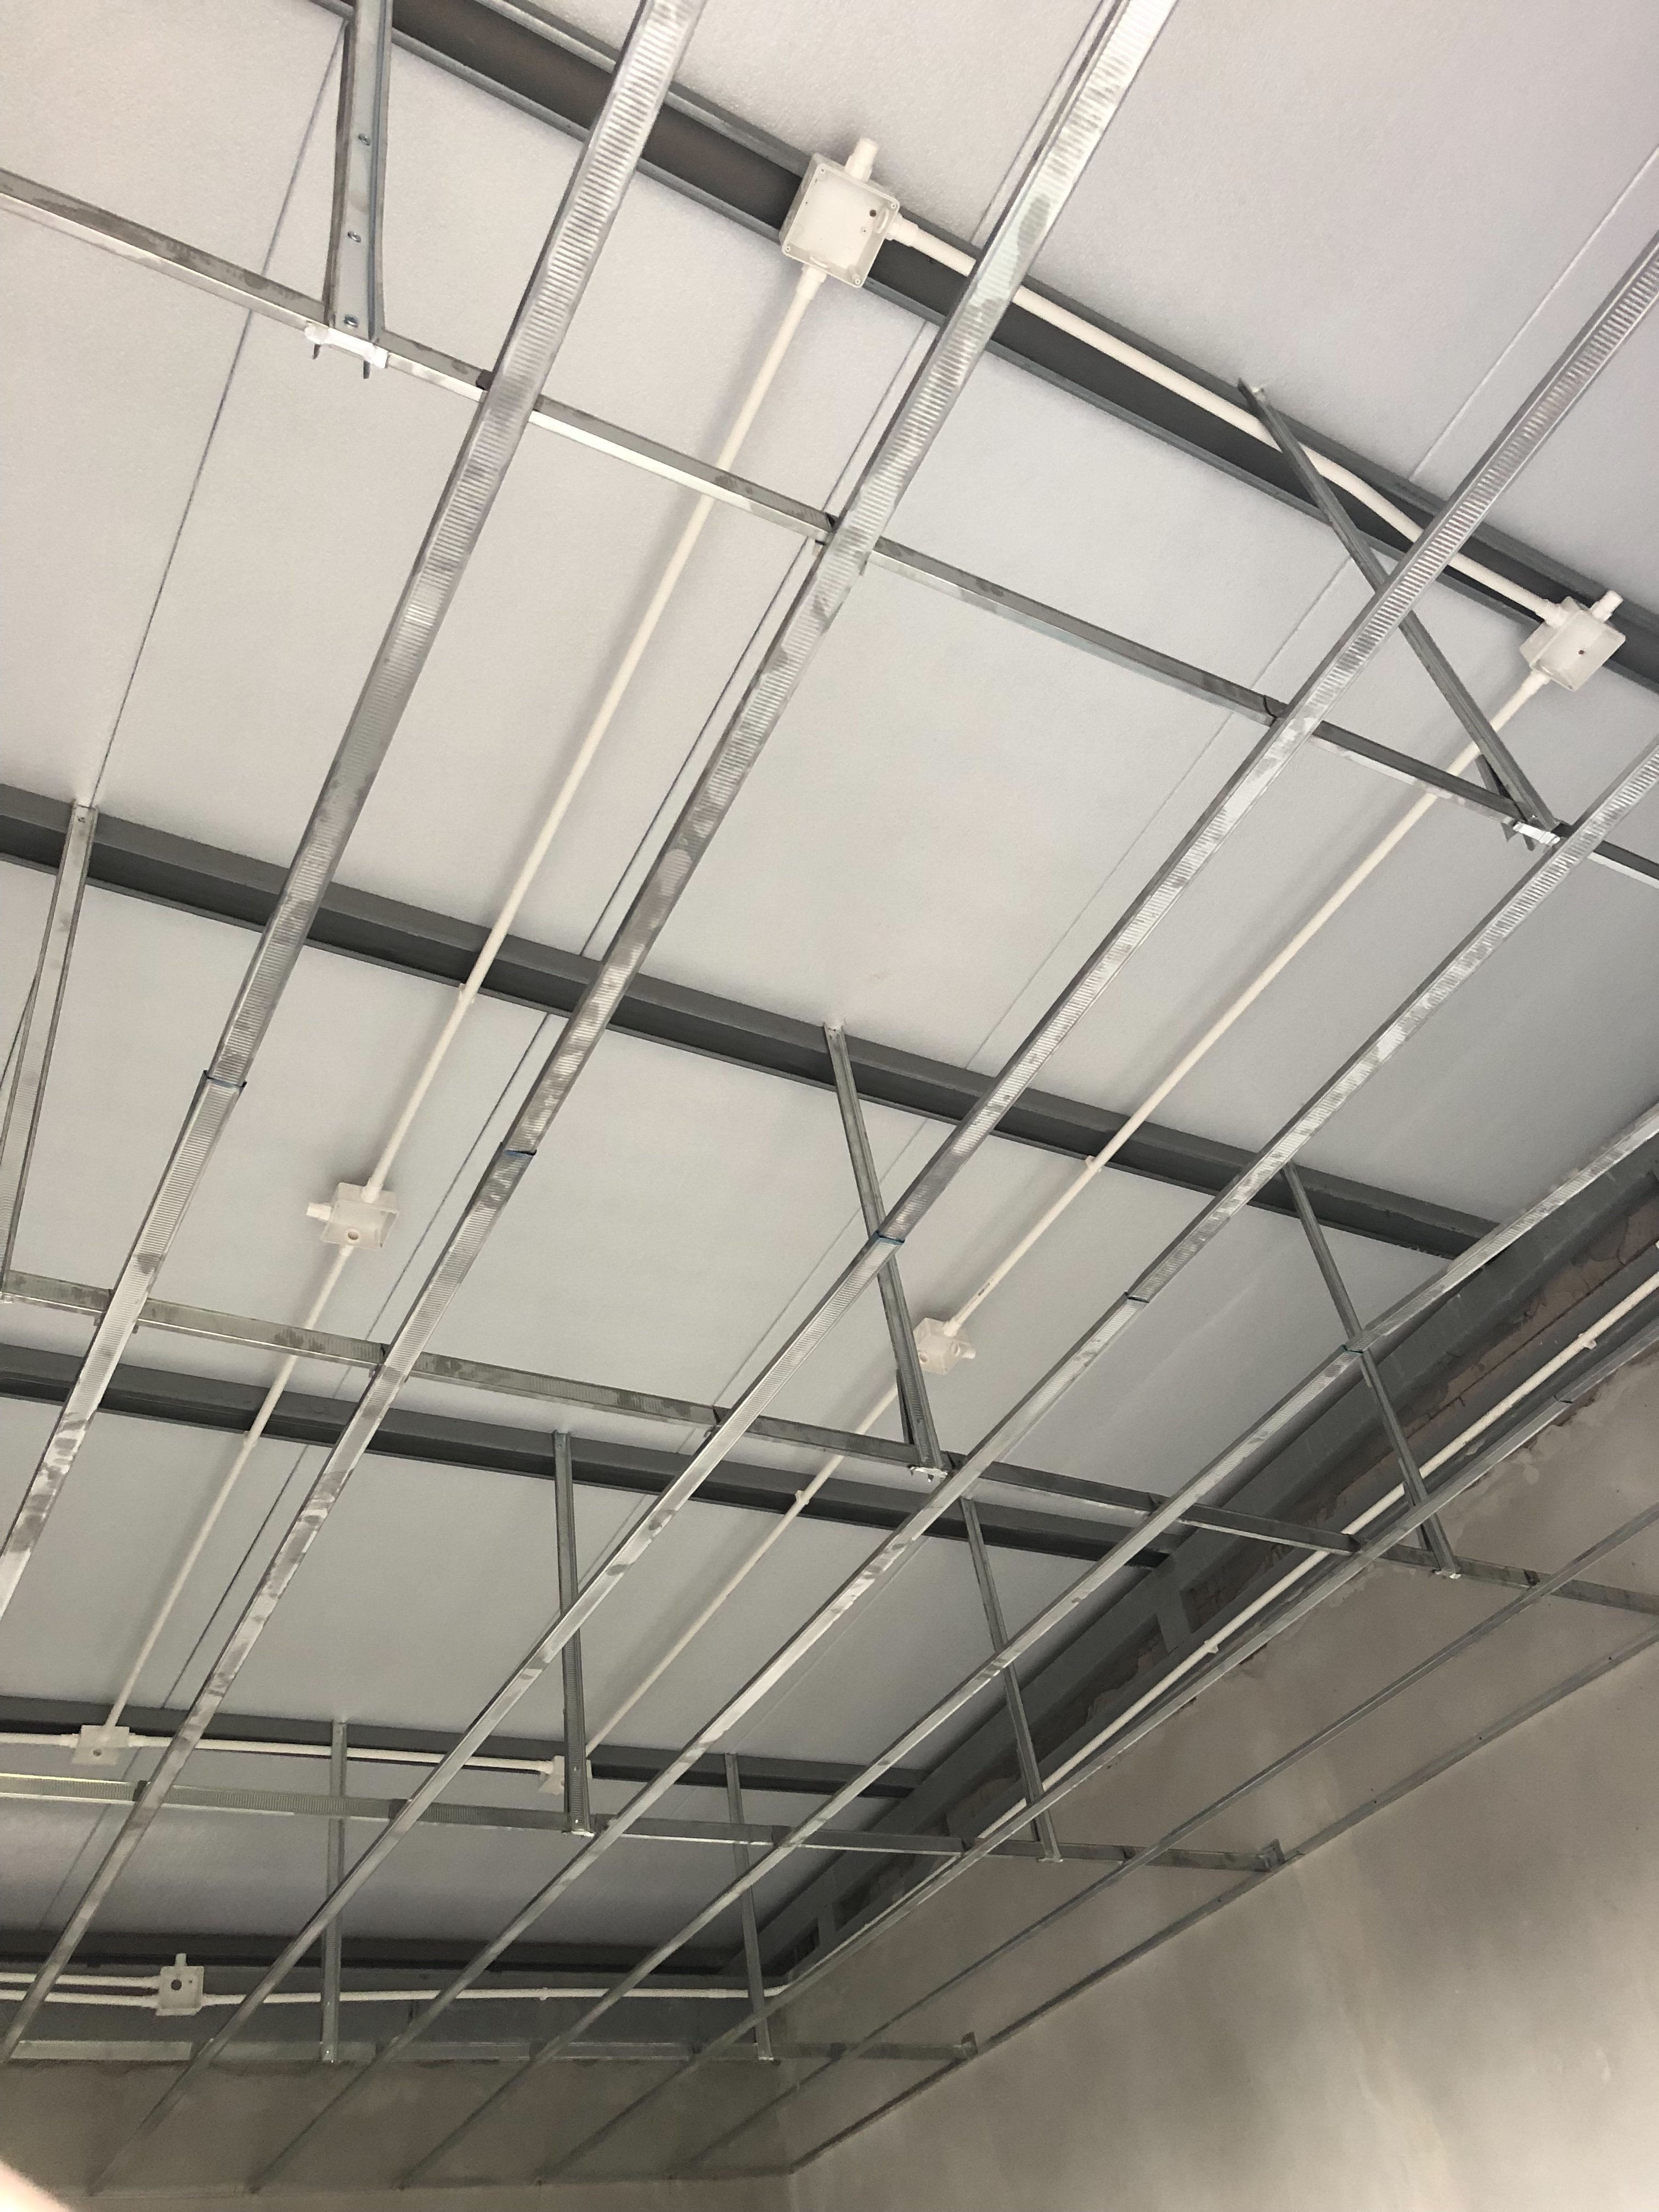
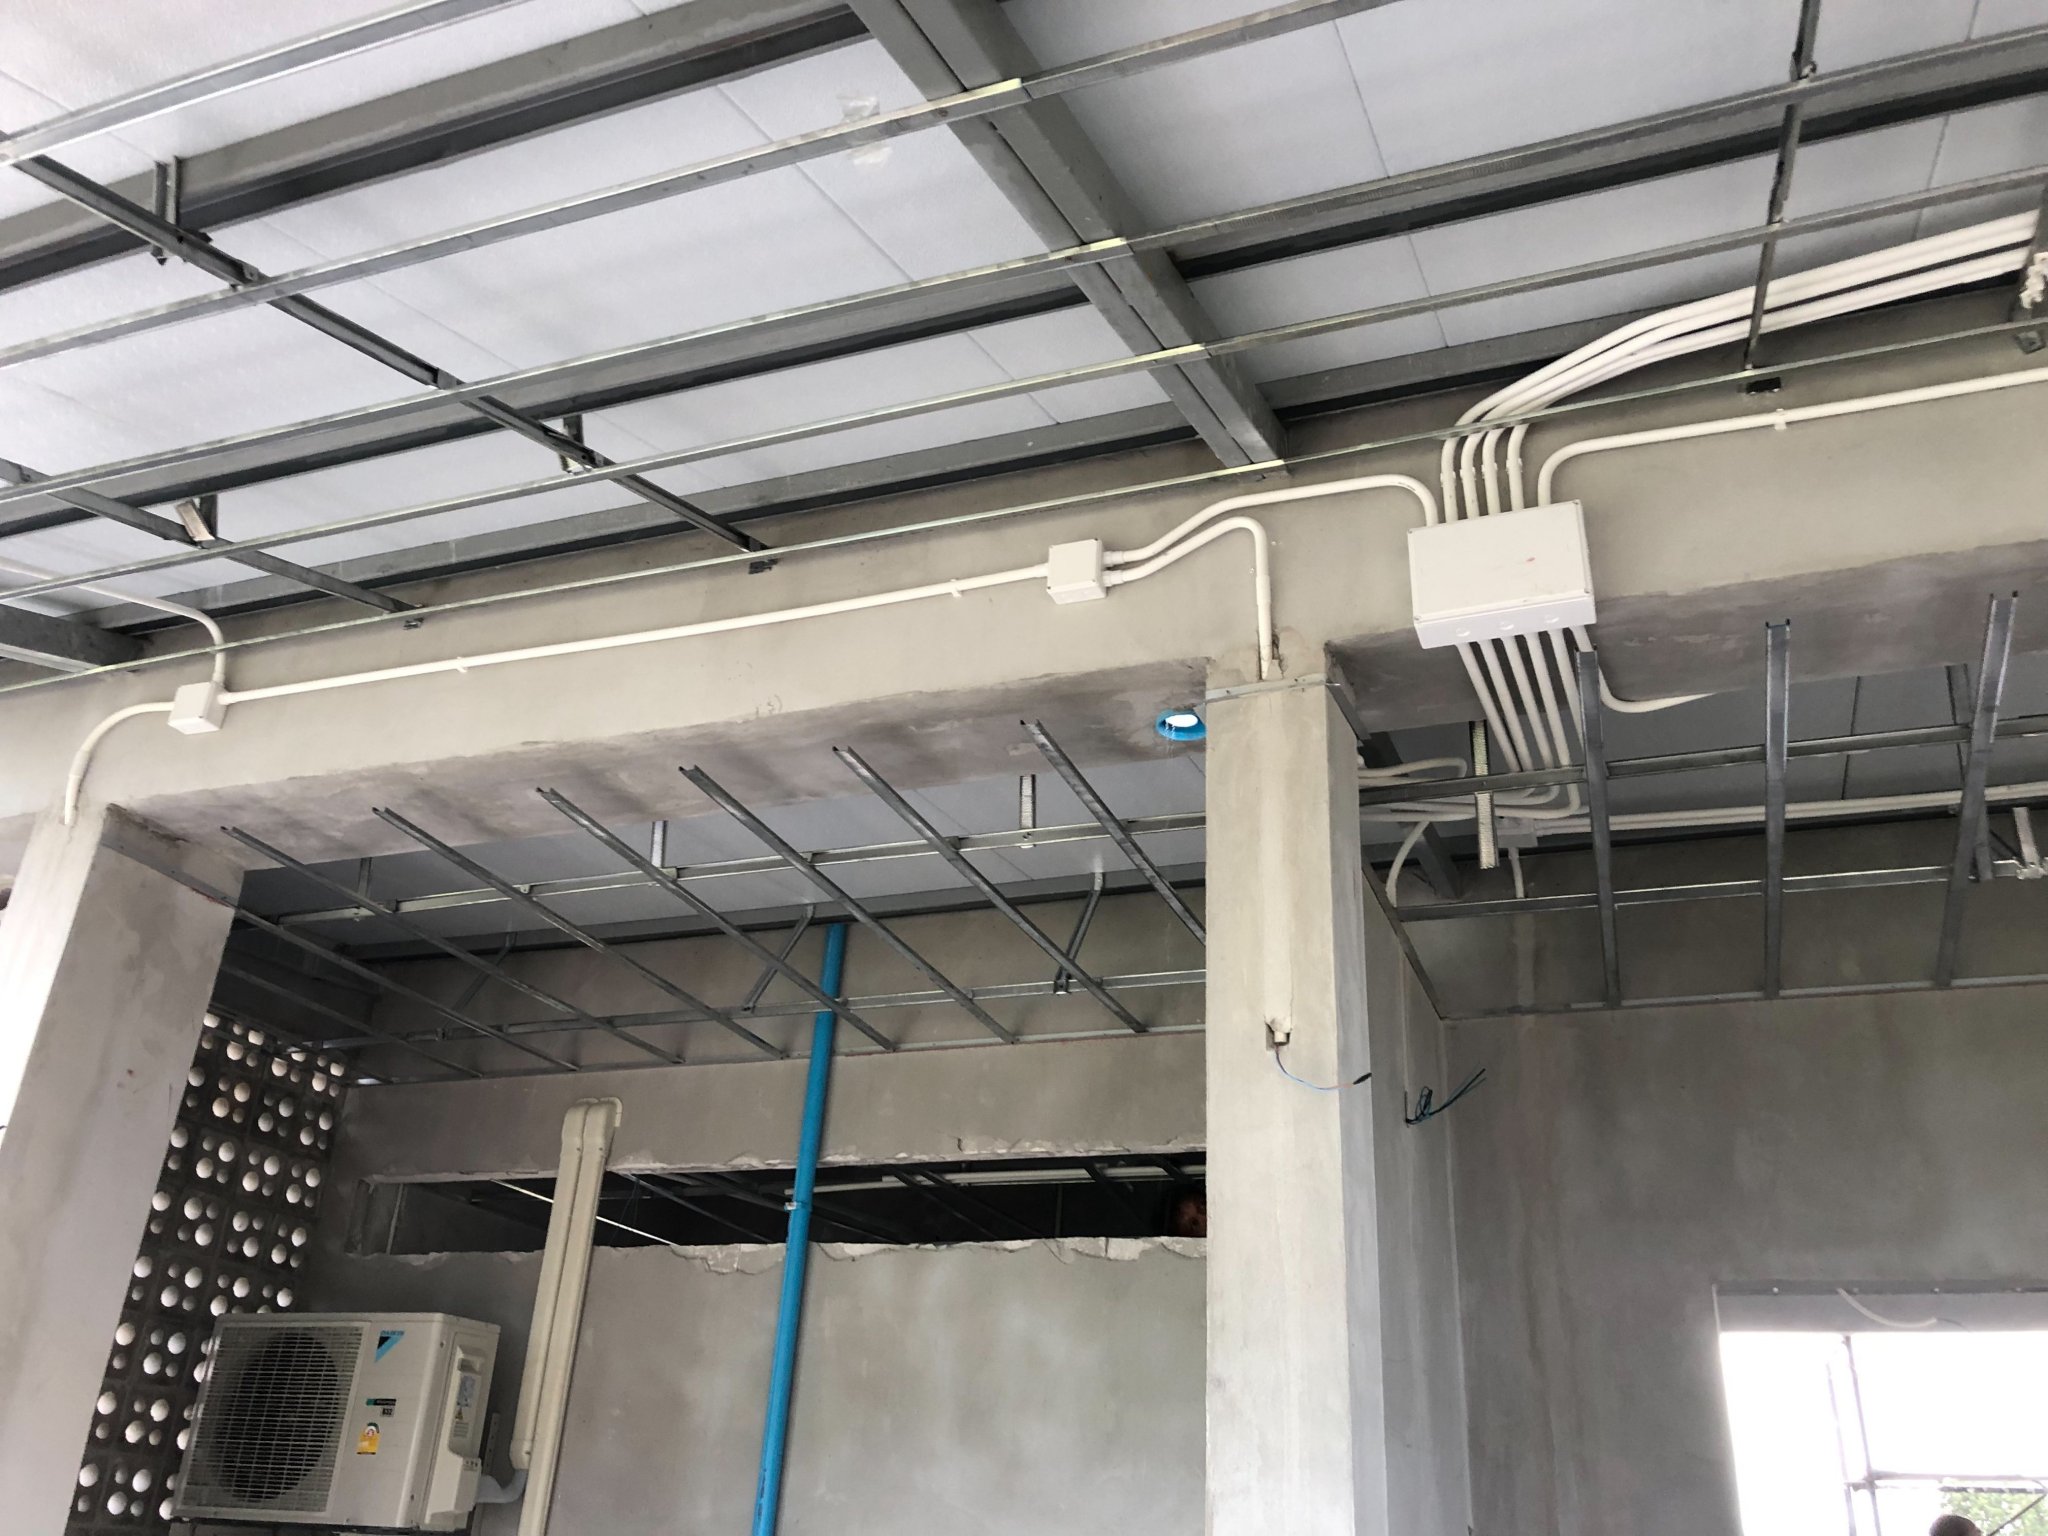
We have had a couple of challenges to overcome since our last visit, and things are now finally back on track... albeit with a minor compromise. The technicians who installed our air conditioners ran the piping to/from the outside condenser units straight across the bathroom at a height of FFL +2.5m (Finished Floor Level) rather than running it around the bathroom inside the cavity wall which is what I wanted. They decided that they knew better so ran the piping in a much more direct route, so we now have a much lower bathroom ceiling than planned... it was supposed to be FFL +2.8m. OK... we decided to live with that as it is only a bathroom and not so important to have the high ceilings that we wanted for the rest of the house. Then one of the AC technicians sold his abilities to our builder as a guy than can do anything, so this guy ended up doing all the suspended ceiling work in the whole build. So we had agreed on a height of FFL +3.0m for the ceiling height in all the internal rooms (except the bathroom). As the ceiling was installed the lighting wiring was supposed to be located and holes provided for the conduits to pass through the ceiling panels. After that the 150mm thick SCG Stay Cool Insulation was to be laid out in the ceiling cavity on top of the electrical conduits as the work progressed, progressing bit by bit towards a final corner that the insulation could be installed before the final ceiling panels were fitted into place. Not a difficult job, but one that needed some coordination between the ceiling guy and the electrician. They actually did a pretty good job... lights where we wanted them and the entire ceiling evenly covered with insulation.
-
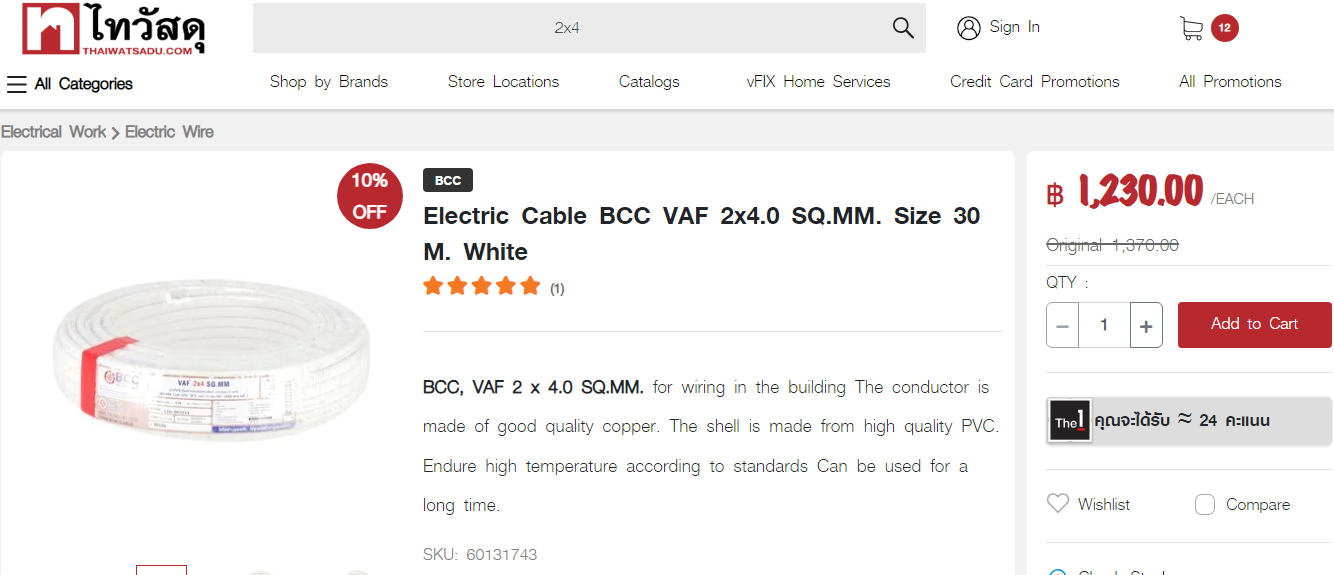
How about using solid core 4mm2 electrical cables as an alternative? Much cheaper than brand name audio cables...
-
Our original plan was to have all the electrical switches and sockets surface mounted (rather than embedded in the walls/columns) with white conduit running down the walls from the ceiling cavity. But after my wife saw the first photos of the Thai kitchen will all the surface mounted conduits she demanded that we change them back to the embedded type. "Mai suay" she said... 555. It wasn't a big cost addon ( about 5K) and the electrician was happy to do it too, so we made the change. I suspect that the cost of the white conduit and junction boxes etc. is not much different to the yellow,
-
Some very good advice there Jerome... thanks! I do plan on being there in person when the grouting is done... as you say it is critical to the quality of the tiling finish.
-
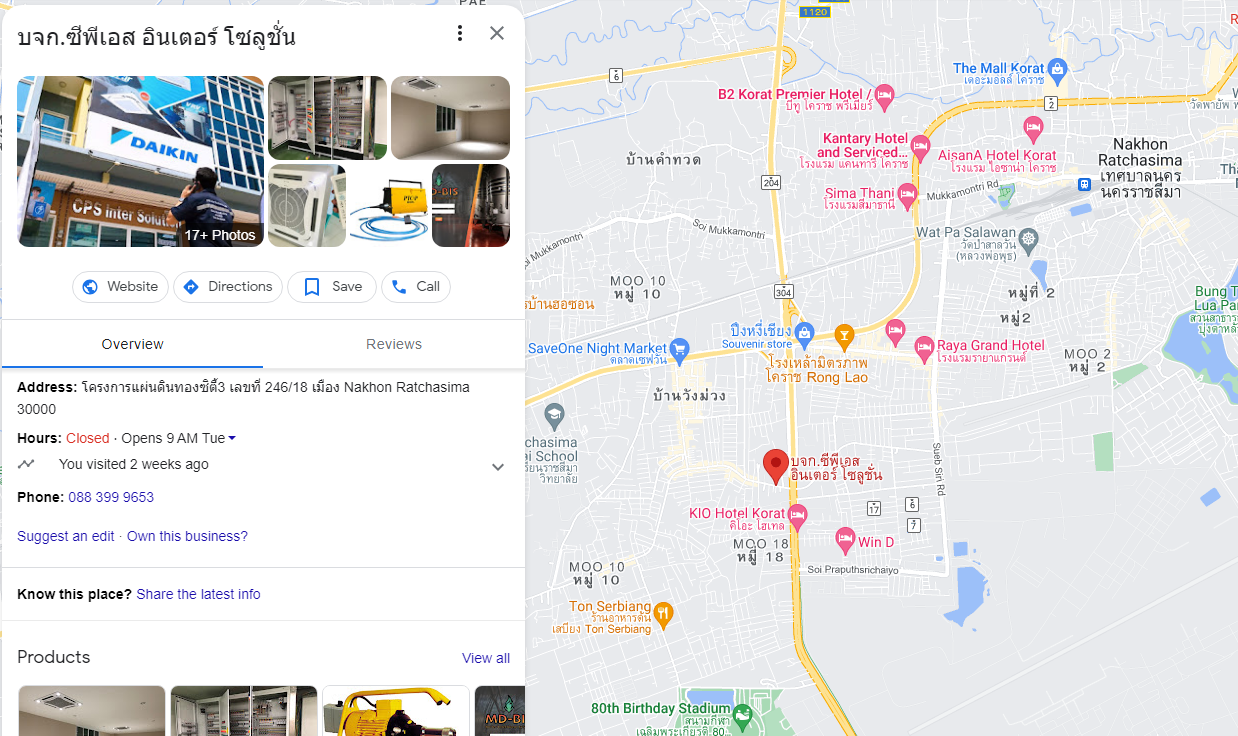
CPS Inter Solution. They so not speak any English at all though, so get your wife to do the talking. It also pays to be specific about the make/models you want too... so do your homework first so you know exactly what you want then call them for a quote.
-
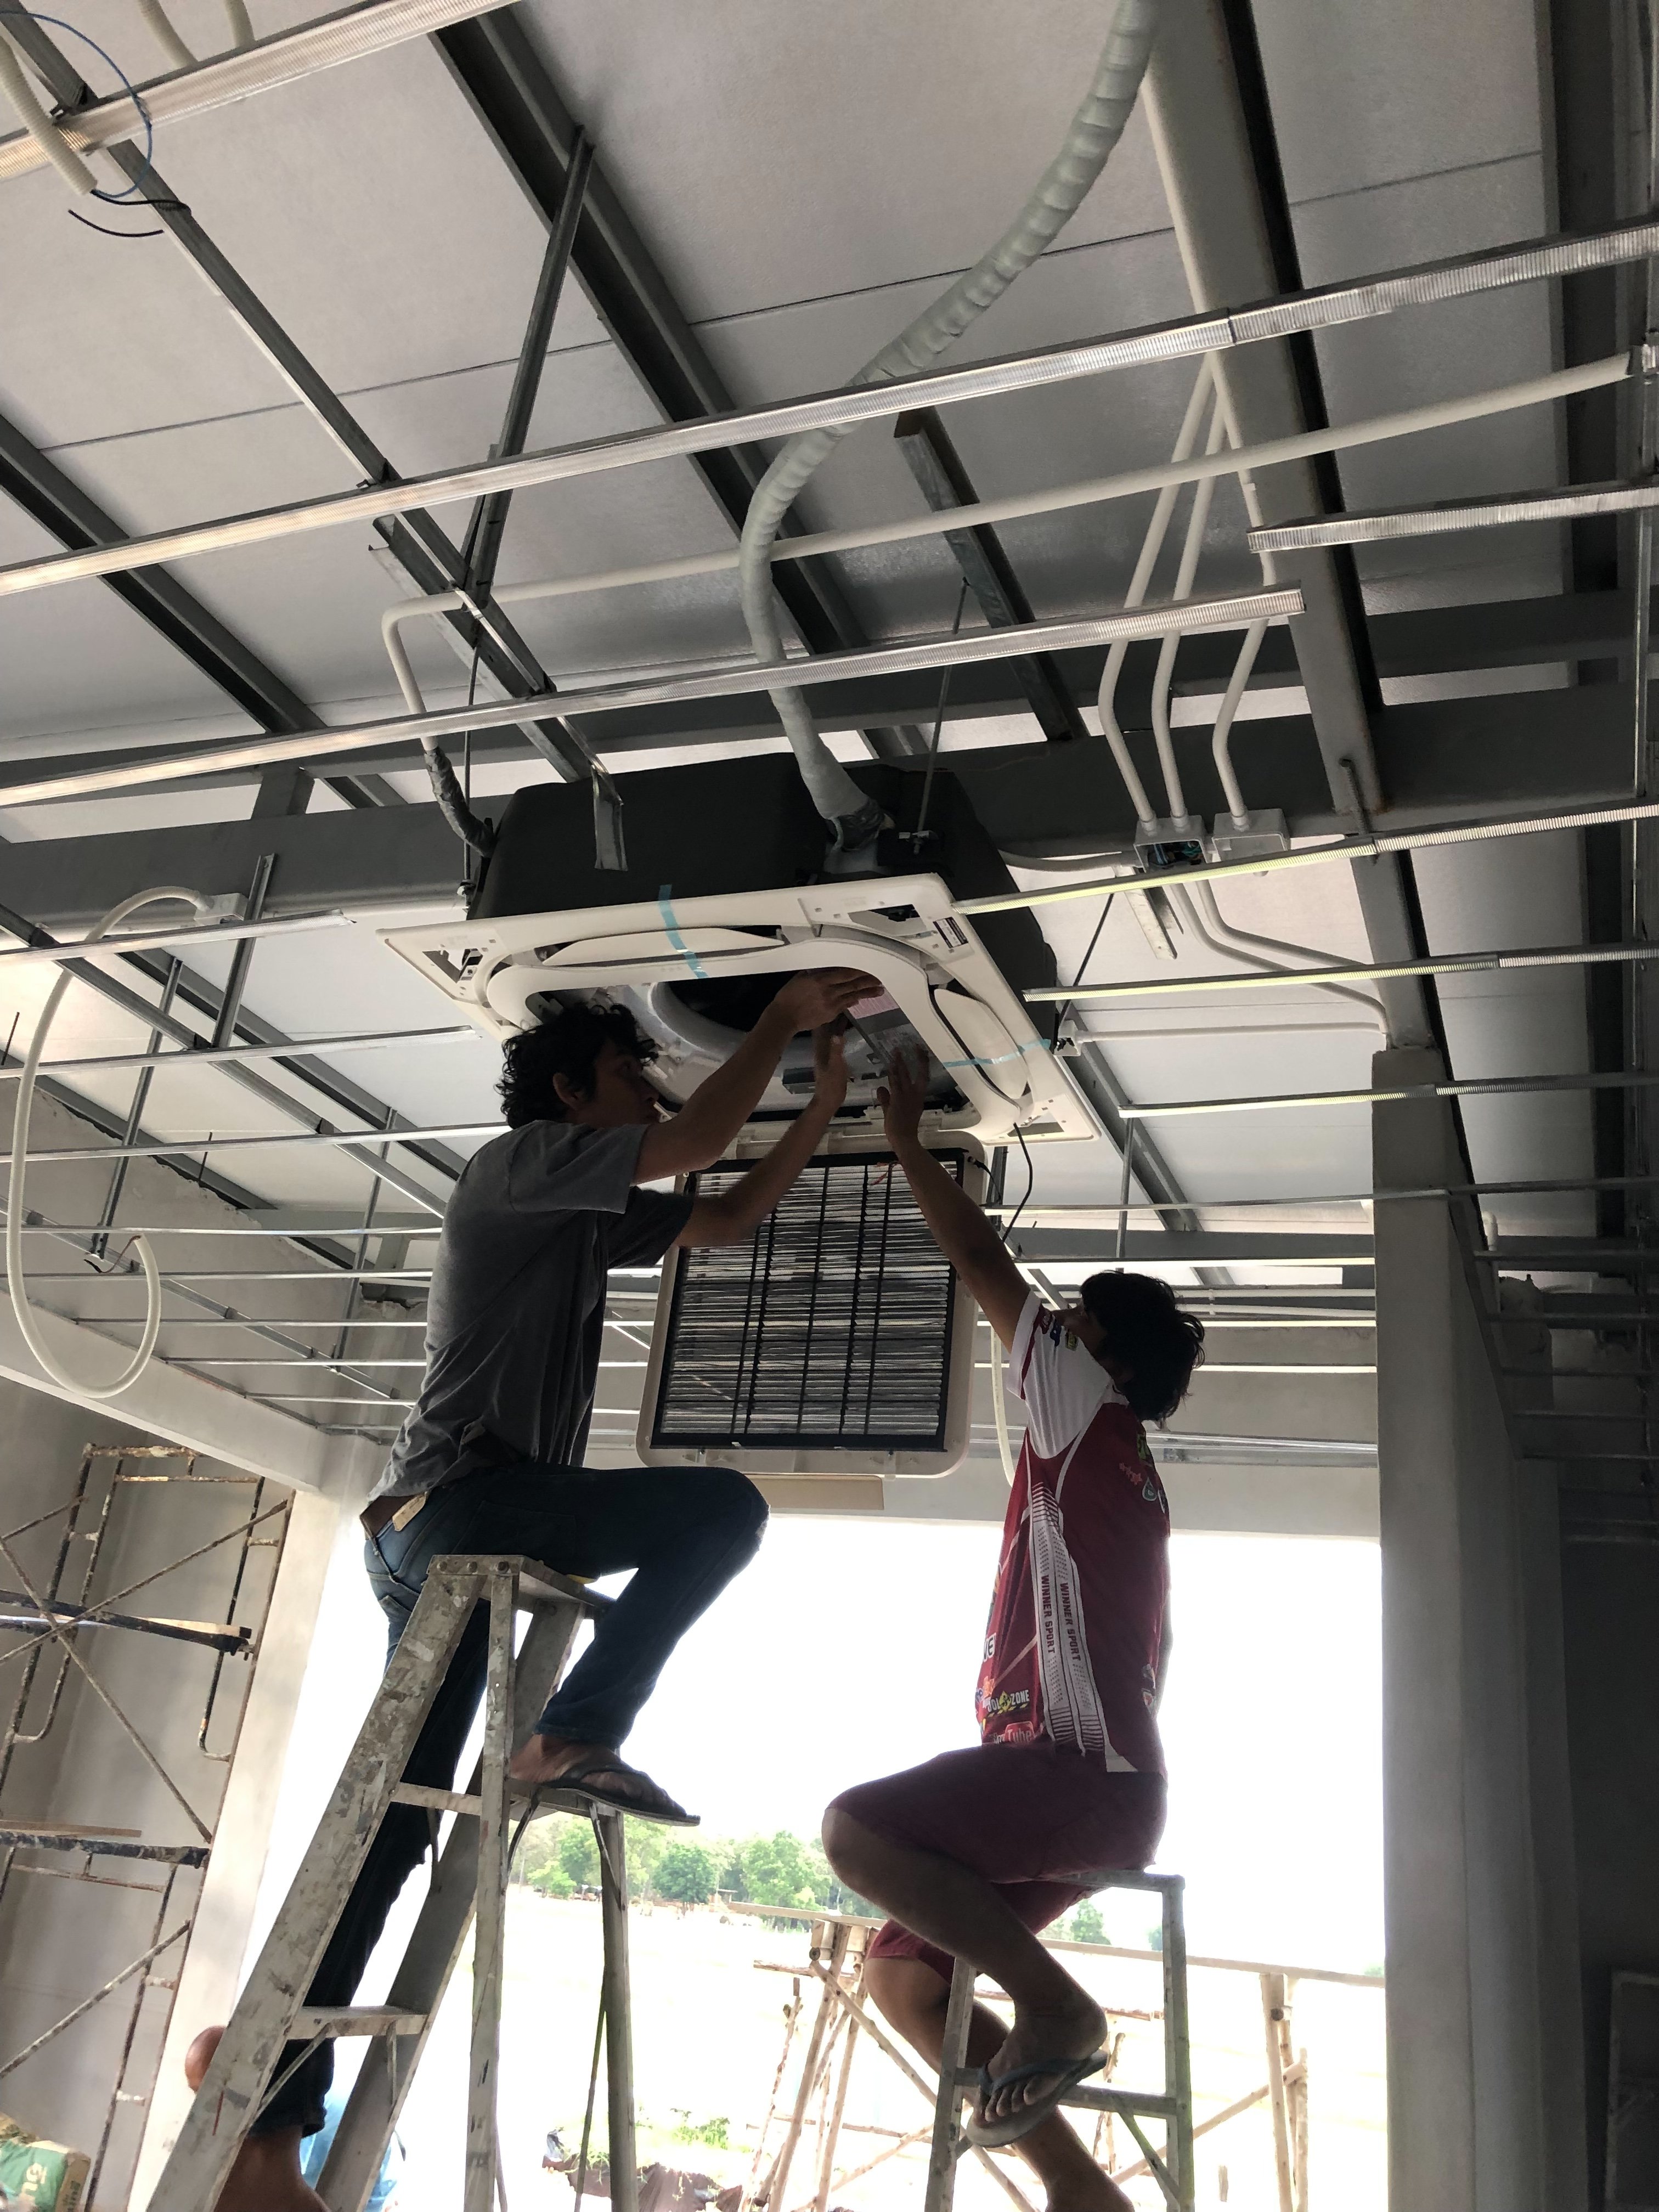
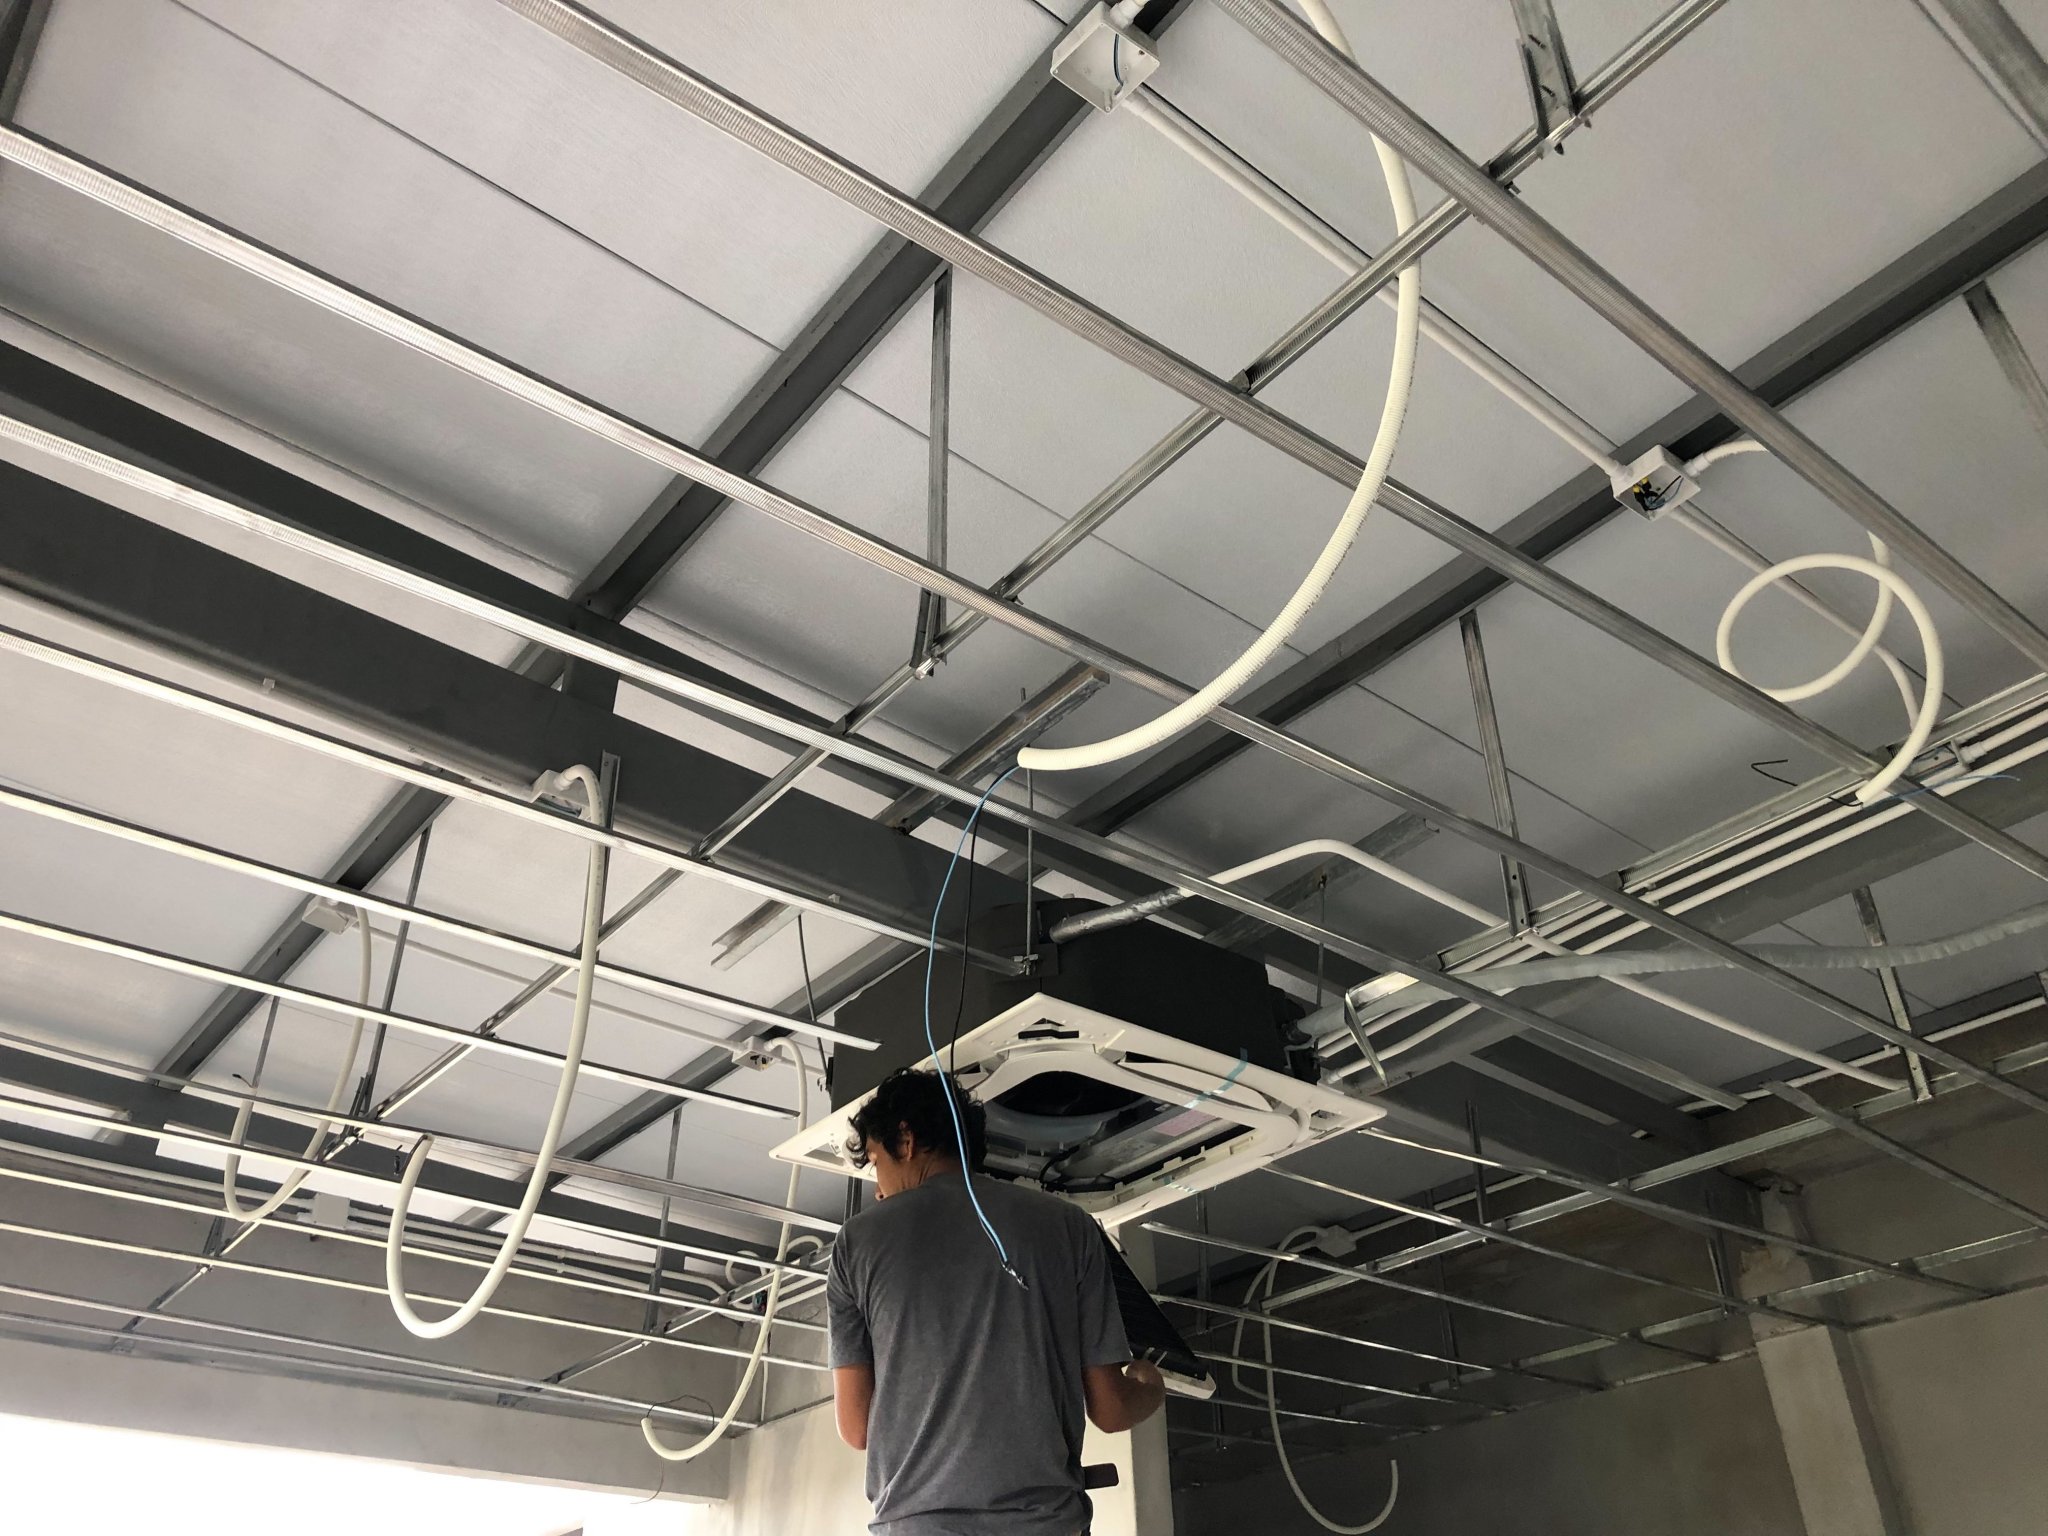
The quest for suitable air conditioning units was a journey in itself... I had originally decided on Mitsubishi Electric units, however due to a shortage of the cassette inverter units in the whole country and no supply for the next 6 months, I opted to go with Daikin. We found a supplier with a very competitive price in Korat city who was prepared to deliver and install. His pricing was some 18Kbaht cheaper than HomePro for the same models so it certainly does pay to shop around. The units being installed are: 1. Bedroom - area 21m2 - wall mounted 15,000 BTU inverter FTKZ15VV2S - SEER rating 24.7 2. Living/Dining - area 36m2 - ceiling mounted 24,000 BTU inverter FCF24CV2S - SEER rating 22.51 Both compressor units are being mounted outside on the bathroom wall where we have just added a concrete block wall to keep the units shaded from the afternoon sun. (See the last photo in the previous post).
-
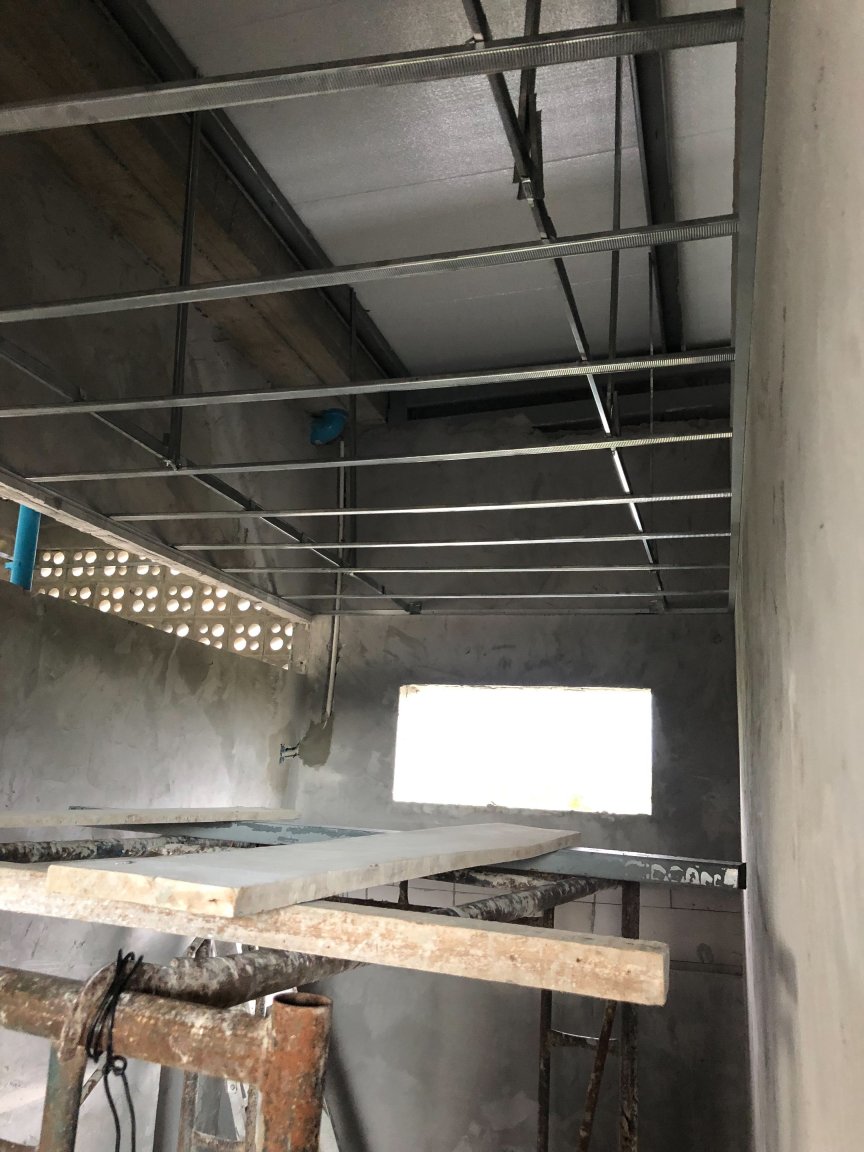
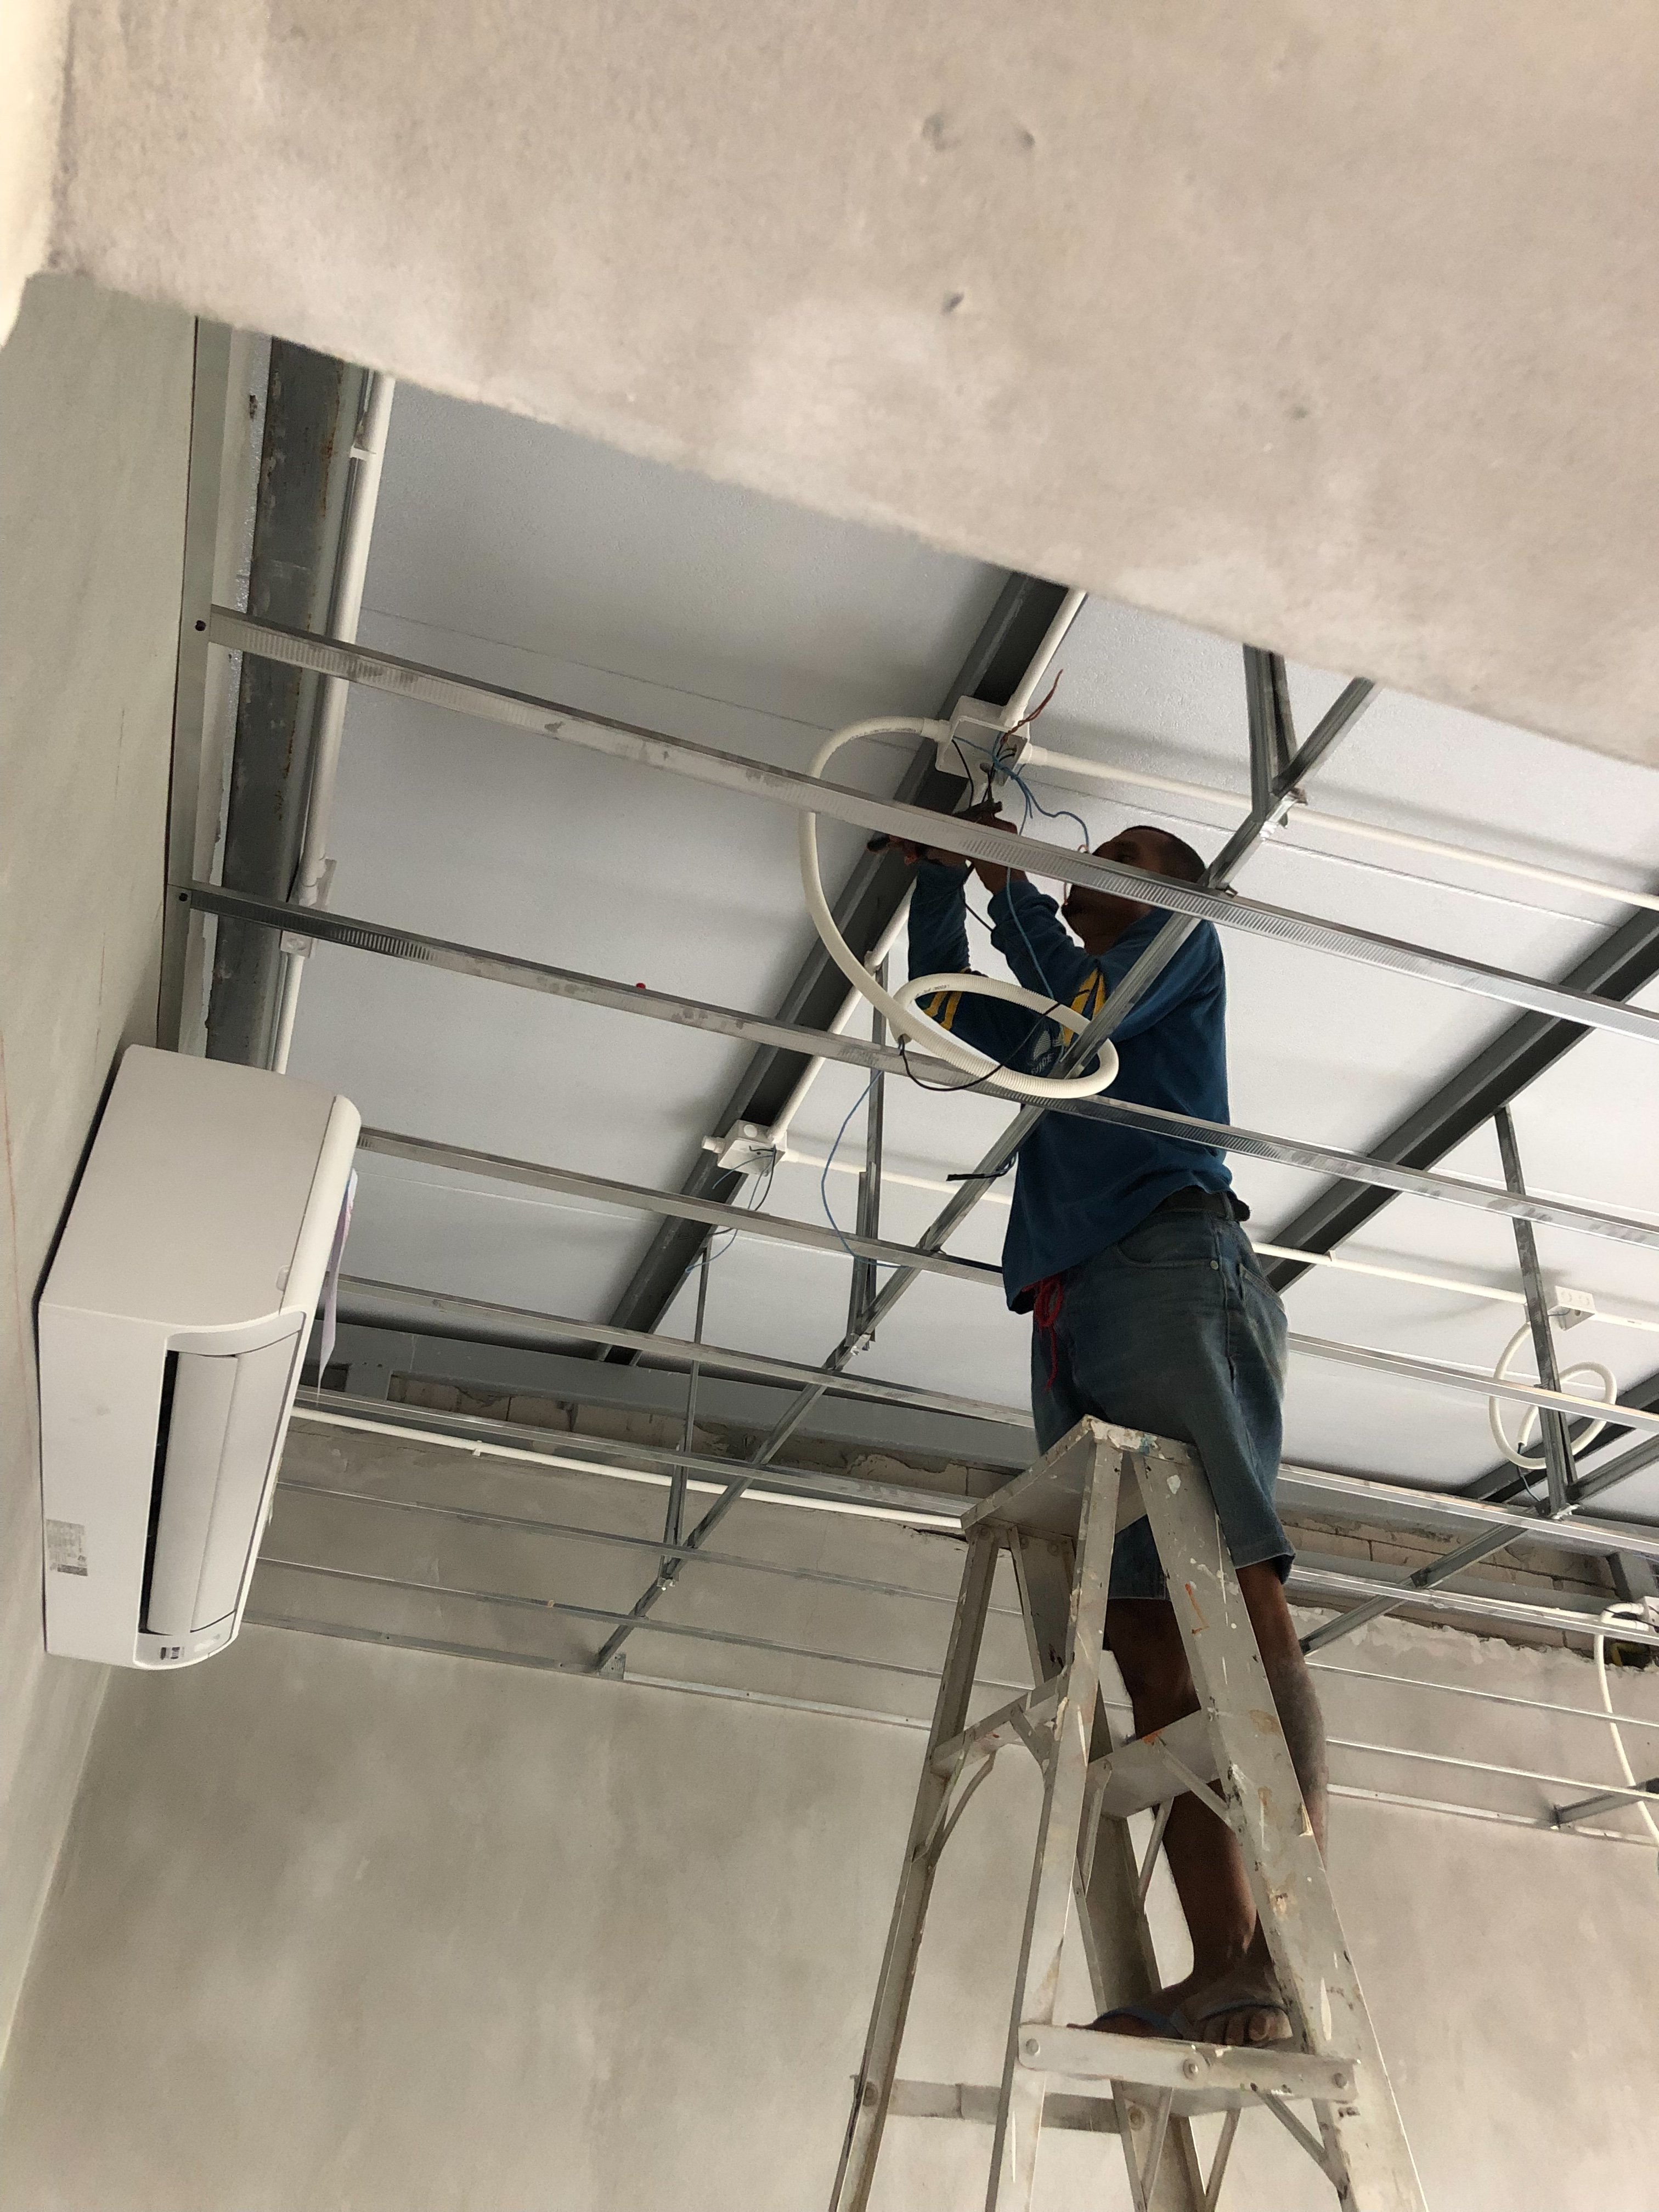
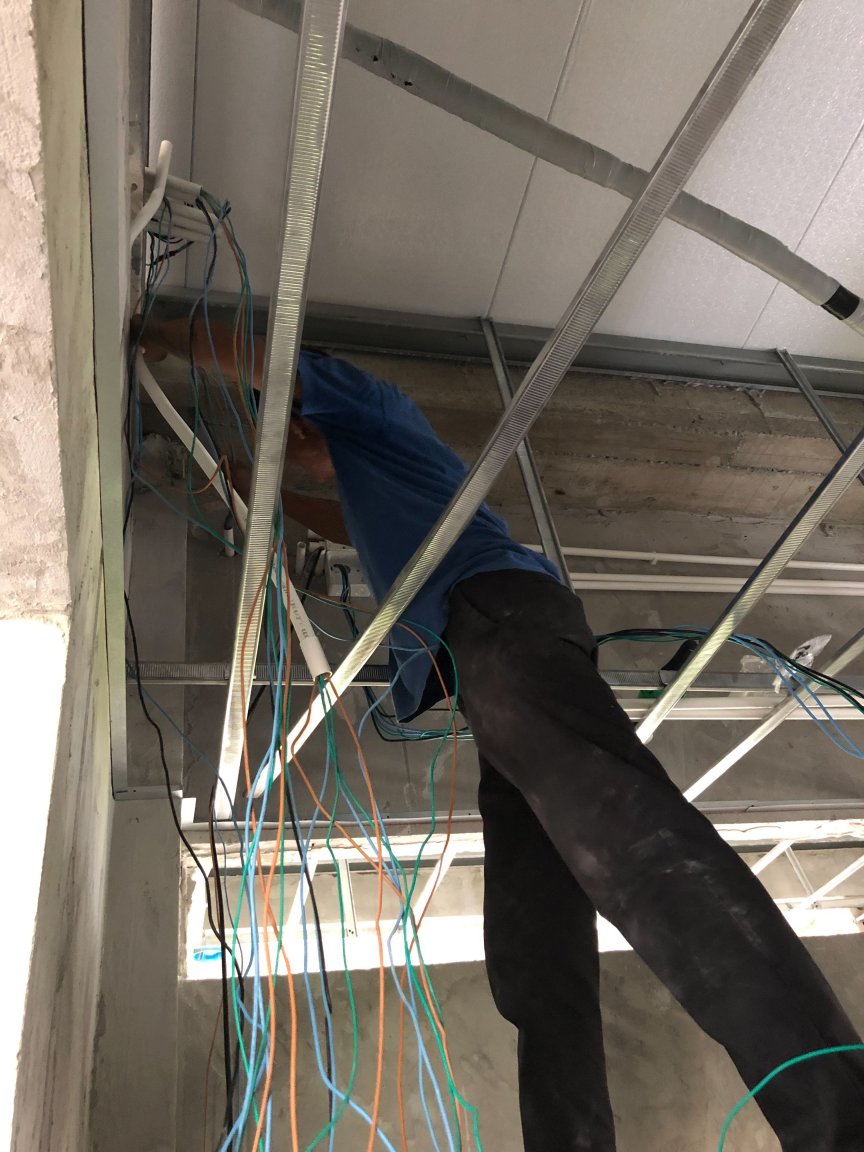
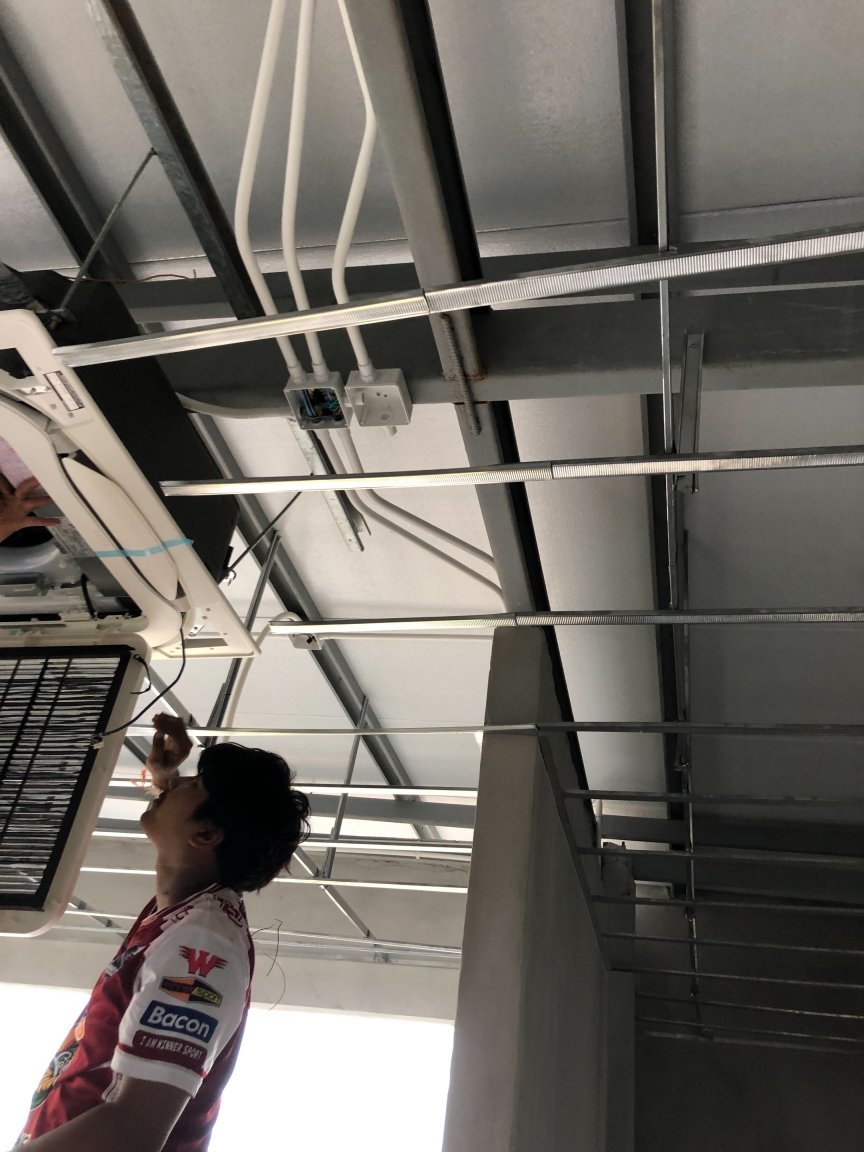
And the air conditioning units are being installed.


-
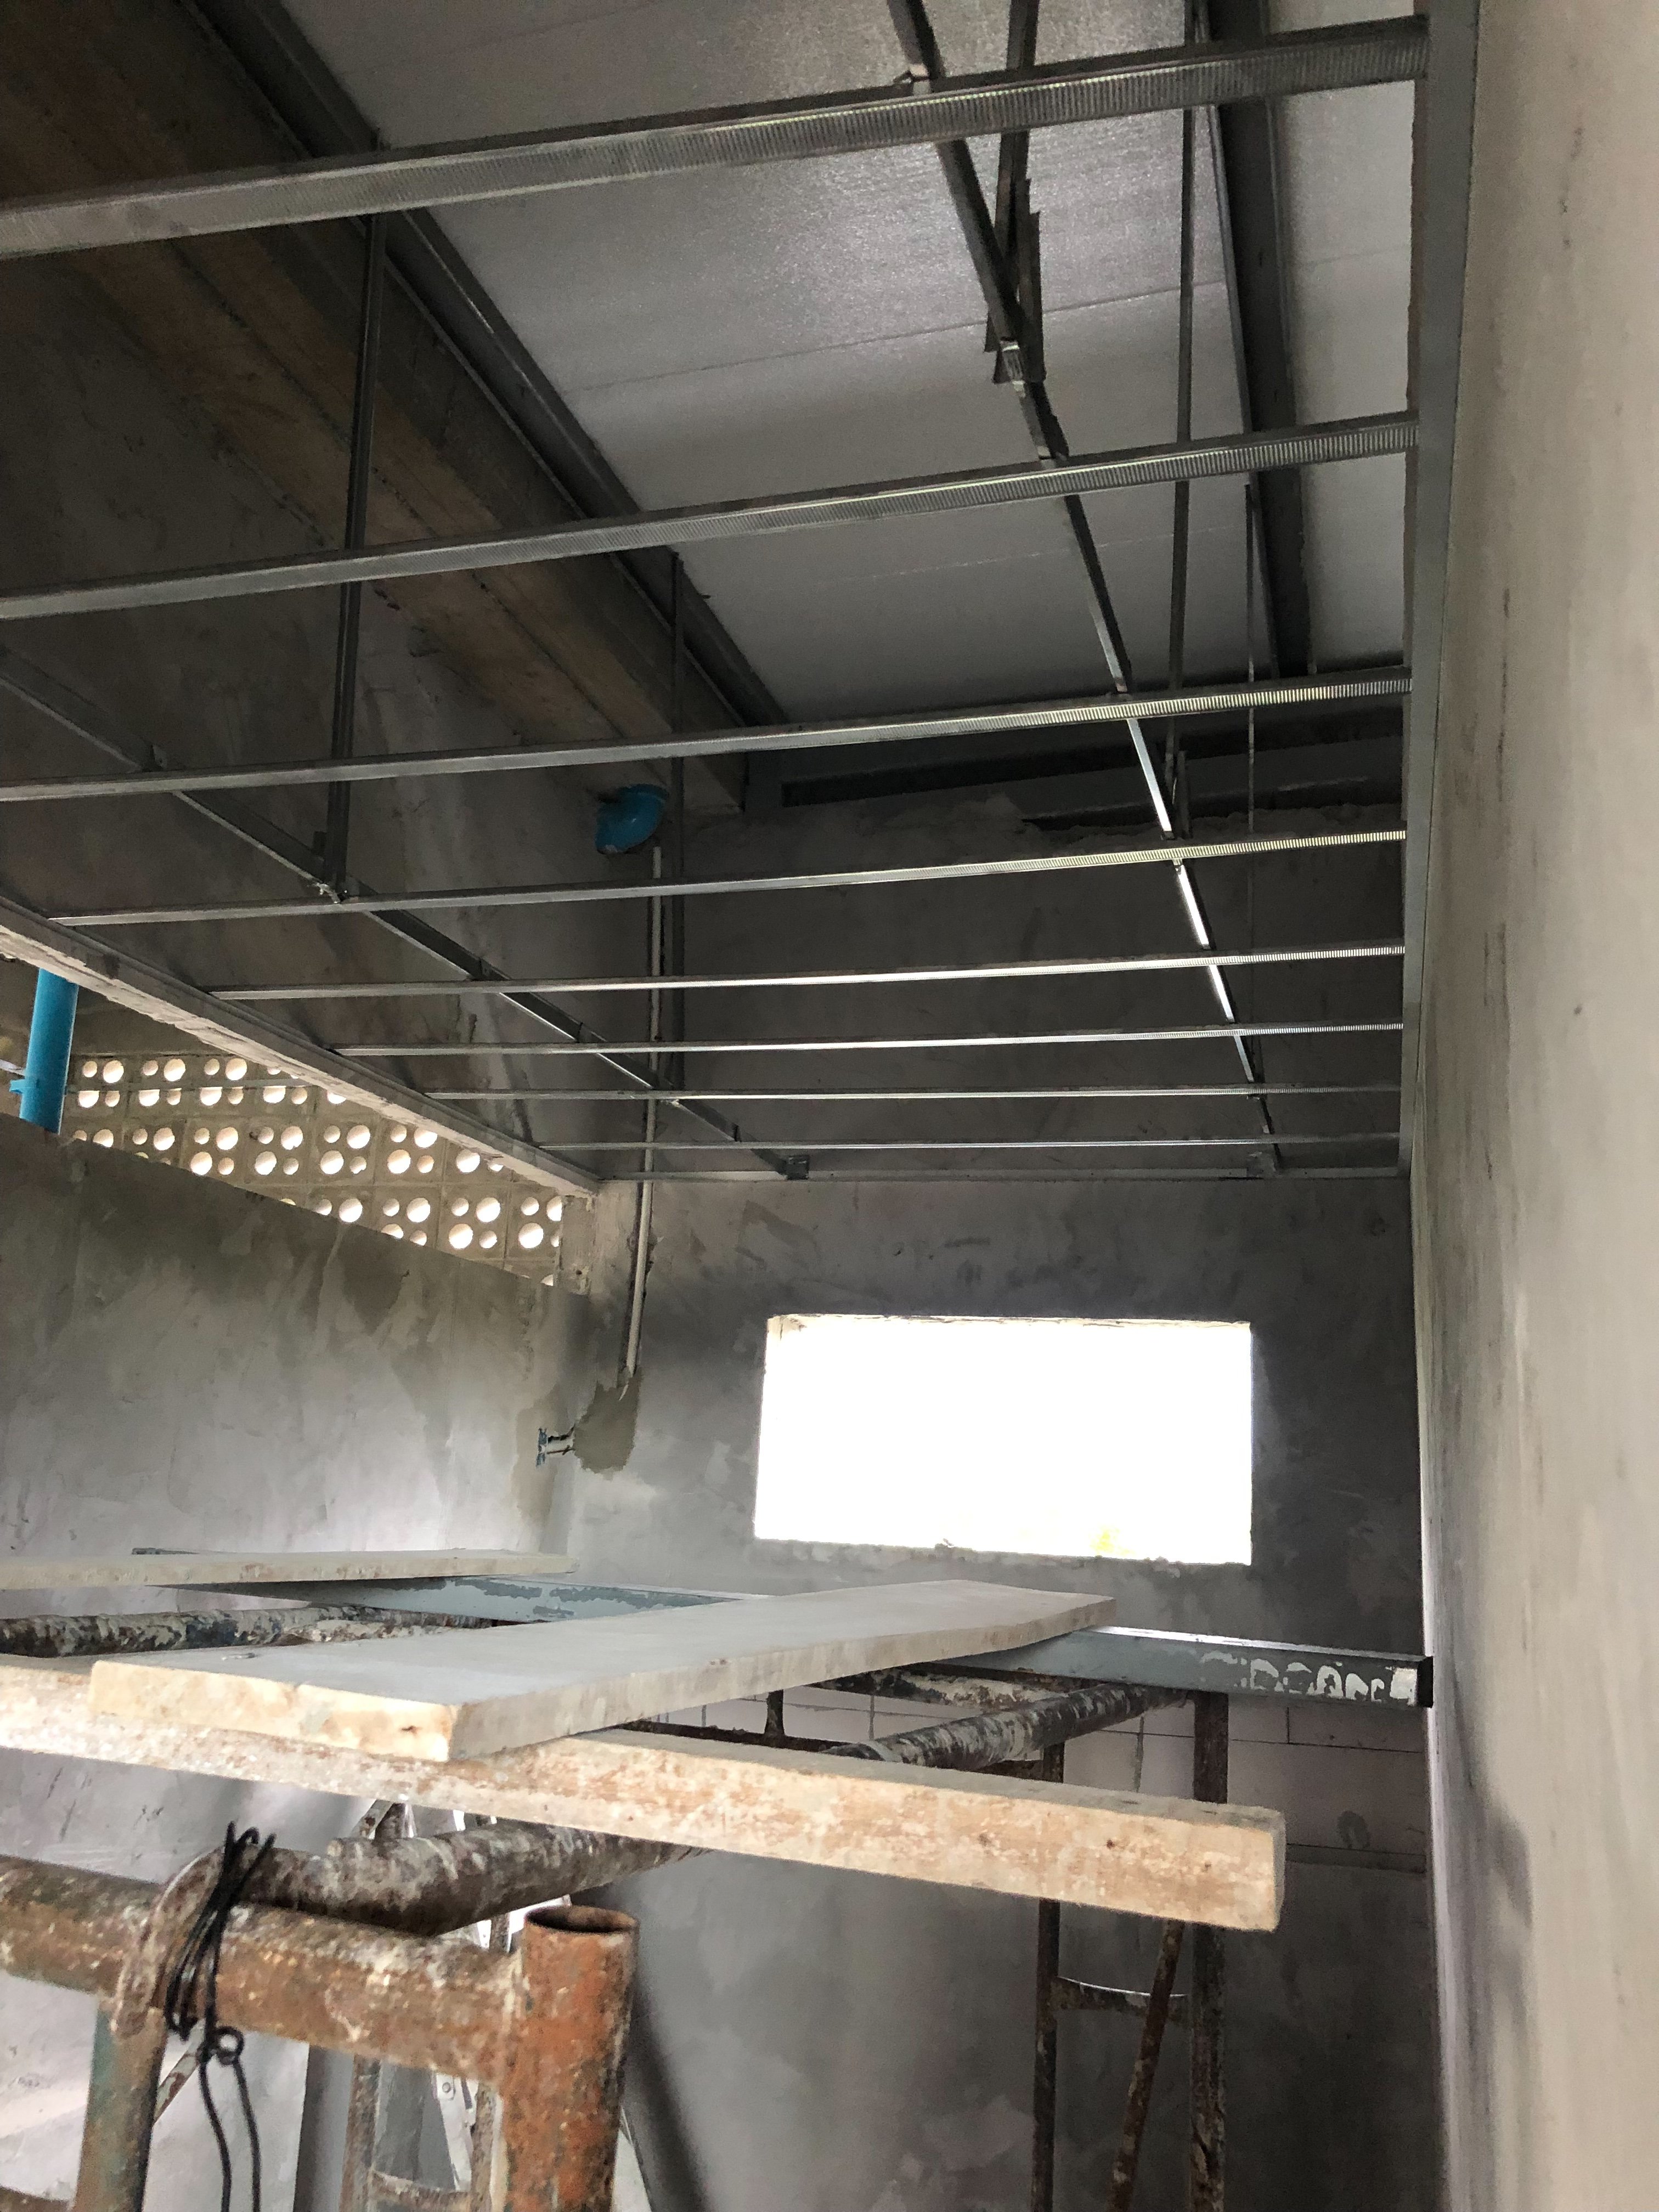
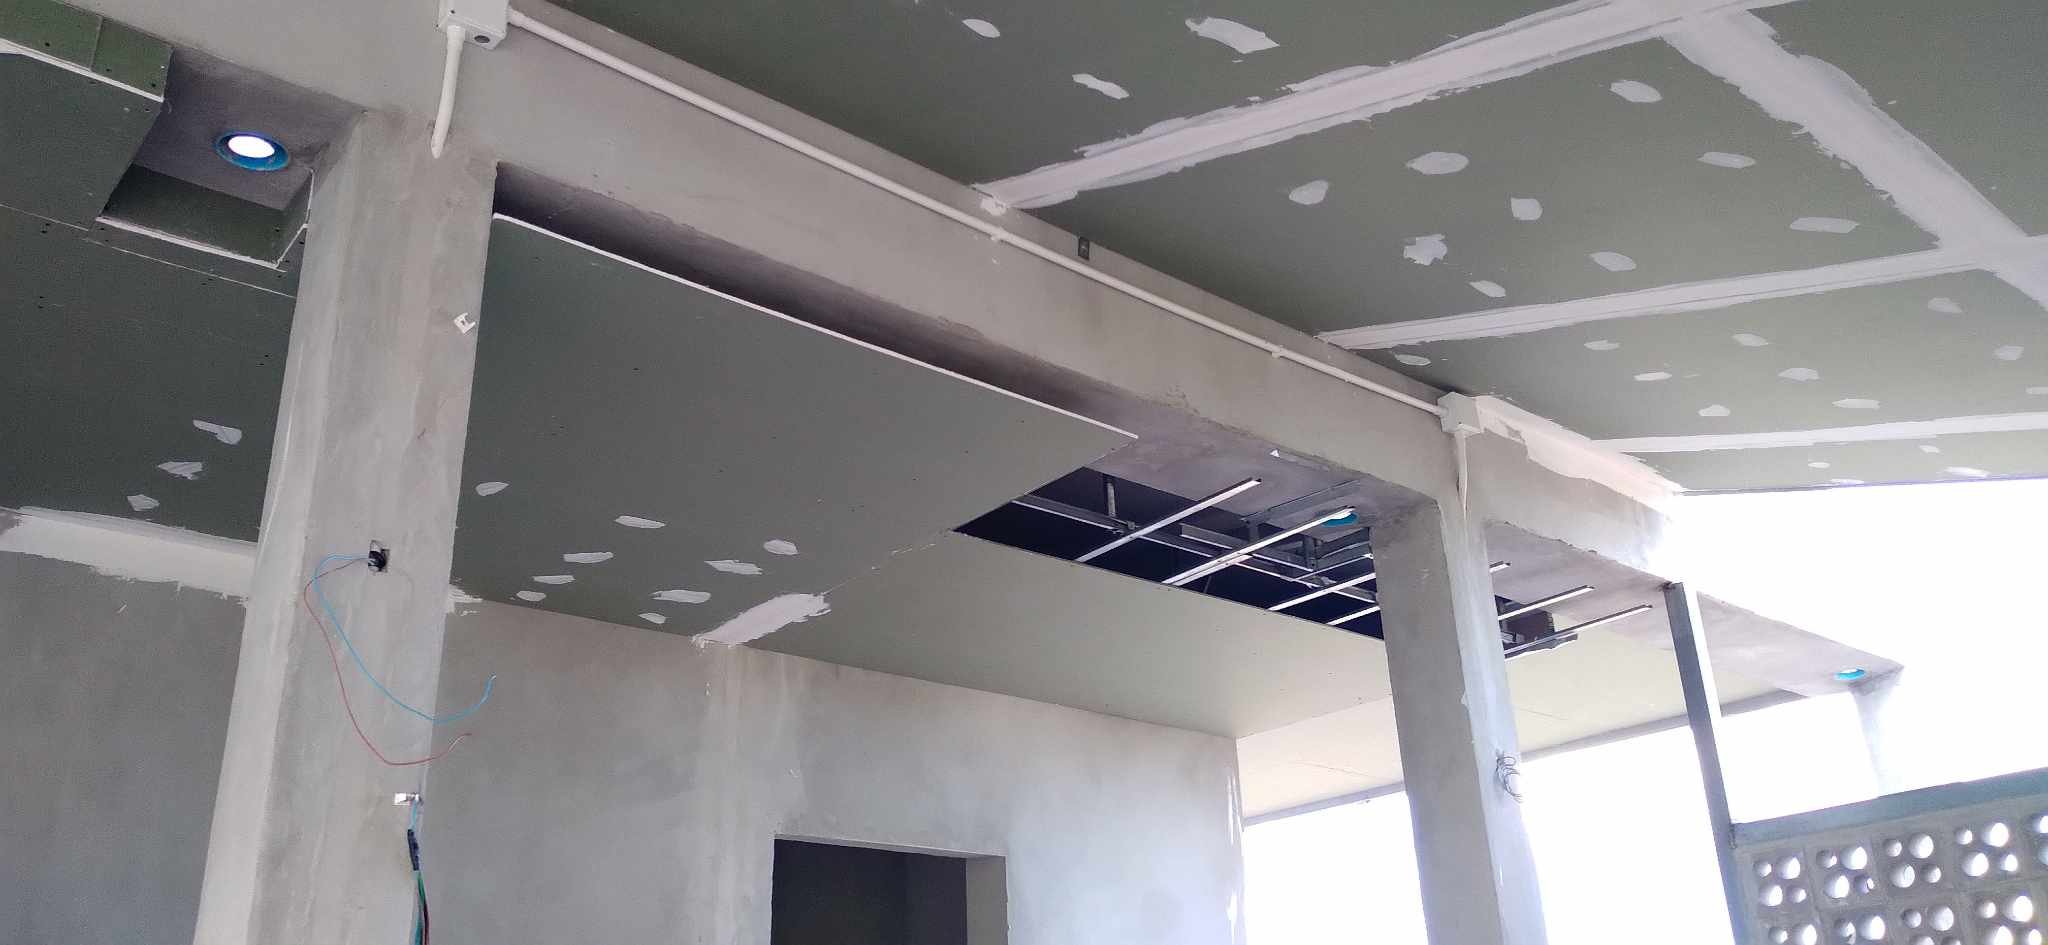
The ceiling supports are also being installed...