Pink7
Advanced Member
-
Joined
-
Last visited
Everything posted by Pink7
-
I have been thinking of this too.... Just drill a new smaller hole. Its enough pace for it. Pink
-
yes correct. Pink
-
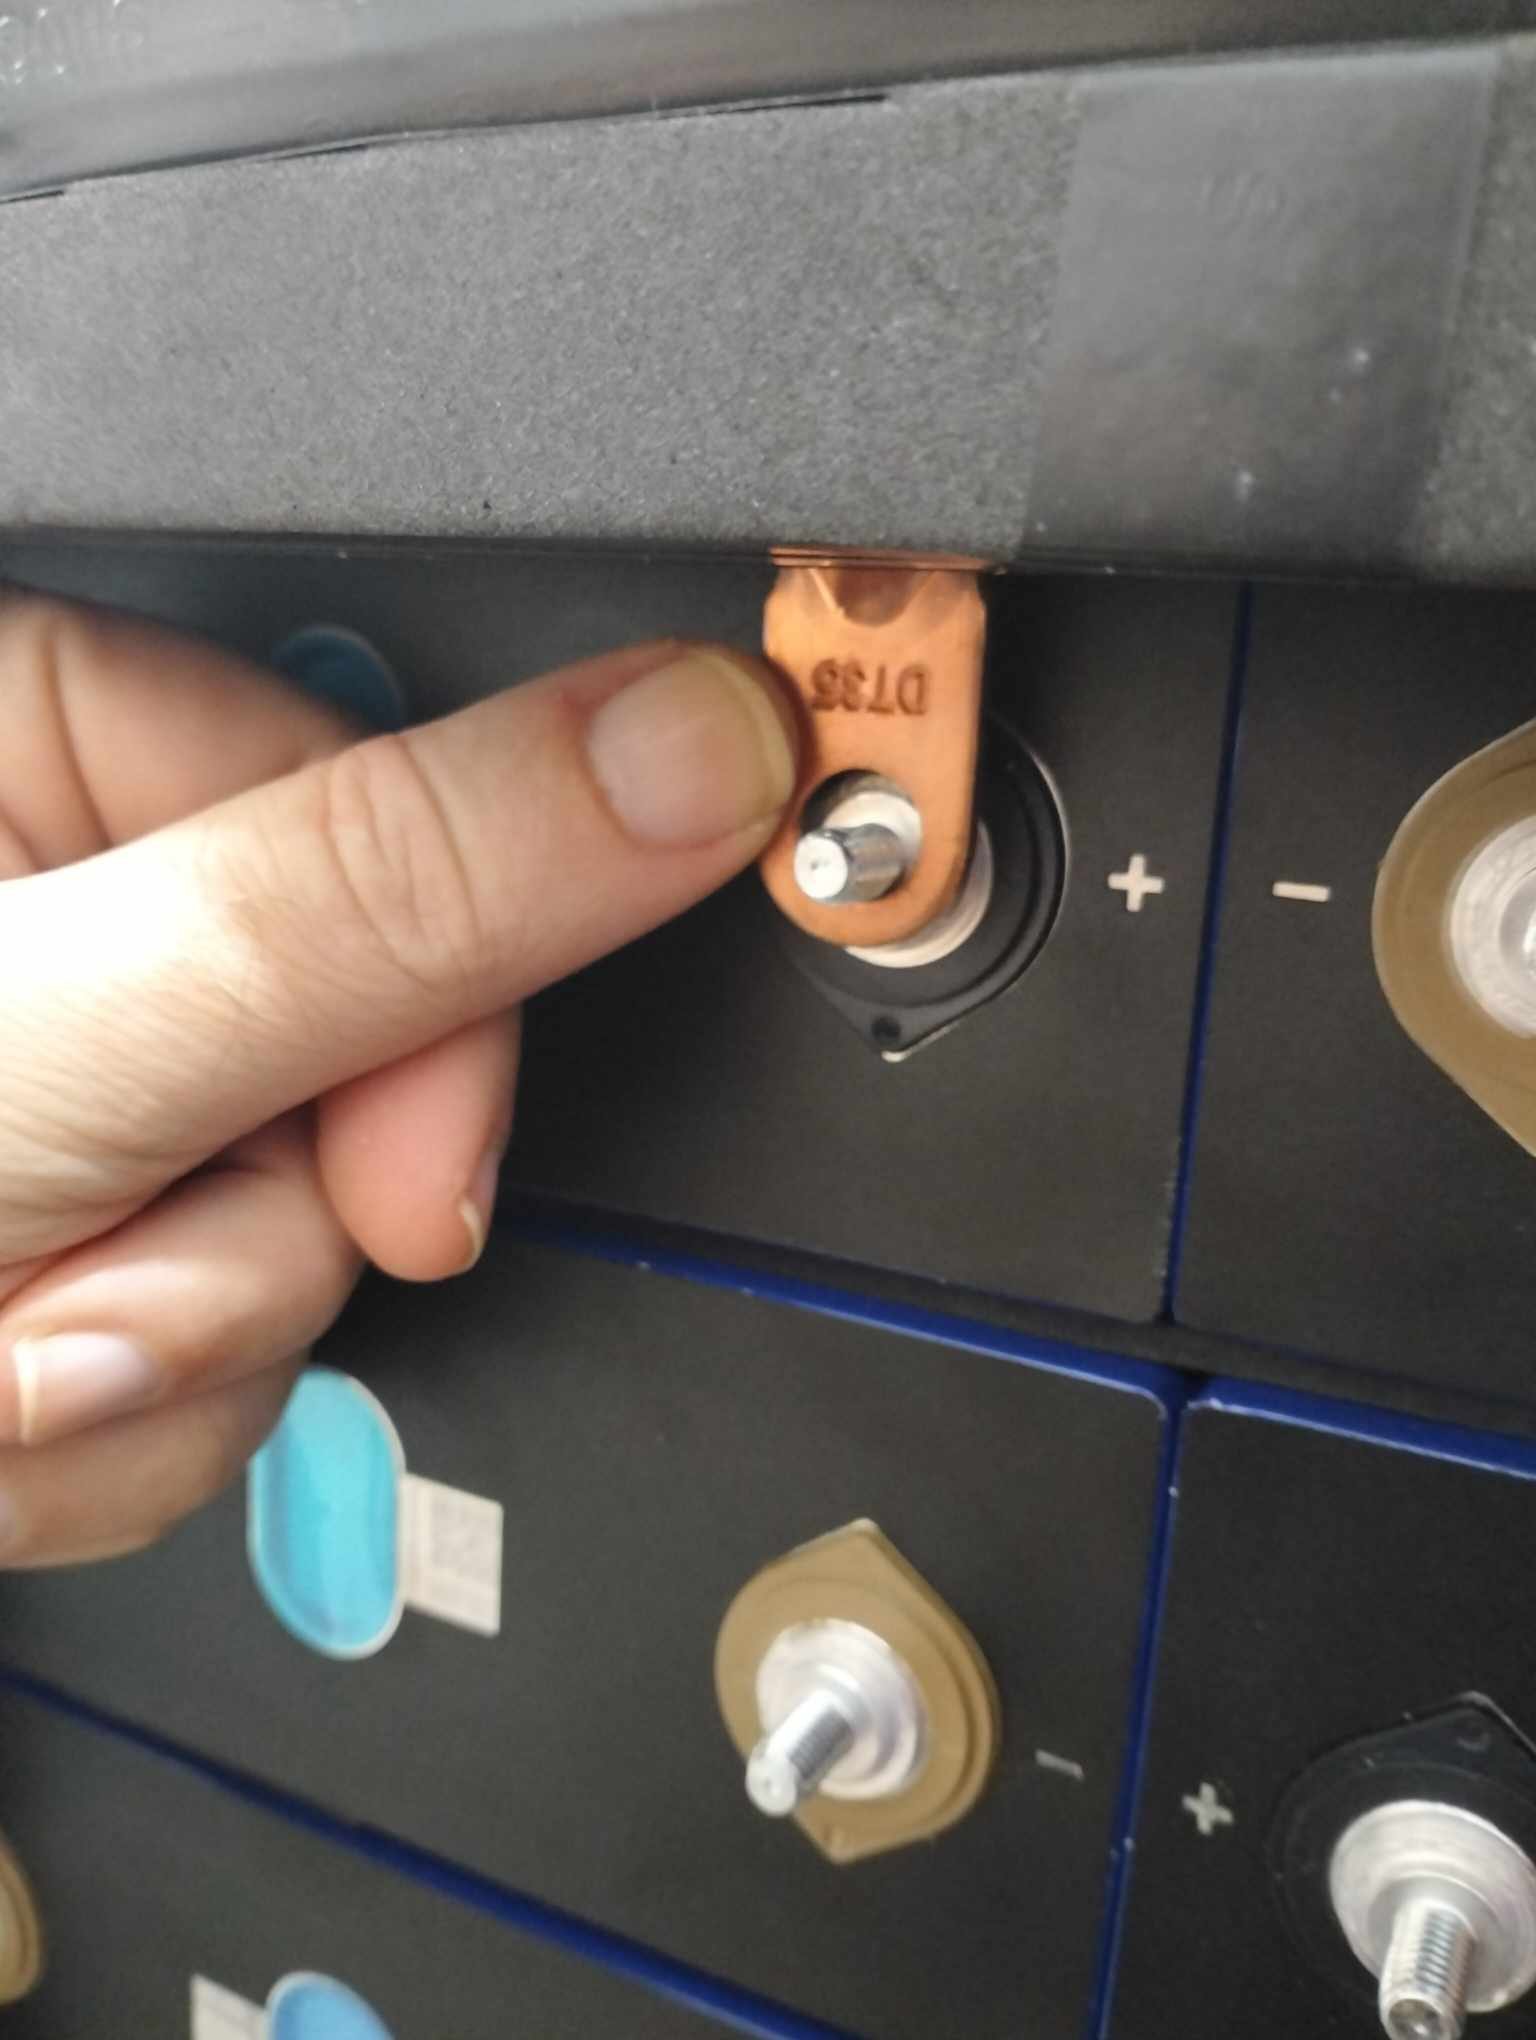
Its still a bit early for me so i had to re read this to get the BMS connector part. Bms connector size is near perfect on the battery terminal. As long as you mean the terminal for the thin bms wire? Pink
-
If I understand what you ask correctly, the terminal is on top of the shoulder but only a small part of it. Could you explain : "modify one of the inter-cell strips with exact size holes and fasteners." Pink
-
I consider cut some pieces of the extra bars who i get with the batteries with a exact drilled hole and place between the pole and connector as a washer. Pink

-
So now its time to get the batteries and JK BMS mounted together. I think I have a quite small contact area between battery connector an the battery pole. Any thoughts on this? Pink
-
Yes its 280Ah Pink
-
Parallel cables and Wifi just added... Pink

-
So today i have done more testing and with real sun conditions ( yesterday testing was just as sun was going down) Both inverter DC270+ in and AC 230 out with only solar connected ( no battery yet and no AC in) So all good !!! Pink
-
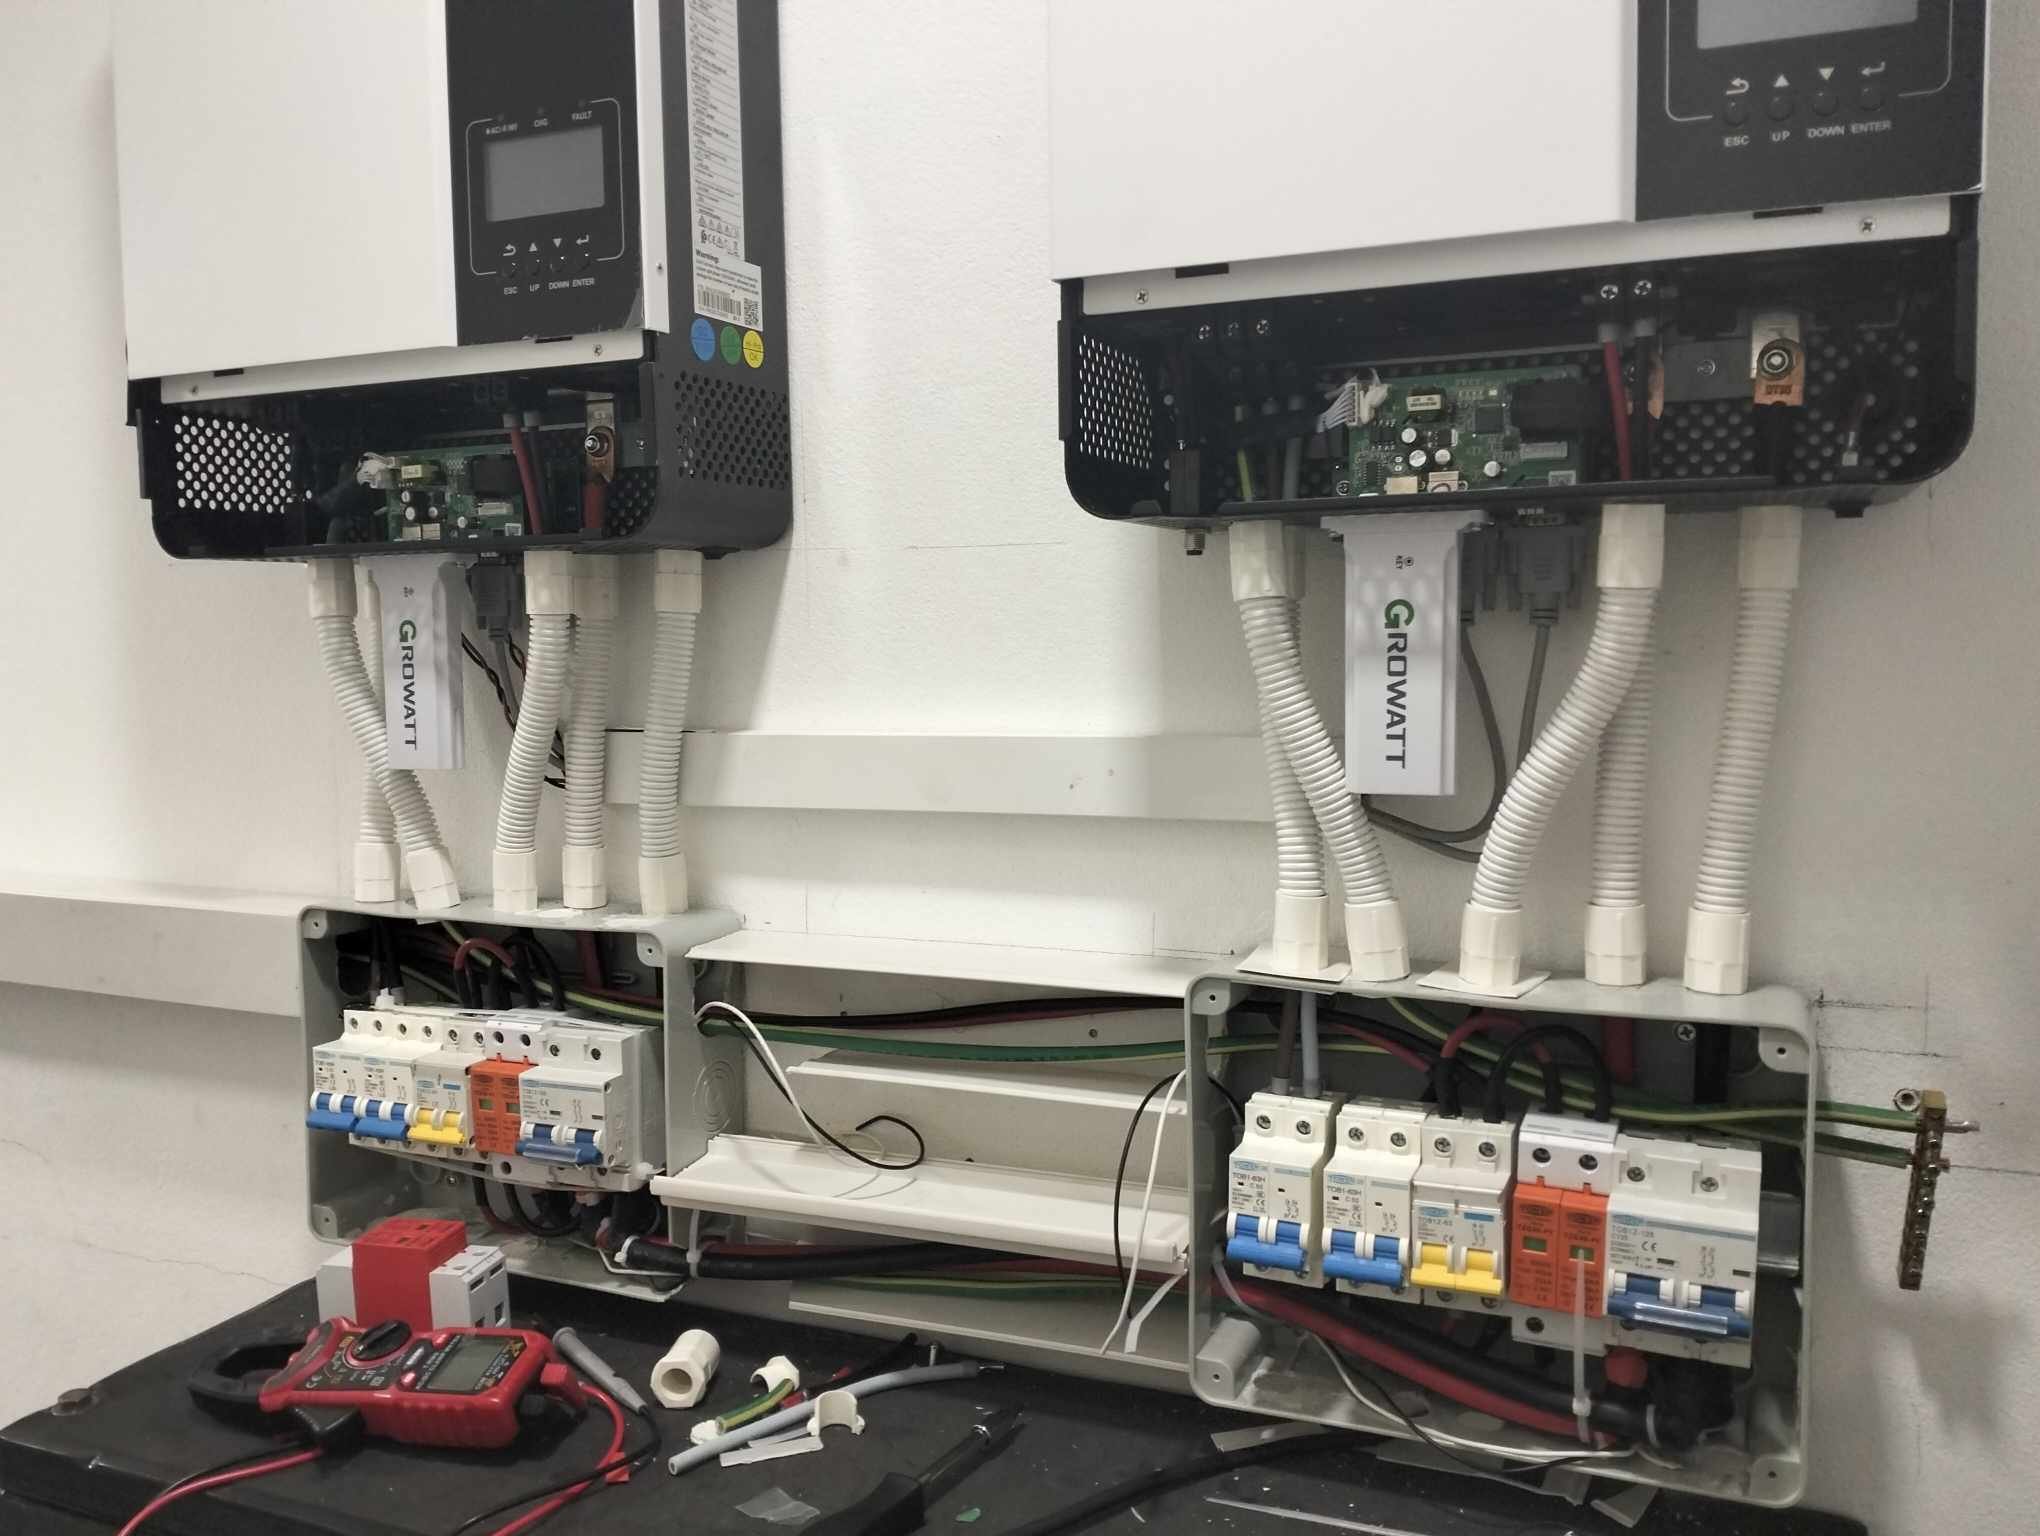
This afternoon solar was connected to my 2 x Growatt inverters. I checked the dc power (DC 250 each) and powered it on. Im not sure if Growatt SPF500ES really can do battery-less because i connected a wire to Ac out breaker on the one inverter and there was no AC Power. Tomorrow i will try the other one when have sun again. When i turn the switch to power it up first time it did not start because i forgot to open DC breaker with solar power. Its not to much work left now then it should hopefully be ready. Pink
-
More experienced than skilled. So i was thinking of join the wires together with some soldering. I will be ok but i know it could be done more beautiful than i do. Usually i will twin the wires together and fold the joint then solder it then shrink tube. In this case might not fold it, just twin together and wire. Pink
-
4 of my wires to BMS is a bit short to reach the batteries in bottom of my build. Extend the needed 4 wires or get a JST extension for the whole set of wires? Pink
-
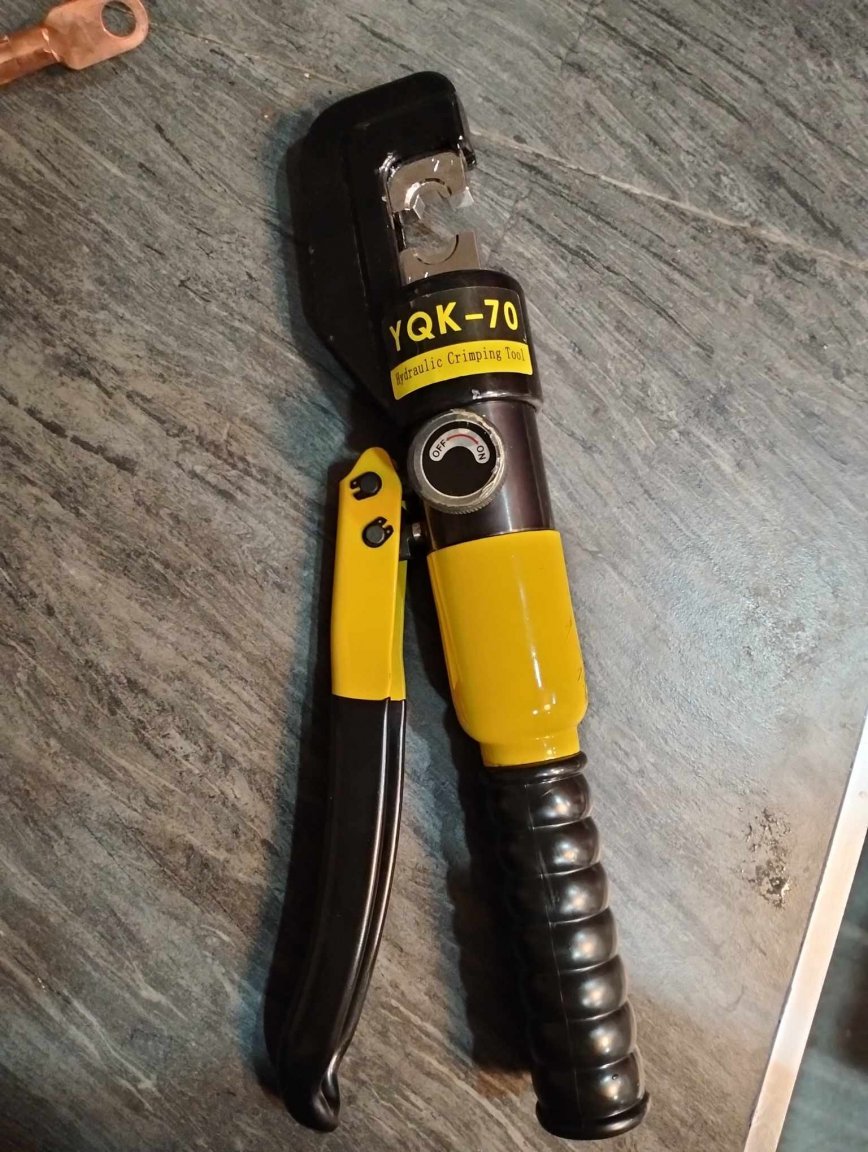
And then the tool decide to be working again..After try taking it apart and back again. Pink
-
Just checked.. No warranty. Pink
-
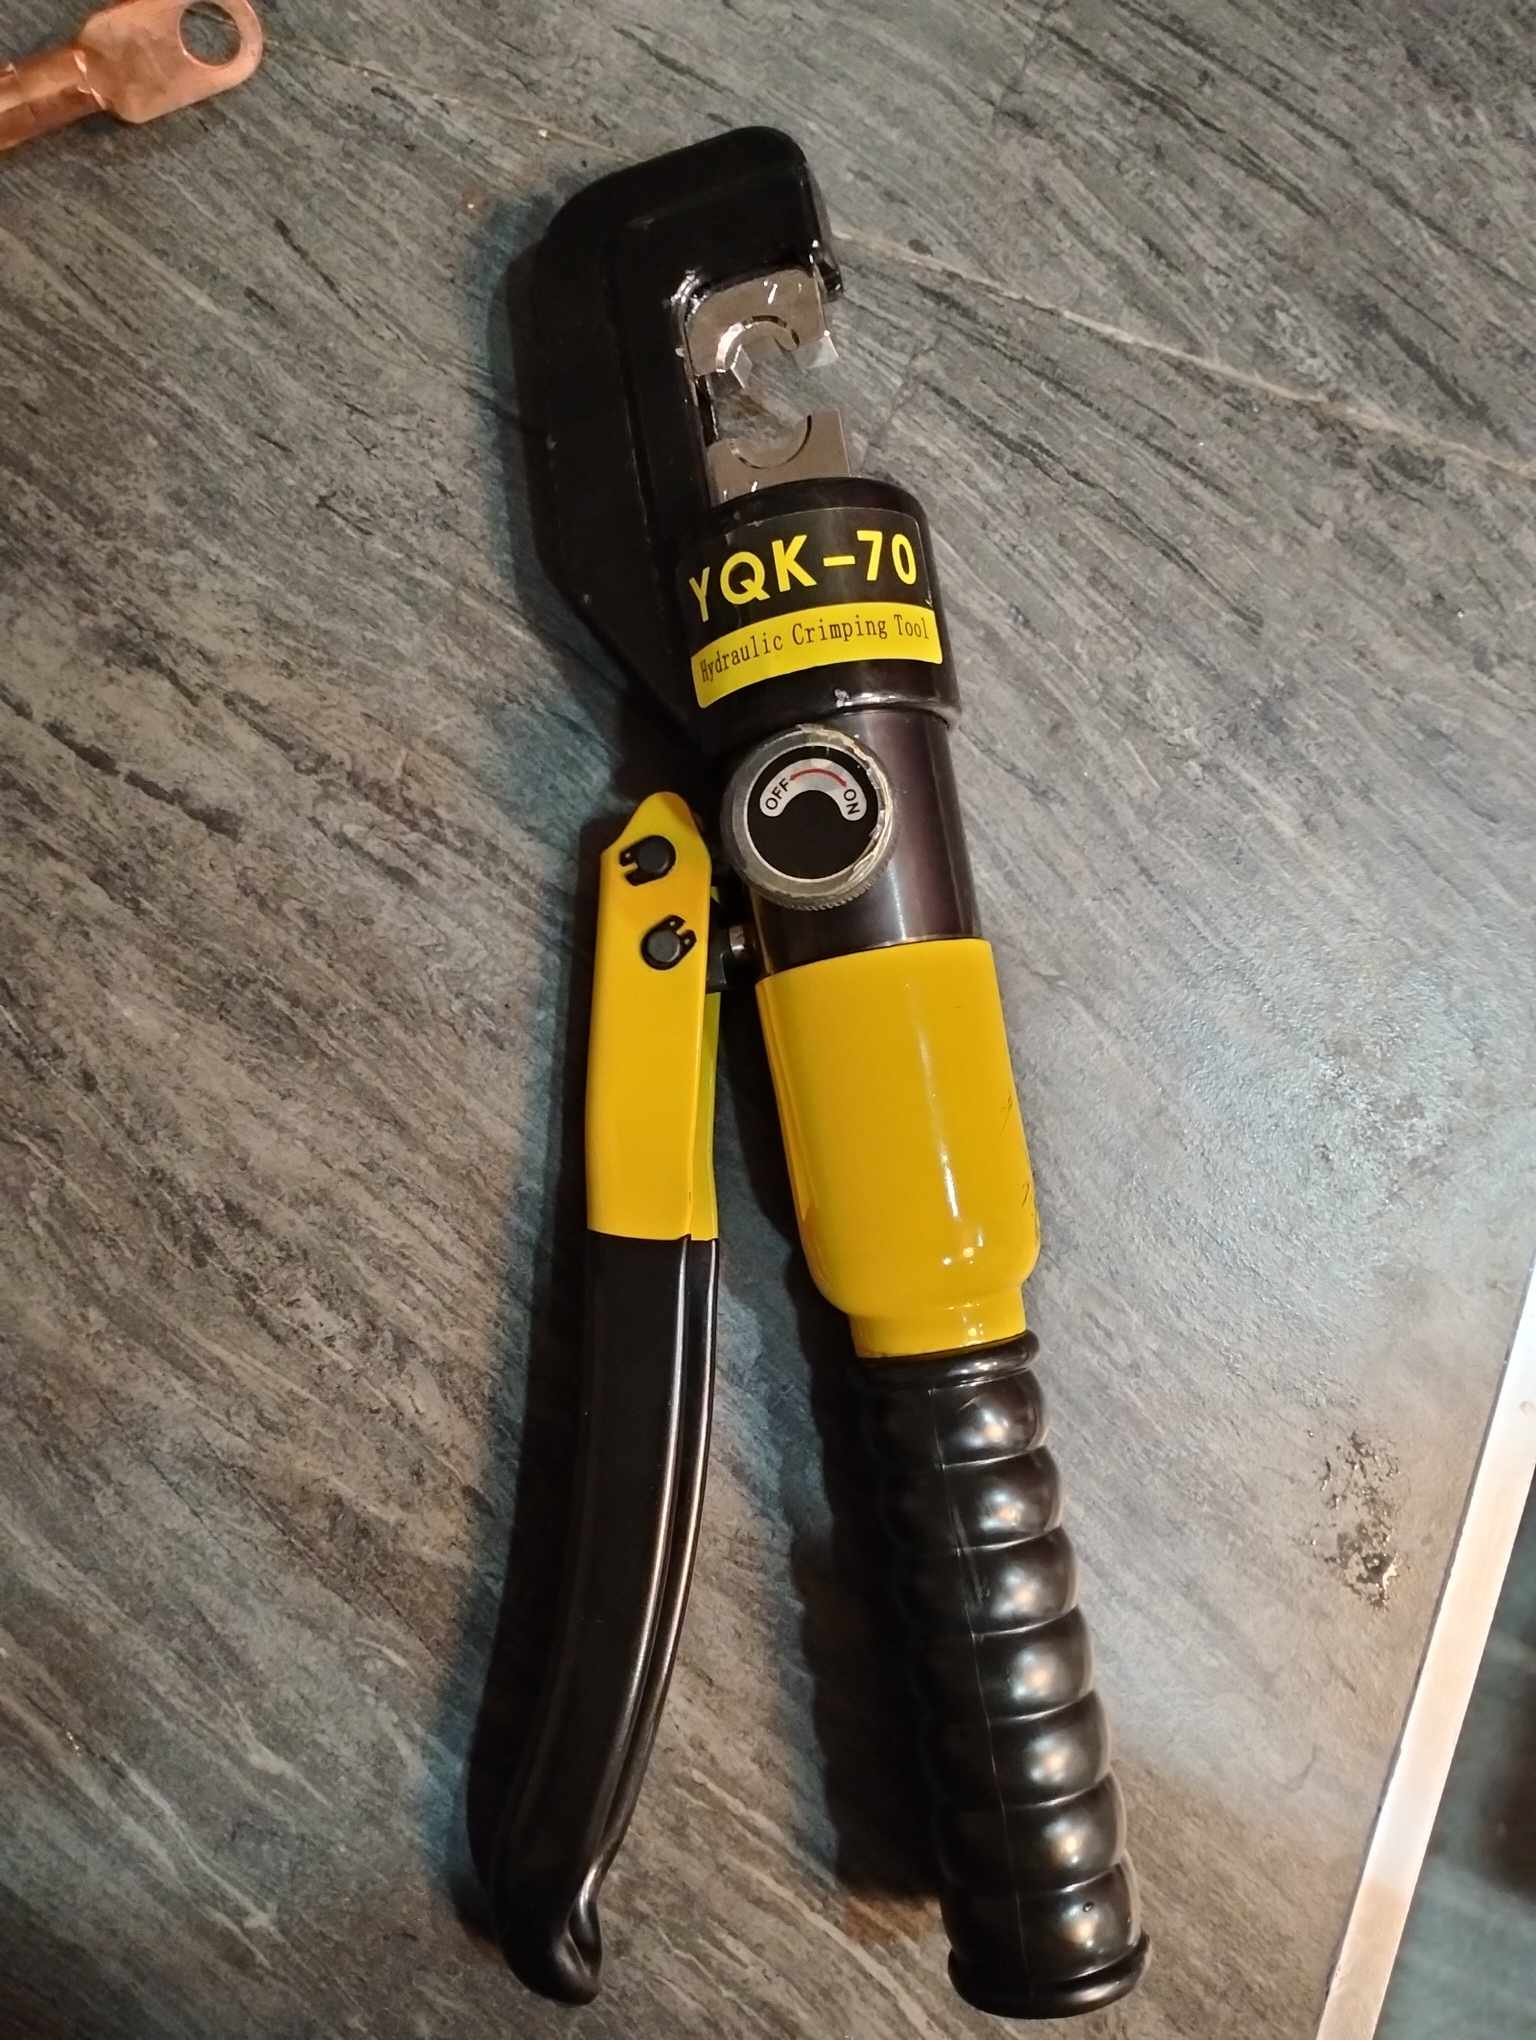
Good idea. Plan one now is a DIY with some of the parts from the crimp tool and some steel and a hammer. Pink
-
Some progress last days on cables and breaker boxes etc, but have to do some changes from my plans as the cables much less flexible than i expected. I was just making cables from breakers to batteries now when the tool to crimp the connectors just stop working, so i must check if i can replace the hydraulic. So it held up 10 connectors or so.. Pink
-
I have a feeling that Thailand just get hotter for every year.. Pink
-
I soldered quite a few XT60 ( Building and flying Rc Helicopters and Gliders) Still not happy with the outcome of the soldering.. Pink
-
I will check 2 mechanic friends who live near me. They must have 4 of this connectors i guess. Pink
-
I did not think about that... Good Point Crossy!! Pink
-
I was plan to solder, i need to solder on the terminal connectors on the battery cables also. Why not solder to the switch? Pink
-
I found it now on youtube:
-
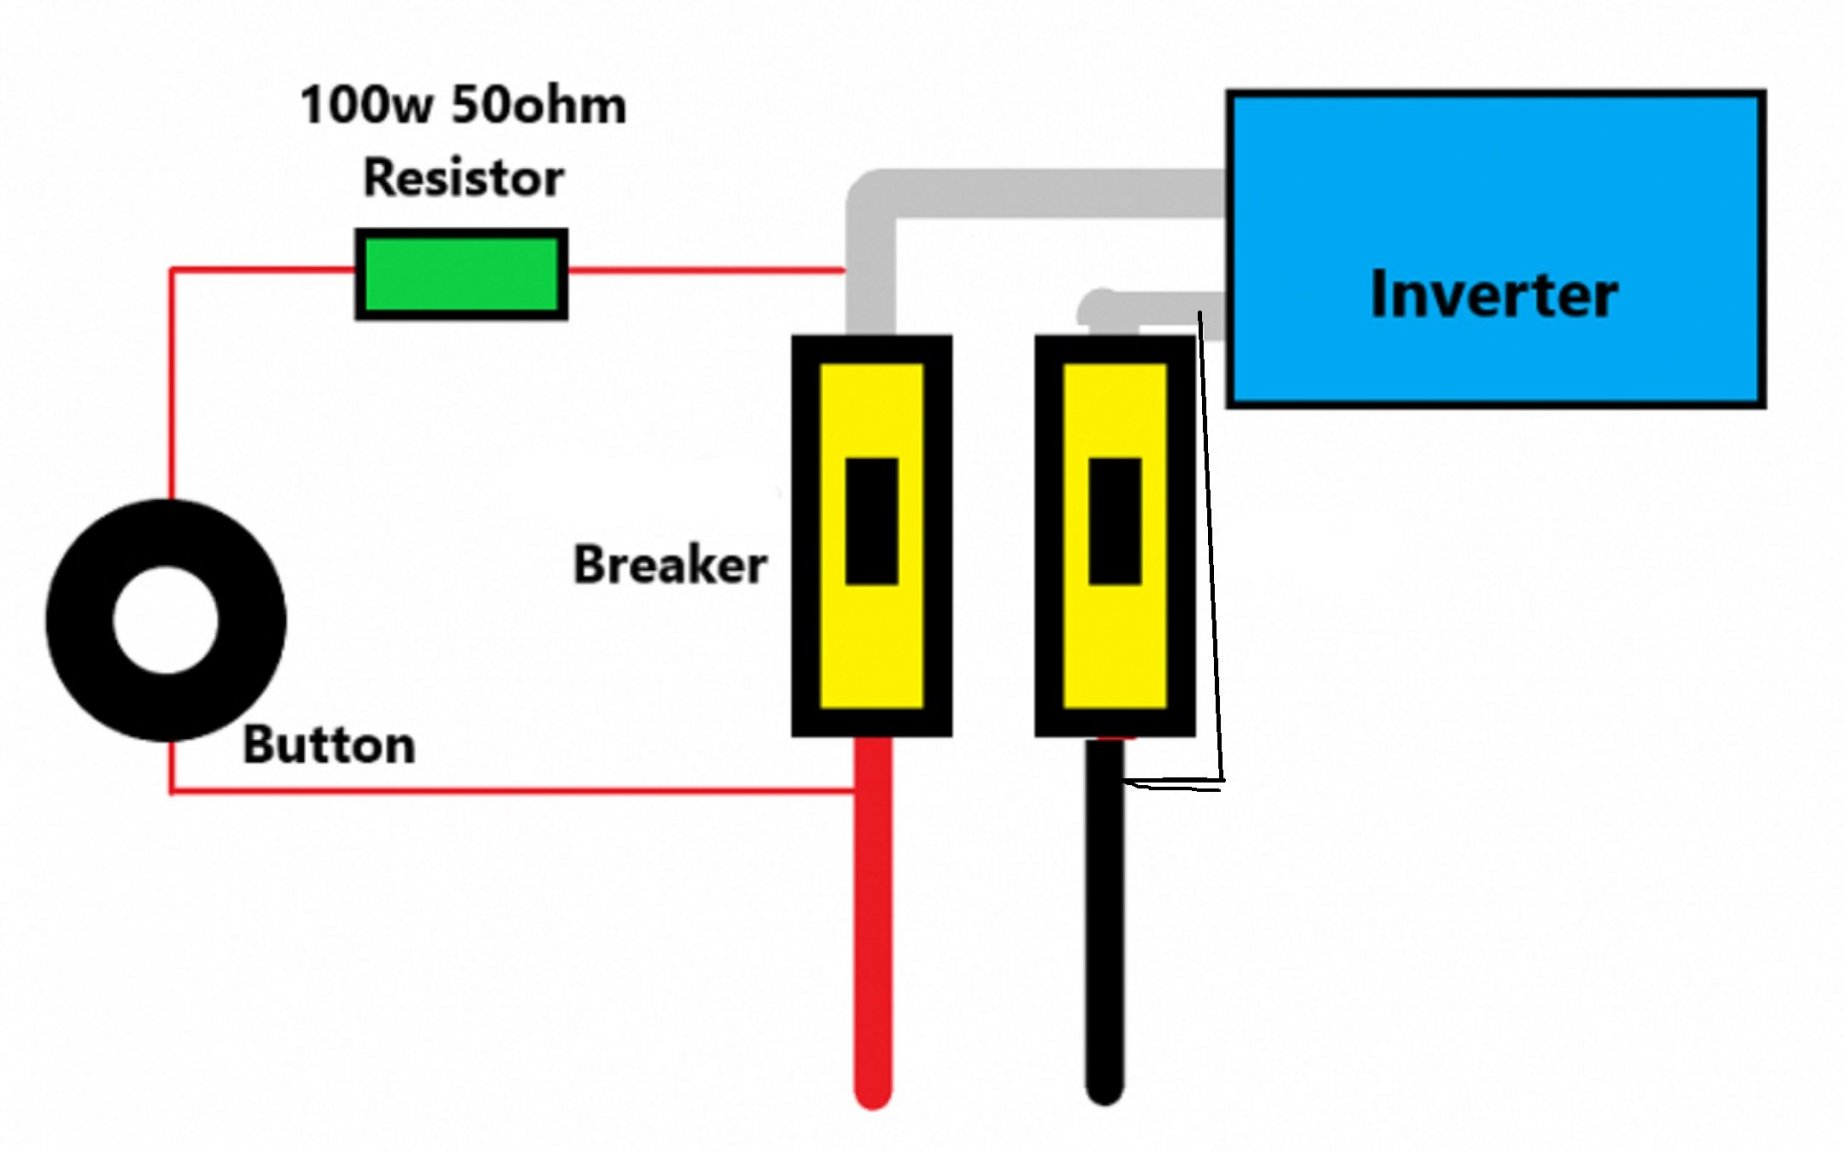
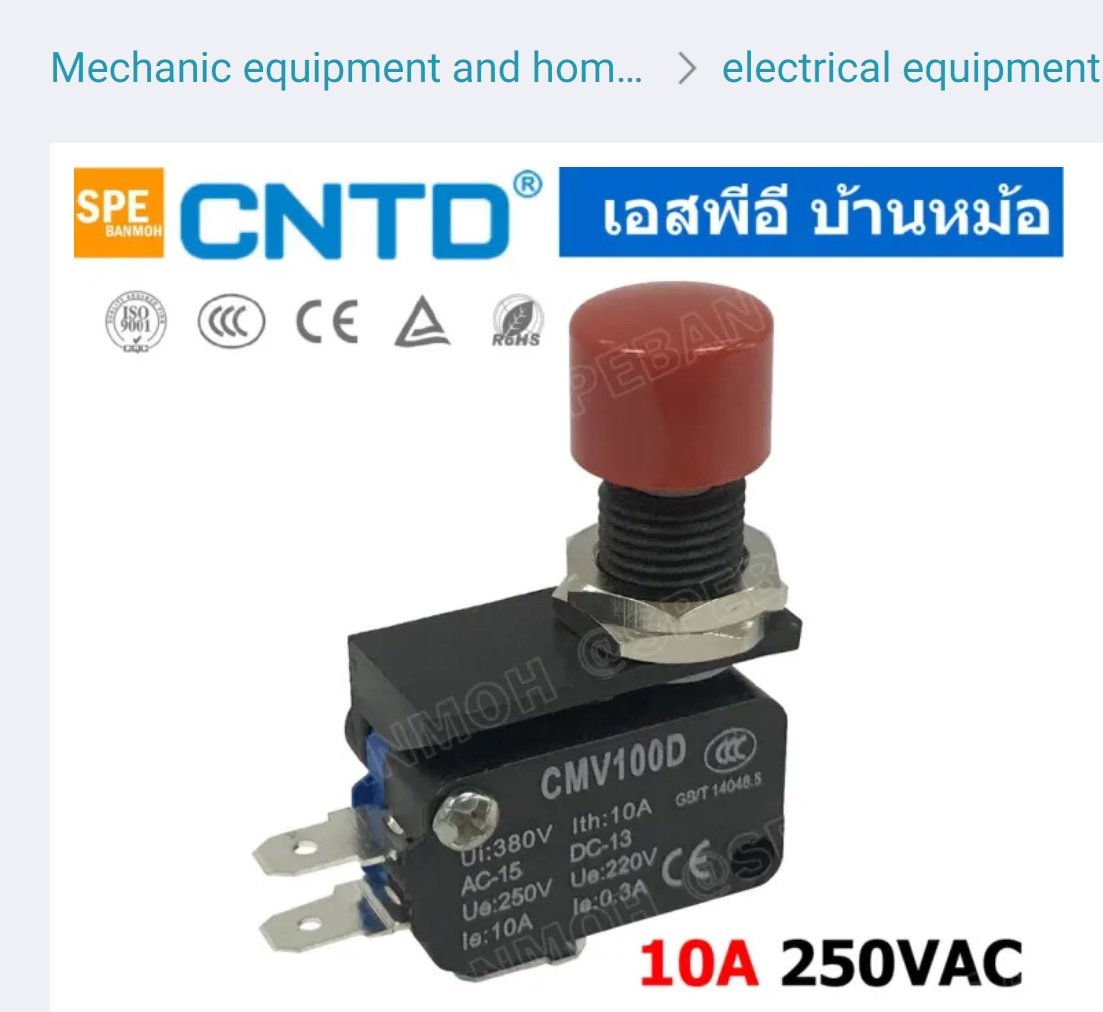
Back in business guys... Got up more water storage and also improved water filtering and added a waterpump. Things at times take more time than normal..I dont have quite same energy as im used to in younger days and in colder climate. What i need now next is to get my breaker boxes ready and cabled. Regarding the pre charger: I will follow the drawing and plan discussed with Crossy. When it come to the momentary switch. Anyone know what 2 pinst to connect too? there is 2 pins in side and 2 under. Pink
-
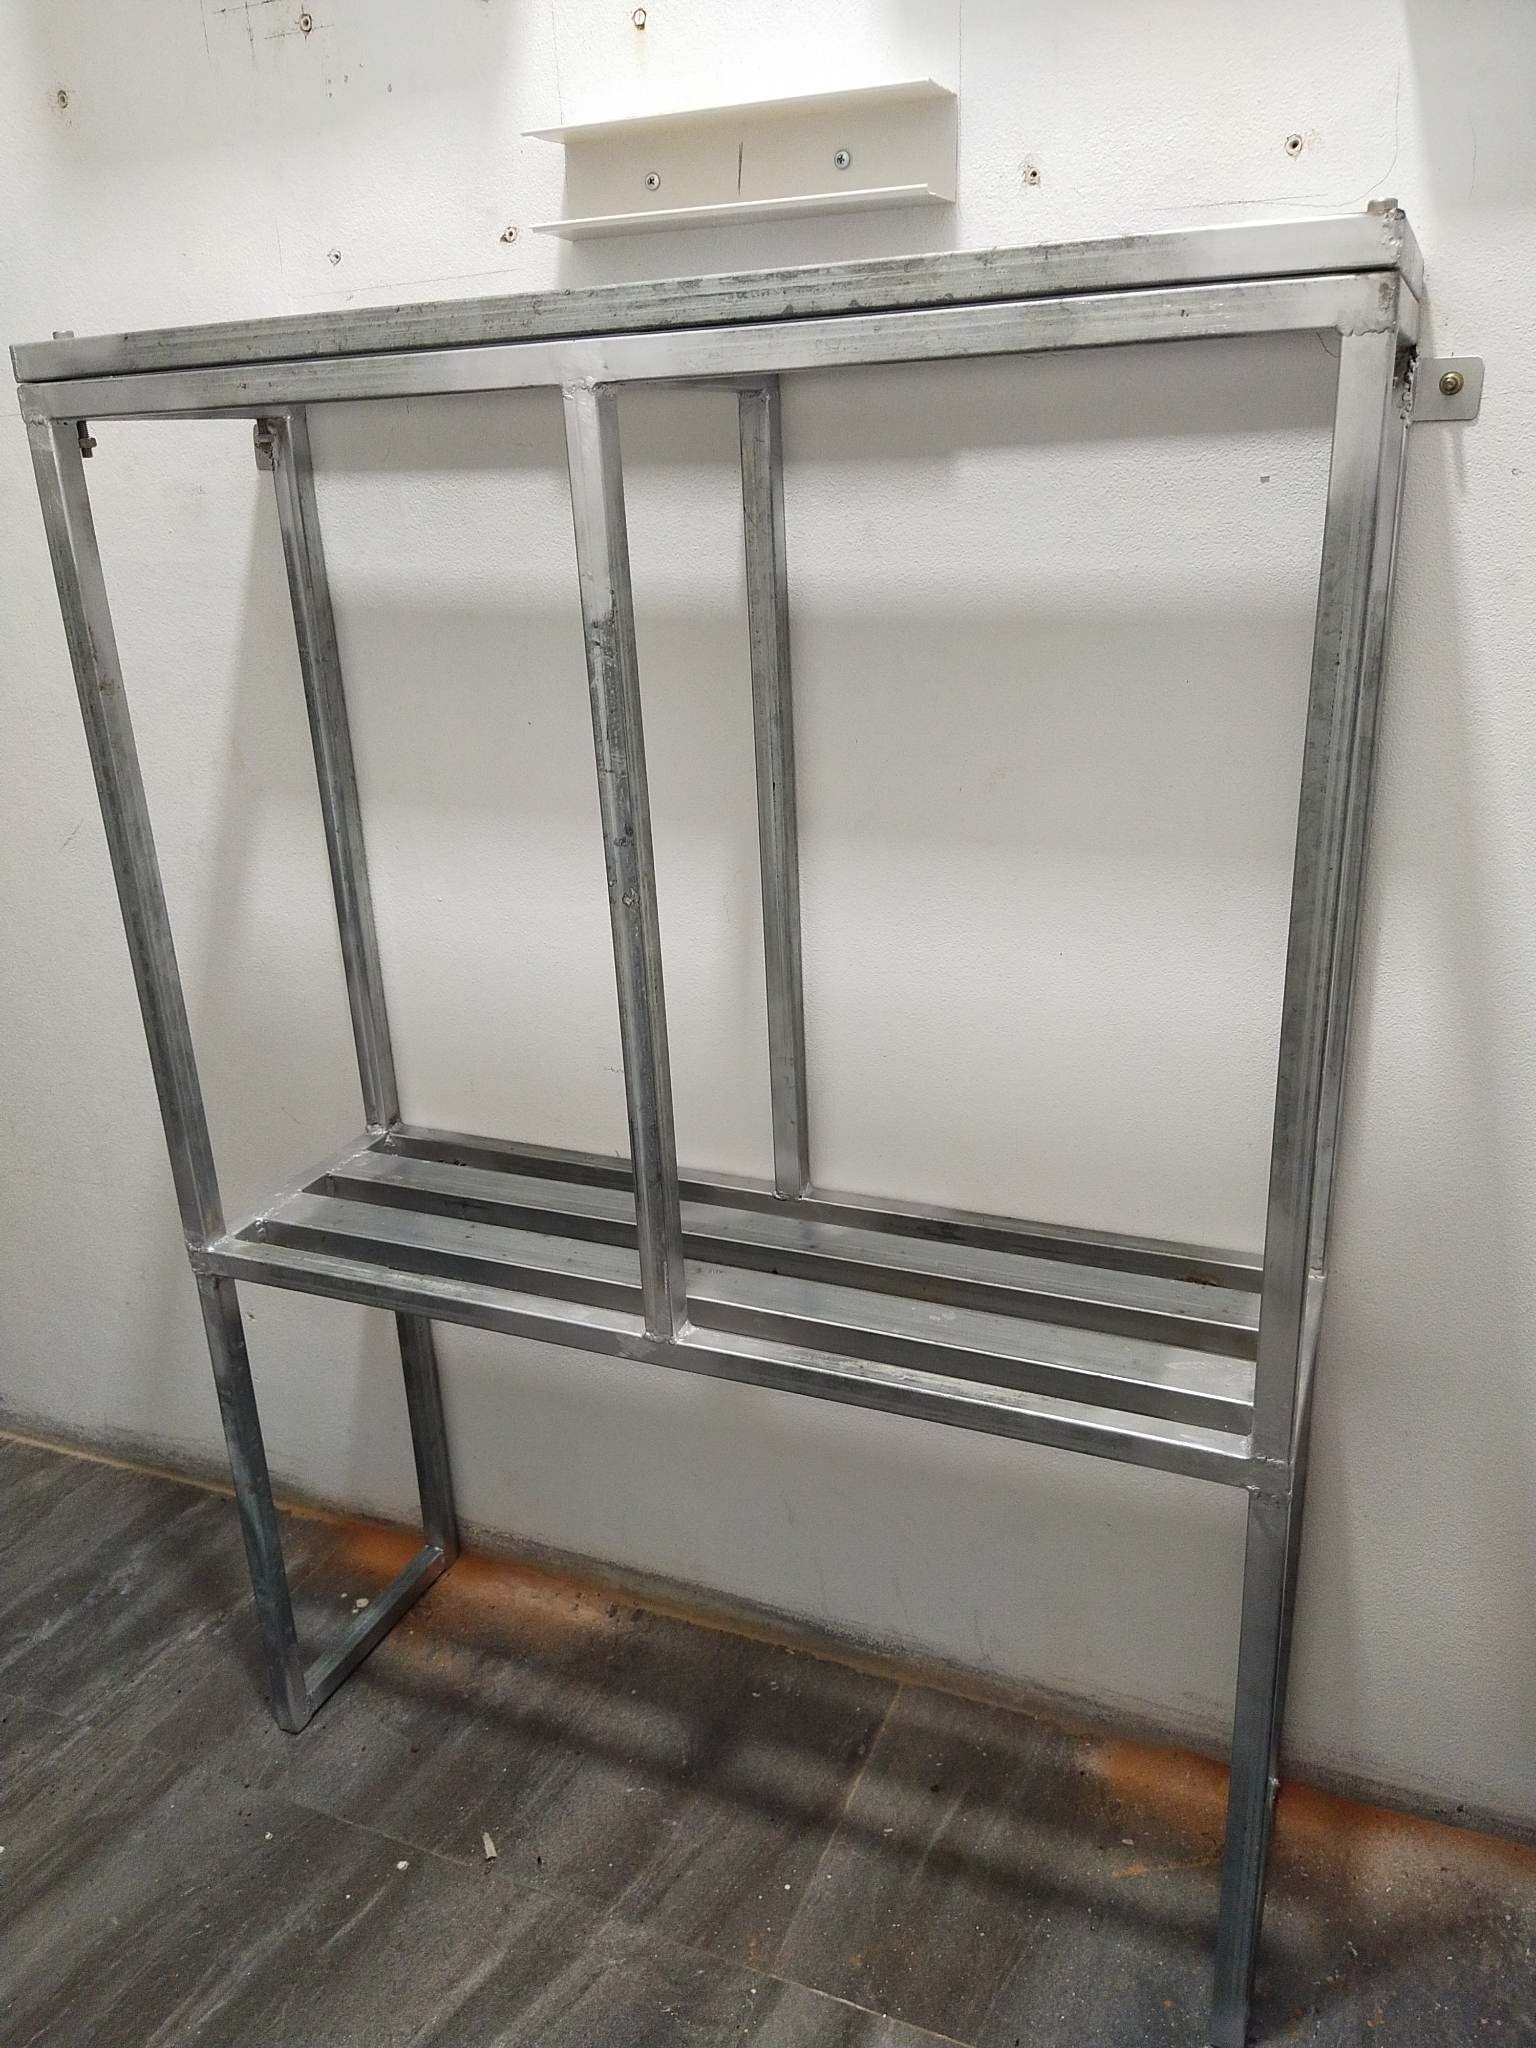
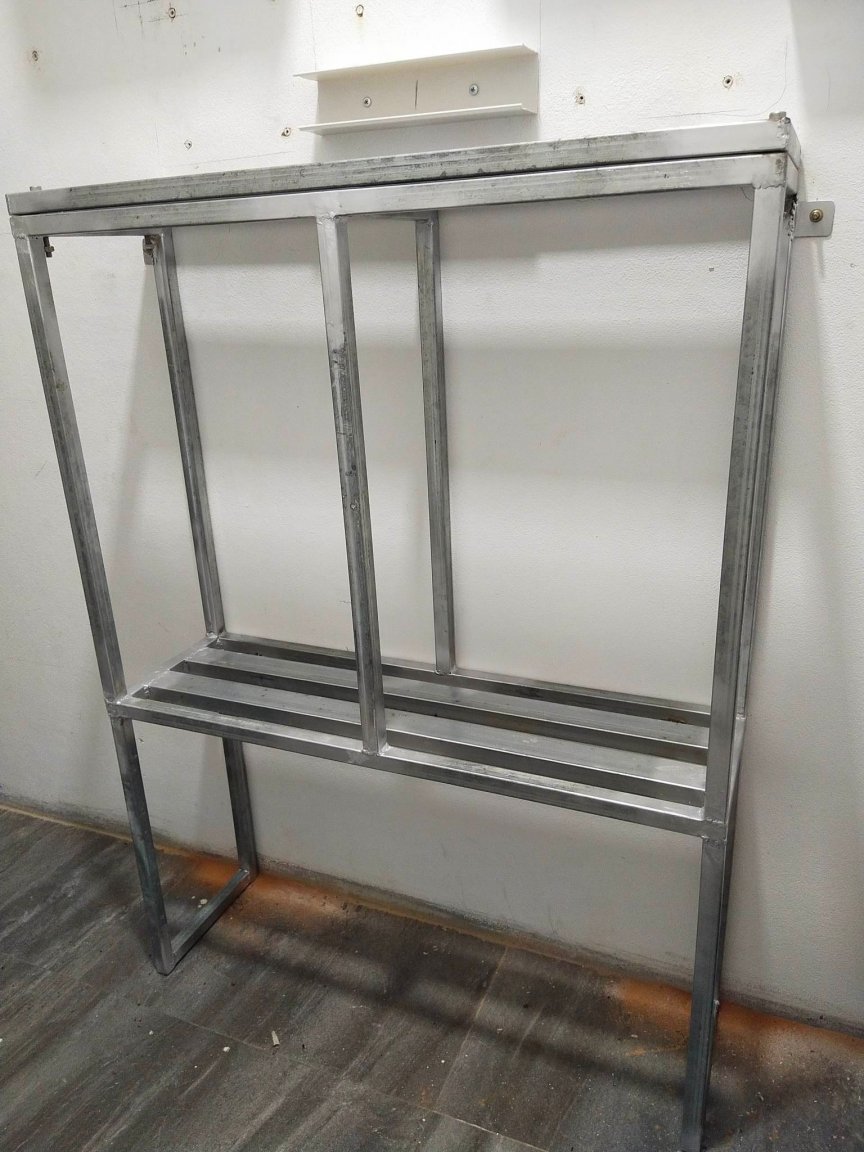
Is time to get the batteries for my DIY solar project built. There will be 2 batteries with 16 EVE LF280k and a JK 150A BMS on each battery. The LiFePO4 will be placed with the largest side down, not standing up. The rack is made and up now, its made for some airflow and for compression. I will also use some 3mm EVE foam between the cells. and also to cover some steel. Pink
-
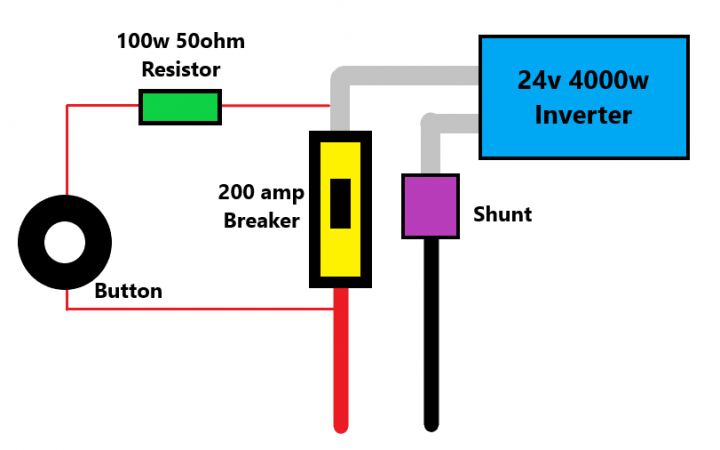
I have buy parts and prepare to set up Push Button Pre-Charger On my 2 Inverters With Parallel Battery. The batteries are parallel connected between breaker and inverter. So i asking my self if enable the ONE pre charger if it will precharge both? Here is a plan i found ( my data is different from the example img) But i plan to connect it same way. Pink